There are a lot of devices on the market on which you can plunk down your money to get stronger and fitter. If you have a thick wallet, go for it.
If you’re like me – a thrifty cheapskate – you can make some effective less-expensive devices. Here are five training devices you can construct at a reasonable financial expense.
Durable Sand Bags
Sand bag training can be productive, but one consistent issue is the durability of the bag. Constant dropping can compromise the seams that encase the sand. It can be frustrating and messy when training with a leaky bag.
Here is a method to construct a durable sand bag that will be resistant to numerous drops to the ground. Obtain these:
- A military duffel bag measuring 6’ long and 20″ wide (or larger)
- Various sections of truck or large vehicle tire inner tubes, five to eight feet or longer un-punctured sections of tubes
- Two hose clamps for each tube section
RELATED: 5 Week Sandbag Workout Program: Week 1 – Get Started
Equipment required – Left: Duffel bag; Right: Large vehicle tire inner tube.
Construct it like this:
- Fold and secure one end of the inner tube with a hose clamp. Be sure to tighten the clamp to maximal tension.
- Fill the inner tube with sand to the desired weight (i.e., 50, 100, or 150 pounds). Use a scale to determine weight of tube sections.
- Fold and secure the other end of the inner tube with the other hose clamp. Again, be sure to tighten the clamp as tight as possible. You can also add Gorilla or duct tape to offer another level of security.
- Load the military duffel bag with the sand-loaded inner tubes to the desired amount of total weight you want. That is, if you want a 150-pound sand bag, load a 100- and 50-pound inner tube bag into the duffel bag. Do the math, however it works for you.
- When you reach the desired total sand bag weight, secure the end of the duffel bag with a rope or other method.
You now have a functional training sand bag that will endure many hours of lifting and dropping.
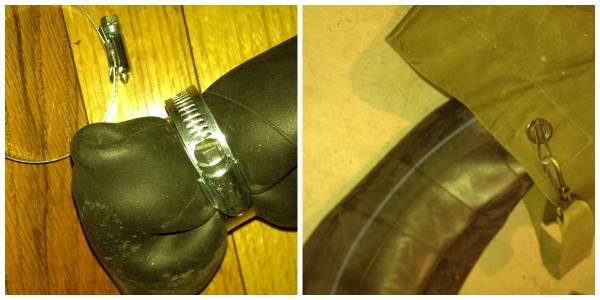
Constructing the sandbag – Left: Securing with hose clamp; Right: Loading the bag.
Multi-Use Manual Resistance Device
This is pretty simple to make. To get started, you need these items:
- Five-foot length of ¾” rope
- Two ¾” washers
- Two 6″ x ¾” PVC pipe sections
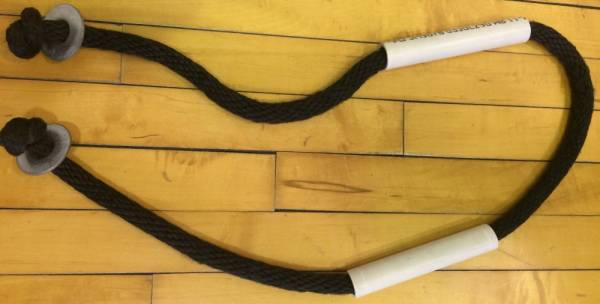
The completed multi-use manual resistance device.
Slide the PVC sections and washers on the rope. Tie a knot at each end to secure the washers. You now have a device to perform manually-applied resistance. One person can either grasp the PVC sections or the rope itself while his or her partner holds the PVC.
It can be used for bicep curls, tricep extensions, upright rows, one-arm seated rows, or any other creative exercise.
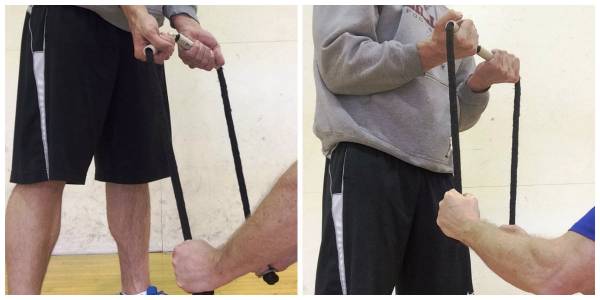
Performing bicep curls with manual resistance.
Barbell Back Squat Assist Device
This implement is intended for those with shoulder joint issues. Young lads and lasses who barbell back squat without shoulder issues are lucky. But, beware as you age. As you accrue years on your training body, maintaining the bar on the back of the neck can compromise the shoulder joint.
RELATED: 5 Simple Solutions to Shoulder Pain
If your shoulders hurt due to extreme upper arm extension or external rotation, you need to be able to move your arm to a more comfortable stabilizing position (usually out in front) if you desire to back squat with a barbell.
Here is a simple hack that will allow you to squat pain-free at the shoulders. Use either wrist straps or other strap devices.
Either way, they will allow you to secure the bar at whatever hand-spread distance is comfortable for you without extreme shoulder joint stress.
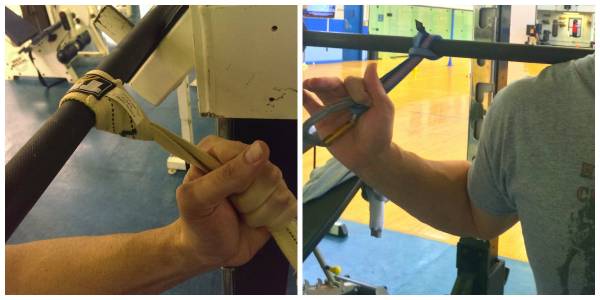
Left: Attaching the strapping; Right: Squatting with the strapping.
Thick Bar Training
The pool noodle. A pool noodle? Really? They’re for hanging in the pool on a hot summer day. Eureka! They can be used to help your strength training endeavors.
Take a 3″ diameter pool noodle with a 1″ center hole. You can make either shorter, individual sections (i.e., 4″ to 6″ sections for dumbbells or barbells) or a long three-foot section to be attached to a barbell.
With a box cutter, slice a seam on one side to the center hole.
From here, simply secure the noodle section(s) to the bar/dumbbell and you instantly have a thick hand grip to work with.
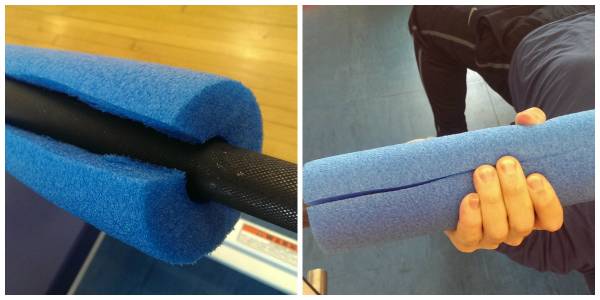
Left: Securing the noodle to the barbell; Right: Benching with the new thick hand grip.
Foam Roller
With that 3″ diameter pool noodle (or thicker), you can easily make a foam roller for a few dollars.
- Cut it to the length you desire.
- Obtain a plastic PVC or metal electrical conduit pipe and cut it ½″ shorter that the pool noodle length. Make sure the diameter of the PVC/conduit pipe is the same diameter of the center hole of the pool noodle.
- Slide the PVC/conduit pipe through the center hole of the noodle
Secure the ends with some type of plug and duct tape, and you have afoam roller for just a few cents.
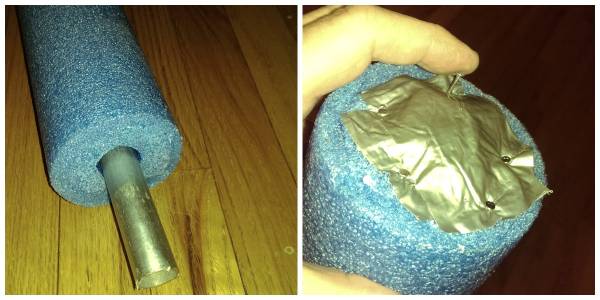
Left: Threading the pipe through the center hole; Right: Securing the ends with duct tape.
Summary
These inexpensive hacks can save your hard-earned money while allowing you train effectively. It’s okay to be thrifty and still train hard.
What gym hacks have you come up with or have found that work best for you? Share your ideas to the comments below.


