As a coach for 10 years, I would say two of the most common limiting factors in athletic development are hips and shoulders.
Today, it’s time to talk shoulders.
As a coach for 10 years, I would say two of the most common limiting factors in athletic development are hips and shoulders.
Today, it’s time to talk shoulders.
Specifically, how to get them stronger, more flexible and more stable to be able to do all the cool tricks, like overhead movements such as jerks and snatches, and inverted movements like handstands—if that’s what you desire. Or, if you just want to maintain healthy shoulders…
First things first, however, I must provide a warning: If you’re legitimately injured—maybe you have an undiagnosed labrum or supraspinatus tear that you have never bothered looking into despite constant pain (cough, cough…if this is you, you should probably look into it)—these exercises will probably do more damage than good.
But, if you’re just looking to iron out muscle imbalances, improve mobility so you can get into better positions, and strengthen and stabilize relatively healthy shoulders, give these exercises a try after your training session, or even as part of your warm-up.
1. Single Arm Dumbbell High Pulls
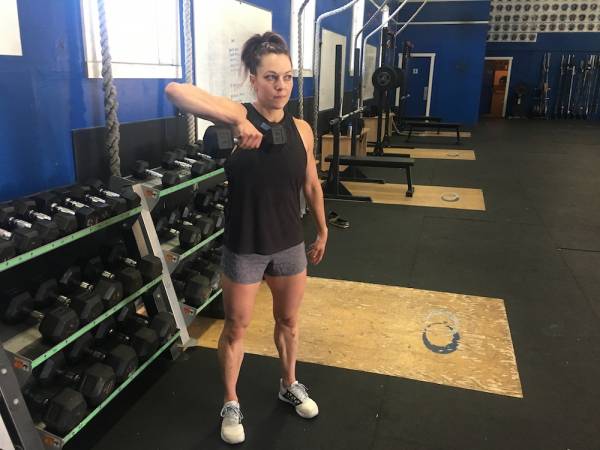
Though you can do these with two arms, I like the single-arm DB high pull as it exposes any muscular or functional mobility imbalances right away.
Stand with your feet shoulder width apart. Start with the DB at your waist and drive it straight up to your collarbone, leading with the elbow the whole time. Focus on keeping your body square (don’t rotate at all) and pull straight up—as opposed to driving your elbows back—as if you’re zipping up a shirt. This will ensure you get some internal rotation as you pull.
Go as heavy as you can for 3 sets of 10 per side. Or stick with a little lighter weight and hit an @2222 tempo (2 second to pull, 2 seconds to hold at the top, 2 seconds to lower and 2 seconds at the bottom).
Position 1
Final Position
2. Lean and Loiter
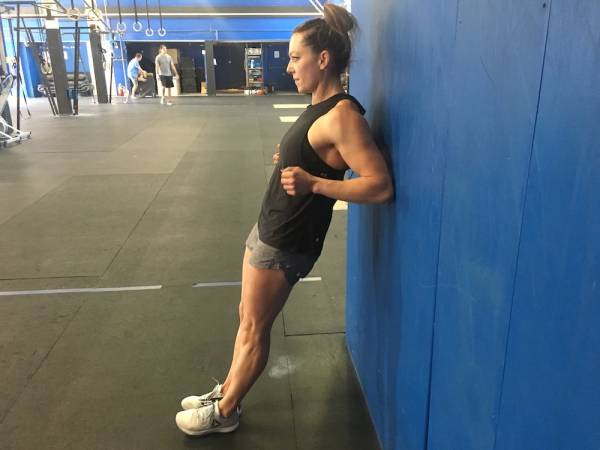
This is a great drill for getting all the stabilizing muscles around your shoulder blades to fire hard.
Stand a few inches from a wall and simply lean back into the wall with only the tips of your elbows touching the wall. If you’re not feeling much of a challenge, take a step or two. This should feel like you’re fighting for your life to stop your arms and back from collapsing onto the wall. If you do collapse, you’re a little far from the wall.
Try 2 to 3 sets of 30 seconds as far away from the wall as you can.
3. Shoulder Flexion Stretch
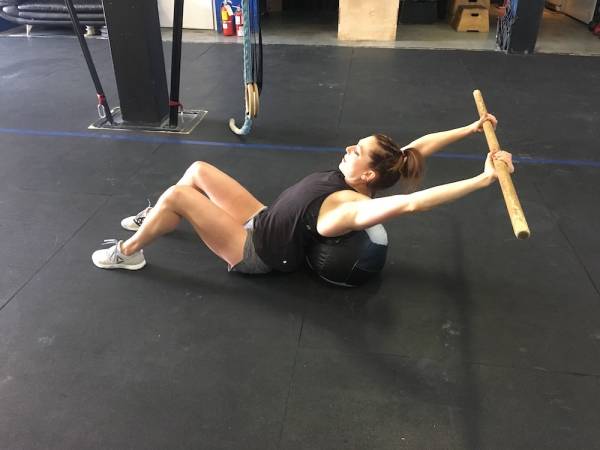
Place a medicine ball in the middle of your back and lay supine on top of it. Grab a dowel or a light barbell and press it overhead to the top of a strict press position. Make sure you keep your ribcage from flairing out (i.e. keep spinal extension to a minimum) and press the bar as far behind you as you can while maintaining this neutral position. The further your hands are apart, the easier the stretch. The closer your hands are together, the more intense the stretch.
Hold for 1 minute before a shoulder intense workout to access a little more range of motion in the shoulders.
4. Shoulder Extension Stretch
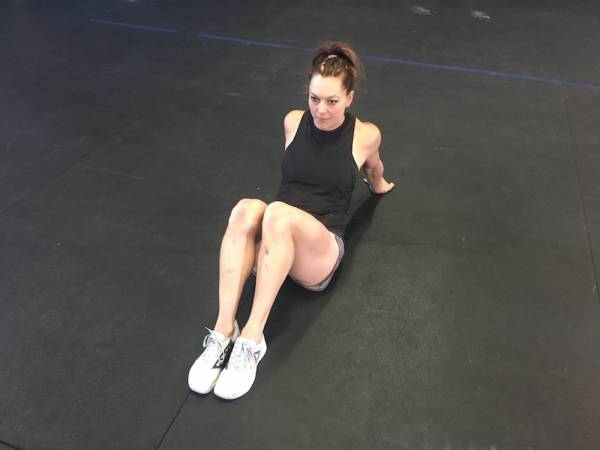
Simply sit down with your knees bent and your feet flat on the ground and reach as far behind you as you can with you hands, all the while keeping your arms straight. Make sure your fingers are facing away from your torso. The closer your hands are together, the deeper the stretch.
Hold for 1 minute at the end of your workout.
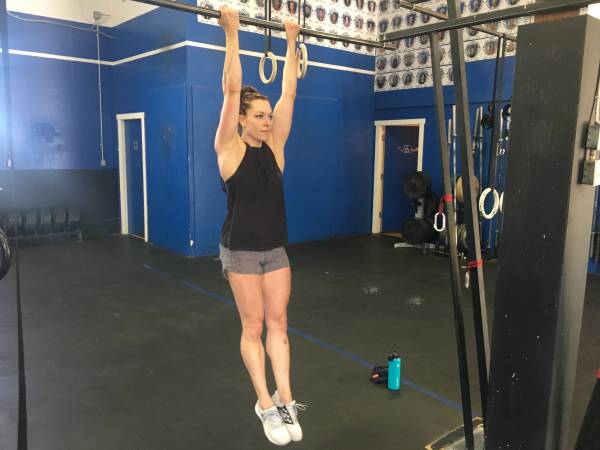
5. Supinated Grip Deadhang Hold
Just like the name says, it’s a deadhang hold with a supinated (or chin-up) grip. As you hang, keep your shoulders active and focus on keeping your feet together, your pelvis turned up (like you’re trying to pee on your face. How’s that for a visual?) and your ribcage down. In other words, aim for a perfect hollow body position.
Hold for 2 sets of 30 seconds to 1 minute.
6. Plank Shoulder Tap Variations
There are tons of variations for these. You can do them in a bent-knee plank with your knees one inch from the ground, or you can try them in a traditional plank. You can also reach up and over your head with a straight arm, or touch your hand to your hip instead of to your shoulder. In all variations, the idea is to keep your hips steady with as little movement as possible through your torso.
Start with 3 sets of 10 taps per arm.
Check out the video below for these variations.
7. Yoga Push-up
Again, there are tons of variations of these, but I like this one: It involves three positions.
First, lower yourself into the bottom of the push-up (position one), and then keep your hips low and raise your shoulders so you end up with an extended spine (position two), and finally drive your bum into the air and push your head through your arms until you feel a shoulder stretch (position three). Make sure you keep your knees straight as you get into this third position.
Good luck and take care of those shoulders!


