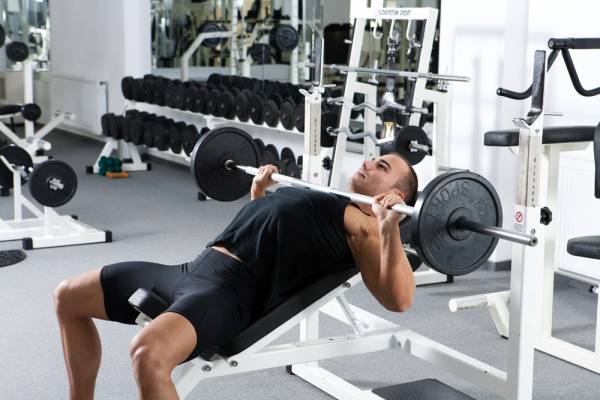
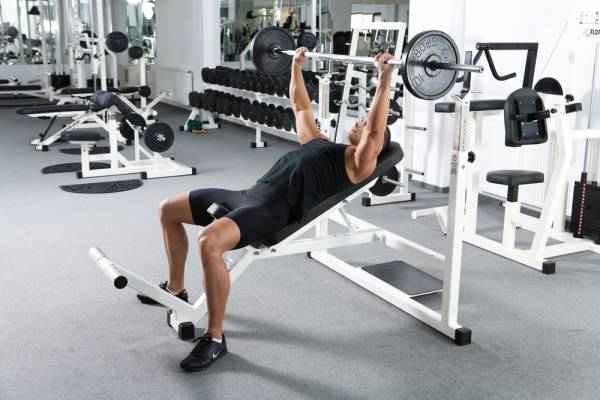
In my long ago days as a three lift Olympic lifter we did a lot of press-type lifts to help not only the Olympic press itself but also our overhead work in general. Despite modern criticisms on how pressing can be harmful to performing proper jerks, we seldom missed any jerks in those days since we had some quite awesome shoulders capable of holding up anything we could realistically think of putting overhead. We did lots of strict overhead presses and inclines angled the same as how much we thought we back bended in the Olympic press. In meets lifters always would bend even more (although I, of course, was honest). Now that my quick-lifting days are over I have rediscovered the incline press and also it’s many pitfalls.
Related: The Best Chest Workouts for Muscle Mass, Strength, and More
The incline is a nice compromise between the overhead and bench presses. It works mostly the clavicular pecs instead of the sternal ones, while still giving a lot of work to the delts (drive) and tris (finish). At the same time it is a little easier on the lower back than the overhead version since the isolated position on a supportive bench stabilizes the lumbar spine. Unlike the bench press, bridging or even just arching is not really possible. So the incline press is an honest one.
History of Equipment
Equipment is important in this exercise. Evolution continues. The first incline benches available were generally garbage. They were not very sturdy and had no attached racks. Lifters would either get others to hand him the weight or else they would clean it first, then sit down and lay back to lift. To get rid of the bar the latter bunch simply front squatted upwards and then wrestled the bar down. As a result, dumbbell inclines were more common at this time.
The incline benches used in commercial gyms were often of the “standing” variety; these were similar to a long sit-up board held up at some angle. The lifter lay along the length of the inclined platform, supported by built-in foot-holds. The bar was usually taken off of squat stands, themselves often rickety. At least with these a miss could be more easily handled by standing upright and wrestling the bar to the floor. Few such benches exist today. Again, dumbbells were common.
How Much Incline?
If one is talking “inclines” then the exact degree of that incline will sooner or later become an issue. Different slopes will hit the muscles at different angles and therefore produce different strength and hypertrophic effects on the muscles involved. Trainees want this option. But long incline benches made angle adjustment and bench stability difficult.
 For these reasons the seated incline eventually became more popular and the gym standard. Some benches have a fixed angle, usually at the halfway 45 degree mark. Others are adjustable to a number of desired angles – from zero (or flat bench), and moving to 30, 45, 60, and 75 degrees (for seated overheads). I myself prefer a 60 degree angle, but that’s just me. If the bench is adjustable make sure that the mechanism is capable of holding the barbell plus the bodyweight. Many home models are just not strong enough for a serious athlete. A collapsing incline bench underneath you and a barbell over you are not funny.
Modern Equipment
Seated incline benches may or may not come with racks and even if they do they may or may not be height adjustable. And even if they do adjust they may or may not suit each individual user. Some may also be adjustable in width but those are rare. Most annoyingly we have adjustable angle benches that work fine for flat benches but end up with the bar behind the lifter’s head when inclined. Useless.
Rackless benches will need a power rack to lift off of. Ultimately though rackless benches used in conjunction with a power rack is usually one’s best bet. The rack’s saddle heights are adjustable while the bench itself can be moved for-and-aft to taste. A set of safety bars placed just below the upper sternum level when on the bench will take care of any misses.
The Lift
 Now the lifter has his or her equipment ready they are ready to take on the job of lifting the bar. The first two things anyone new to inclining notices is that pressing will be harder than on a flat bench and the pressing “groove” is much narrower front-to-back, in direct proportion to the degree of incline. This affects the lift two ways. One, it is hard to find a place where the bar can be un-racked without a lot of rearward moment arm. Two, the return trip will also be tougher. The pecs want to throw the bar out front into moment arm territory. But the lifter also finds that if he or she tries to keep the bar back towards the face the top lift and re-rack will often involve banging into the racks and/or saddles. As a result, precision technique becomes important at both ends of the lift.
- Set-up – Experiment with the set-up of the equipment you are using. Get the bench, its angle, saddles, and safety bars in their desired positions if these are not fixed. Load the bar. Try to minimize the rearward un-racking moment arm while still being able to keep the bar away from the rack and saddles when lifting.
- Spotting – Spots are not needed in a rack except for maybe as part of an un-racking. Psych-up routine, feeling a light bar and all. Spotting is needed only if there are no safety bars or other such preventatives. If so then it is good to have built-in spotting stands or two competent end spotters.
- Grounding – Get yourself into the proper position on the bench – butt to the bench, blades squeezed in, proper hand position and grip, and legs planted wide enough to help to avoid any bench tipping. Keep the abs and back tight. Nothing much new there if you already know flat bench technique, as I will assume you do.
- Centering – Start your concentration and psyching routine if you have not already done so.
- Charging – Take a few breaths and then do a Valsalva.
- Un-rack – Take the bar from the racks and move it forward to the start position. Charge and Valsalva some more if necessary.
- Lowering – Lower the bar straight to the top of the sternum. Those with long forearms may have to float the bar. Use either a touch-and-go or a full pause as desired.
- The Drive – Try to drive the bar upwards hard enough to get through your sticking point. KEEP THE BAR CLOSE TO THE FACE. This minimizes the moment arm. Don’t slow down when coming to the sticking point as that tends to psych you out.
- The Finish – Lock-out the bar to complete the rep. Repeat as often as desired.
- Re-rack – When the set is completed carefully re-rack the bar. Remember, there is a moment arm. Do not miss the saddles since your head will still be between between the saddles and the safety bar.
Now, just PUSH, PUSH, PUSH, PUSH, PUSH.
Photos courtesy of Shutterstock.


