Pull-ups are often called the king of upper body lifts — but do you know what is even more worthy of the crown? Adding resistance and doing more pull-ups. There will come a point when bodyweight pull-ups won’t provide you the gains they used to. When that happens, simply doing more reps will be less efficient for building muscle and strength.
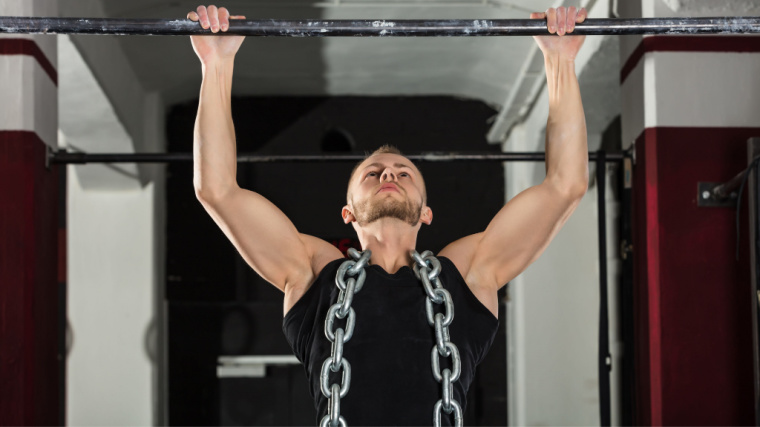
The weighted pull-up will offer you the same benefits as the basic bodyweight exercise, but you can better suit your strength level. This leads to more strength and size in your back, arms, and abs. If you have mastered the unweighted pull-up, check out what the weighted version has to offer and the best way to do it.
- How to Do the Weighted Pull-Up
- Weighted Pull-Up Mistakes to Avoid
- How to Progress the Weighted Pull-Up
- Benefits of the Weighted Pull-Up
- Muscles Worked by the Weighted Pull-Up
- How to Program the Weighted Pull-Up
- Weighted Pull-Up Variations
- Frequently Asked Questions
How to Do the Weighted Pull-Up
The weighted pull-up is not really different from the bodyweight version, technique-wise, but you still have to accommodate the weight depending on what implement you use. Here’s how to do them.
Step 1 — Pick a Weight
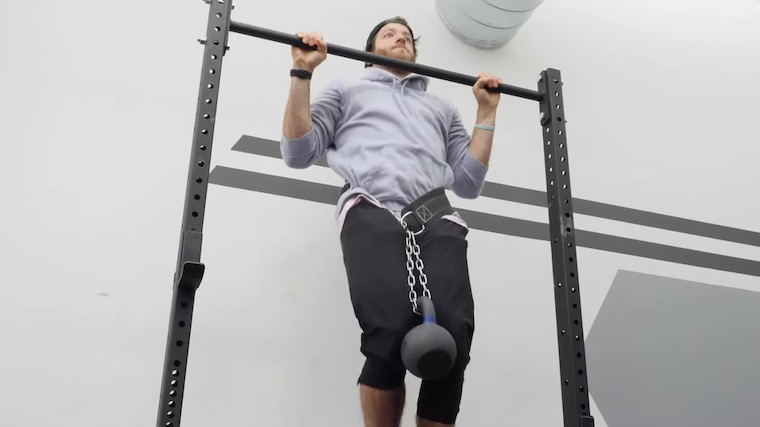
Depending on what’s available to you and your preferences, there are several options to add external resistance to the exercise. Here’s how to do it:
- Weighted Vest: Using a weighted vest will have the most natural feeling because the weight is distributed evenly around your torso. The general technique will be the closest to the bodyweight pull-up using this resistance. The only drawback is that you can’t go too heavy, as many vests are limited to 22 or 45 pounds.
- Backpack: This inexpensive, homemade alternative is very close to using a weighted vest. Simply add some weight in a sturdy bag and put it on. The biggest drawback is the unknown variable for weight capacity, as going too heavy is asking for the fabric or straps to tear down, which could be dangerous.
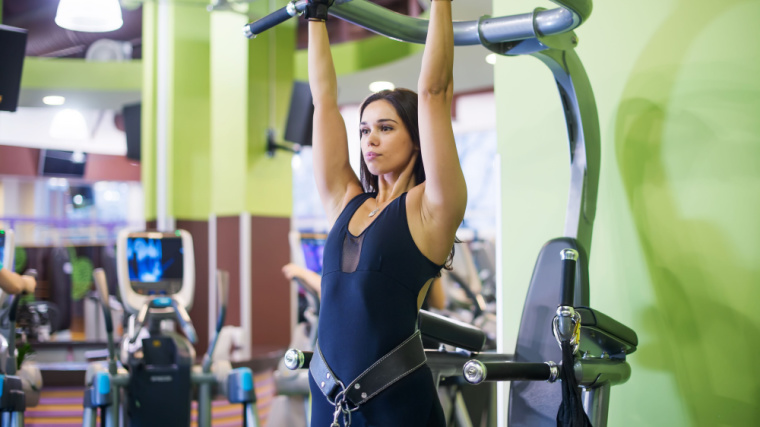
- Weighted Belt: Likely the most common way to add weight. It is a specialized belt with a chain on which you can add plates to load yourself. You put it around your waist, then let the weight hang between your legs. This resistance might feel a little harder because it will demand superior abdominal involvement because it’s pulling on your hips. The weights might dangle and move on the chain, but the sky is the limit weight-wise. For moving the heaviest loads possible, this is the best option.
- Dumbbell: If you have none of these options available, you can always grab a dumbbell and hold it between your thighs with your legs bent. This option is the least comfortable and will involve your abs and legs, but will work just fine to make pull-ups more challenging.
- Chains: Drape some chains around your neck and shoulders. It’s very easy to do and you’ll look great on the ‘Gram. Once again, you’ll most likely be limited by the amount of weight you can use and it can be uncomfortable.
Step 2 — Find Your Grip
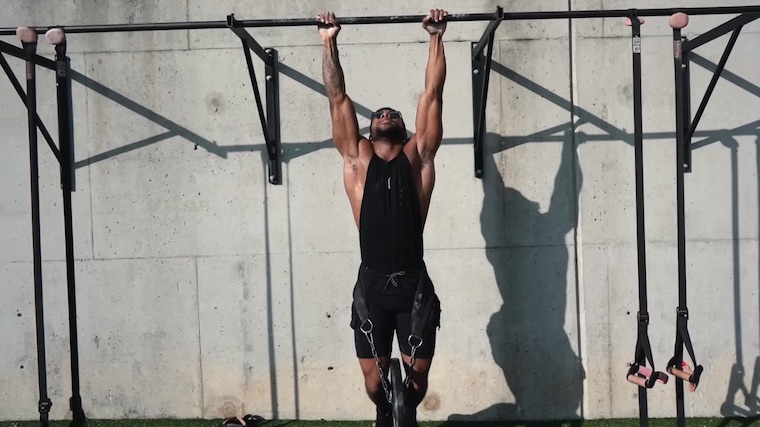
Climb on the steps under the pull-up bar, or place a box under it. Grab the bar firmly with a slightly wider than shoulder-width grip, with your palms facing away from you (pronated).
Your grip-width will depend on your own limb length and mobility, but generally aim for a “medium” grip — not too wide or too close — for maximal strength and balanced muscular engagement.
Let yourself hang from the bar under control in a dead-hang, with your arms completely extended. Pull your shoulder blades back, keep your chest high, and engage your abs so that you prevent your legs or (the weight if you’re using a belt or dumbbell) from swaying. If your lower body does start moving, wait for it to settle. This is your starting position.
Form tip: Depending on the width of your grip, you can shift focus onto different body parts. A closer grip will induce more arm recruitment, and a wider grip will emphasize your back. Because your back is a relatively larger and stronger muscle, err on using a slightly wider grip unless you’re specifically looking to build your arms and grip strength.
Step 3 — Pull Yourself to the Bar
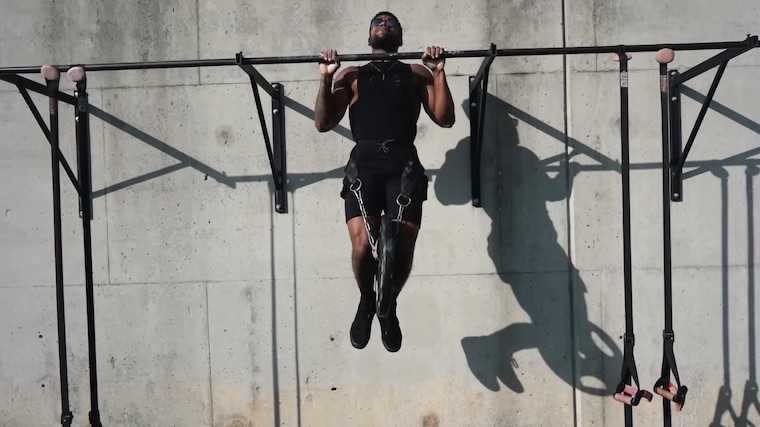
Take a deep breath and flex your abs. Pull yourself toward the bar as hard as you can. Keep your elbows aimed down to ensure maximal lat engagement.
Pull until your chin goes over the bar, exhale, and hold the contraction for a second. Keep your chest high and your back very slightly arched to engage as many back muscles as you can.
Form tip: Depending upon your morphology (limb length) and your goals, pulling all the way up is not mandatory. If you’re a tall lifter or have relatively long arms, your muscles’ maximal contraction point might be reached before your chin is over the bar. If you’re one of these unique lifters or if you’re only interested in building muscle, aim for a range of motion where you only reach peak contraction. However, if your goal is overall strength, it’s wiser to adopt the same form on each rep and get your chin over the bar.
Step 4 — Lower With Control
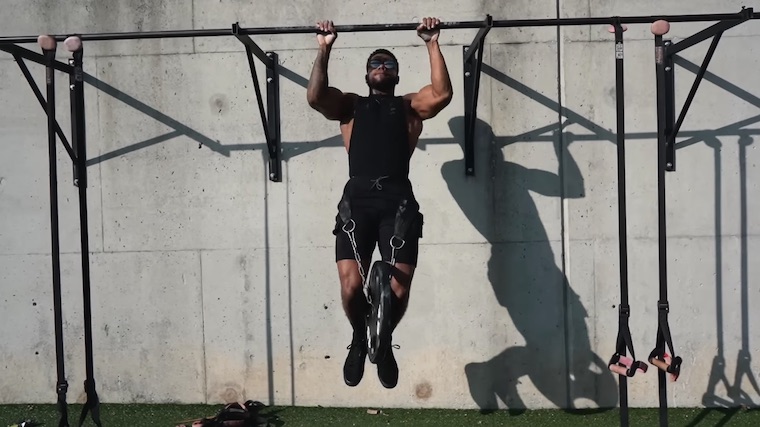
Keep your body tense and slowly lower yourself until your arms are extended and your lats are fully stretched. Avoid any lower body swaying by flexing your abs as much as you can and squeezing the bar hard. When you’re at a dead-hang with straight arms, begin the next repetition.
Form tip: Your legs should remain in the same position for the duration of the lift. It will actually help you be stronger by increasing total-body stability. Whether you have them stretched or bent, keep them that way and flex them. This will help your core recruitment, and improve your lower lats strength through fascia connections.
Weighted Pull-Up Mistakes to Avoid
If you want to reap the most benefits of an exercise, proper execution is key. It’s especially true when you start adding weight to a bodyweight exercise because it can slightly alters the technique. Learn about the main weighted pull-up mistakes so you don’t reproduce them.
Gripping the Bar Too Loose
A common mistake is to hold the bar only with your fingers instead of a deep, full grip using your whole hand. Your forearms and grip are a main component of your pull-up performance — once you lose your grip, your set’s over.
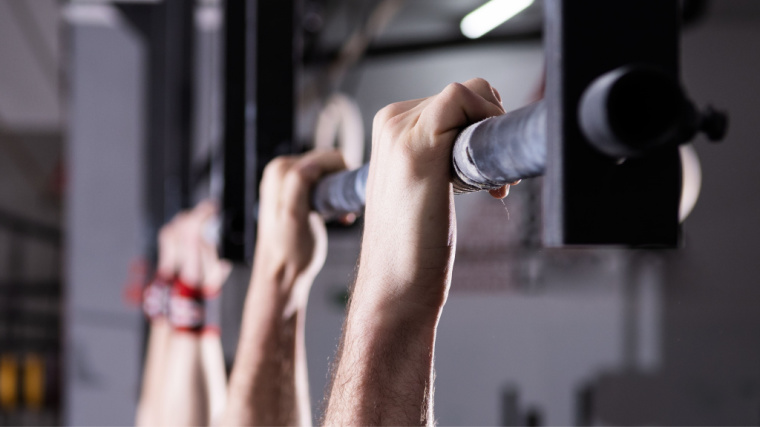
More importantly, your hands are your only point of contact with the bar. Put yourself in, literally, the strongest position possible by maximizing your pulling ability.
Avoid it: You have to grip the bar firmly to transfer as much energy as possible through your body. As an added bonus, with the bar being lower in your hand instead of closer to your fingertips, you slightly reduce the range of motion by an extra inch or to help pass your chin over the bar.
Cutting the Range of Motion Short
Sure, you’re eager to add some weight and get stronger. But if you can only add weight by reducing the range of motion, you’re not ready for it yet. You shouldn’t change the mechanics of the exercise just for the sake of ego, because you might not end up with the results you want. Shortening the range of motion will diminish the time under tension, resulting in less muscle growth. (1)

The main offense with pull-ups is staying in the upper range of motion — only going down halfway. This will result in less hypertrophy because working in a longer muscle length is skipped and stretch-mediated hypertrophy is actually more efficient than only focusing on the shortened muscle length range. (2)
Avoid it: Remember that adding more weight won’t result in more strength or muscle if you succumb to half-reps. Think about quality, not quantity, and keep a full range of motion whether you’re using weight or not.
Swinging Around
Excessively swinging your body is a no-go. This is especially true if you have weight dangling between your legs. You shouldn’t be trying to complete as many repetitions as possible, no matter the cost. If you want maximal muscle and strength gains, use perfect form at all times.
Creating momentum with your abs and lower body will diminish back muscular tension as well as reduce the effective range of motion, leading to sub-par gains. It’s also risking more tension on your shoulder joints which can lead to injuries.
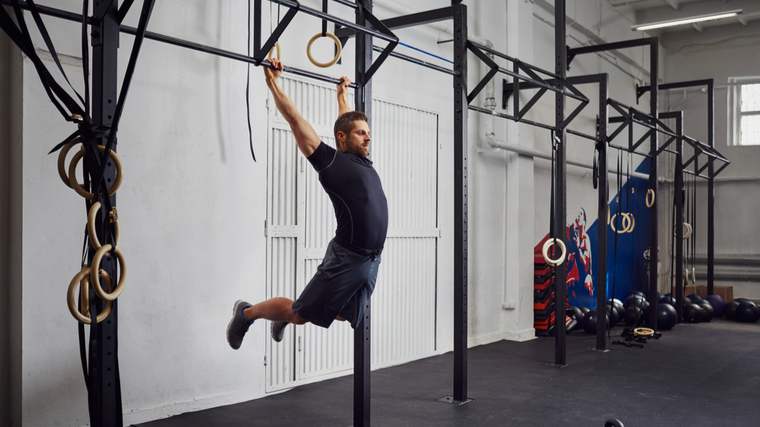
Avoid it: Engage your core and tighten your legs to improve your stability. Practice with a one-second pause at the top and the bottom of each repetition to ensure strict, controlled movement. If needed, wait for an extra second or two in the bottom position of each rep to let the weight settle and reset yourself.
How to Progress the Weighted Pull-Up
Pull-up performance is determined by your relative strength, which is how strong you are compared to your bodyweight. You have two ways of making the pull-ups more challenging — either increase your body weight or add external load.
When you become “too strong” relative to your body weight, it’s wise to make the exercise harder if you want maximum gains. Here are the standards:
- If you want to become stronger at the pull-up, add weight once you can master sets of five or six bodyweight pull-ups.
- If you are focused on building muscle, add weight once you can bang out sets of 10-12 pull-ups without trouble.
But before any of that, you first need to be able to perform the basic pull-up, and here are some ways to get there.
Lat Pulldown
The bread and butter of many back sessions, the lat pulldown mimics everything a weighted pull-up can offer you, with less core activation and an more progressive way to determine your resistance.
What is great about this exercise is that beginners and veterans can use it alike. If you’re too heavy or just lack the strength for weighted pull-ups, this is a perfect alternative. You don’t have to worry about balance and coordination here, so you can focus more on the muscles.
Weighted Inverted Row
What’s better to replace a bodyweight back exercise than another bodyweight back exercise? The inverted row is the pull-up’s cousin and offers the same benefits and functional strength, though using an horizontal motion which slightly changes the muscle recruitment.
As with the weighted pull-up, you can progress to weighted inverted rows. Find a weighted vest, place a backpack “backwards” onto your chest and abs, or toss some chains around your torso, and start pulling.
Pull-Up
Of course, the most essential step in achieving a weighted pull-up is to perform bodyweight-only pull-ups. If you can’t lift your own body weight, good luck lifting your own body weight plus an extra five to 30 pounds.
Work to master the fundamental technique. By the time you’re approaching double-digits with good form, you’ll be ready to start thinking about adding weight.
Benefits of the Weighted Pull-Up
The weighted pull-up is a staple in many programs for a reason. This exercise can elevate your upper-body strength and size to unprecedented levels. If you can bang out ten or more, your fitness is certainly something to be recognized and you’ll get some appreciative stares in the gym. Here are a few more perks.
Maximal Strength
Maximal strength is mostly built using a weight of at least 85% of your one-repetition maximum. If you only stick with training bodyweight pull-ups, there will come a point where you won’t be able to train in the maximal strength zone, because your own weight won’t be challenging enough. This is why strength athletes use weighted exercises in general.
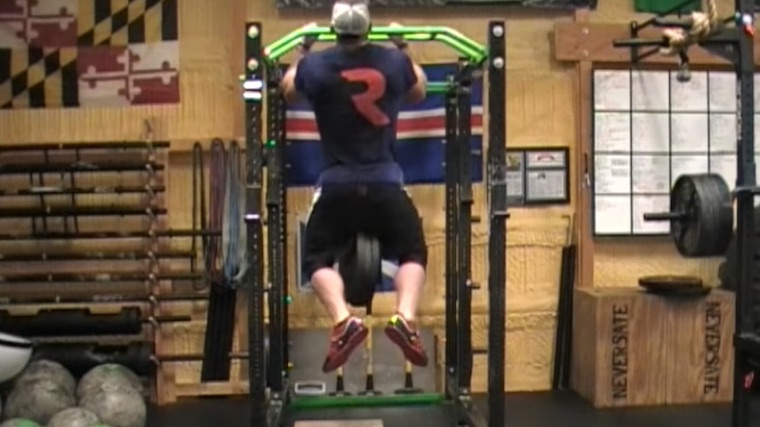
Adding weight to your pull-ups is one of the best ways to improve pulling strength in your upper body and arms. The back directly supports the spine, and many muscles and bones in the body. It’s akin to a tree trunk. Having a stronger back will help your performance by not only being stronger in pulling motions, but by providing a more stable base for your other muscles, for instance stabilizing the arms and scapulae (shoulder blades) in pressing motions.
The weighted pull-up will also directly improve spinal strength (because the lats are attached to the spine from the middle to the sacrum) as well as core resilience, both directly linked to better sports performance. (3)(4)
More Muscle Growth
The weighted pull-up is one of the best exercises to promote back hypertrophy. Period. (6) If you want to improve your posterior chain, adding it to your training regimen will do wonders. It will also build size in your arms and forearms, and most people would be pretty happy with that “side effect.”
If you’re a more seasoned lifter, chances are you can knock out many bodyweight pull-ups. Perhaps you even max out the lat pulldown machine. In both cases, the weighted-pull will most likely be your best bet to further improve your muscle development.
There are several ways to increase the demand on the muscle, but adding weight is one of the most straightforward. The beauty is that you can increase very gradually, by using small plates and making little adjustments. By doing so, you will ensure that you keep building muscle in your back and arms. (5)
Better Grip Strength
Grip is essential for pull-up performance, but also for exercises like the deadlift, or outdoor activities and sports. The weighted pull-up will be a tremendous grip builder, which has the benefits of causing less overall fatigue to the body and nervous system, and not taxing muscles like the lower back or legs. This can be very beneficial for athletes which monitor total volume for body parts or need to recover sufficiently for contest performance.
Moreover, having a weak grip can not only affect performance, but your health. Forearm and grip strength has been linked to wrist, elbow, and shoulder health. (5) If you suffer from tendinopathy or nagging pains in these areas, having a better grip can help. Grip strength is also an indicator of general health as it is linked to longevity, improved brain health, and reduced risk of depression. (6)
Muscles Worked by the Weighted Pull-Up
The weighted pull-up engages many muscles in your upper body and your arms. Here are the main muscle groups trained by the exercise.
Latissimus Dorsi
The lats are the biggest and strongest back muscle. They go from your hip bone and lower spine to your humerus (arm bone) and are heavily involved in lowering, pulling, extending and internally rotating your arms. The lats also contribute to spinal and trunk movements and core stability. They are the main muscle recruited by weighted pull-ups and they take most of the workload.
Upper Back
The upper back is composed of several muscles sharing similar functions, including the trapezius, rhomboids, and posterior deltoids. They all move the shoulder blades in several ways, assist in pulling motions, and contribute to stabilizing the scapulae during pressing movement as well. As the pull-up requires scapular motion, the muscles of the upper back will heavily contribute to the movement.
Upper Arms
The biceps brachii are composed of two heads — the long portion on the outside of the arm, and the short portion on the inner side. They both go from your radius to your scapula, and flex and supinate the arm (rotate it internally). The biceps contributes to the weighted pull-up through arm flexion. You can’t bend your arms without your biceps.
The pull-up’s pronated (palms down) grip actually puts an emphasis on the brachialis muscle, the strongest arm flexor located just under the biceps, originating from the humerus and ending at the ulna (forearm bone). Having a big brachialis can help your biceps pop because they will push it higher.
Forearms
Because weighted pull-ups require tremendous grip strength, your forearms will be recruited extensively. Many muscles are present in the forearm but the forearm flexors, which are responsible for your grip, will be taxed the most. The brachioradialis, the biggest forearm muscle, will also assist the upper arm in flexing.
Core
To maintain proper posture and be more efficient during this exercise, you’ll have to engage your whole core. The added weight makes your core (abs, lower back, and some hip muscles) work even harder to stabilize your body, especially when the weight is suspended between your legs because it’s further from your center of gravity.
These core muscles do not actively move during the lift, but are contracted isometrically to maintain a stable body position for an efficient pull.
How to Program the Weighted Pull-Up
The weighted pull-up is a polyarticular (multi-joint) exercise that can be programmed a variety of ways, depending on your goals and strength levels. Perform the exercise towards the beginning of your session, when you’re still fresh, to ensure proper technique and maximal strength. Here are several efficient repetition schemes.
Heavy Weight, Low Repetition
Performing three to five sets of one to five repetitions is the best way to improve your strength level. Keep one or two reps in the tank to ensure proper form at all times, because technique is crucial in strength development. To be able to repeat this effort with quality technique for all sets, aim for long rest periods of three to five minutes.
Moderate Weight, Moderate Repetitions
If you want to build size, three to four sets of six to 12 repetitions is an excellent scheme. You should be near or reach muscular failure on each set, but never at the expense of form. Rest periods of two to three minutes will be your best bet for maximum muscle gains. (7)
Strength-Skill Sets
Because the weighted pull-up is a skill that necessitates perfect form and long rest periods to recover, you should be wary of reaching muscular failure if we want to improve strength. As such, another strength method is to use a lot of very low-rep sets with short rest periods. You ensure your body stays fresh while providing high-quality, heavy weight repetitions.
For instance, one could use an EMOM format (every minute on the minute) and do one heavy repetition at the start of each minute for a total of ten minutes. You could also set a time limit, approximately 15 minutes, in which you perform as many high-quality sets of three repetitions as you can. These methods let you accumulate technique practice while also stimulating strength gains.
Weighted Pull-Up Variations
Using a pronated grip with pull-ups is the standard technique, but you can very easily change muscular recruitment and instill variety in your training by varying your grip angle.
Weighted Chin-Up
This variation uses a supinated (palms facing you) grip. This doesn’t look like much of a change, but the exercise involves more biceps and can put you in a stronger pulling position.
It is a great variation if you struggle with pronated pull-ups or if you want more arm size. If you want even more biceps involvement, use a closer than shoulder-width grip.
Neutral-Grip Pull-Up
A neutral grip (palms facing each other) puts less pressure on your elbow and shoulder joints. Adding weight to the pull-up can often cause pain to achy joints, and this version allows you to do it with less strain.
Additionally, it will emphasize the brachialis (the muscle under the biceps) and forearms recruitment. This will also be one of the strongest pulling grips.
Ring Weighted Pull-Up
This is one of the most challenging variations you can perform. The rings are not fixed like a bar, so they sway and increase the need for total-body stability. As such, your forearms, upper back, and core will have to work extra to halt any unnecessary swinging movement.
This variation will also be the smoothest on your joints. The rings allow you to rotate your hands freely, creating better joint positions and a more natural motion. If you suffer from achy elbows or shoulders, try this movement.
FAQs
I only have a pull-up bar and no way to add weight. Is my back progress doomed?
Adding weight to an exercise is the most straightforward way of improving progressive overload, but if you cannot perform weighted pull-ups, do not worry. First of all, keep in mind that for pure muscle growth, sets of 20 can be as beneficial as sets of 10. So unless you can consistently bang more than 20 pull-ups, you still have some room to grow. (8)
Alternatively, if you’re already strong as possible, or if you just want to try a different technique, there are other effective methods. You can increase the time under tension by adding pauses or playing with tempo (rep speed). For instance, taking a three-second pause at the top of each repetition or using a four-second eccentric (lowering phase).
You can also do the same basic sets, but with reduced rest periods. Go from sets of ten with two minutes of rest to sets of ten with just 90 seconds of rest. If you can do it, you’ve progressed. Finally, you can also pre-fatigue your pulling muscles to make bodyweight pull-ups more difficult. Doing a 15-second pause at the top of the motion before doing normal repetitions will stress your muscles differently. Try to increase this duration over several weeks.
What is the difference between a pull-up and a chin-up?
For some mistaken people, these both designate the same exercises, but they’re different. The chin-up uses a supinated grip, with your palms facing you, and the pull-up involves a pronated grip, with your palms facing away. As such, the chin-up involves the biceps more and the pull-up emphasizes the back musculature in general.
Get Your Pull-Up to the Next Level
Why stick to bodyweight when you can add weight and further improve your fitness? If you want to keep progressing, the weighted pull-up should be part of your arsenal for long-term success. Once you can do sets of ten consistently, you really will be in the company of kings.
References
- Burd NA, Andrews RJ, West DW, Little JP, Cochran AJ, Hector AJ, Cashaback JG, Gibala MJ, Potvin JR, Baker SK, Phillips SM. Muscle time under tension during resistance exercise stimulates differential muscle protein sub-fractional synthetic responses in men. J Physiol. 2012 Jan 15;590(2):351-62. doi: 10.1113/jphysiol.2011.221200. Epub 2011 Nov 21. PMID: 22106173; PMCID: PMC3285070.
- Oranchuk DJ, Storey AG, Nelson AR, Cronin JB. Isometric training and long-term adaptations: Effects of muscle length, intensity, and intent: A systematic review. Scand J Med Sci Sports. 2019 Apr;29(4):484-503. doi: 10.1111/sms.13375. Epub 2019 Jan 13. PMID: 30580468.
- Moreno Catalá María, Schroll Arno, Laube Gunnar, Arampatzis Adamantios. Muscle Strength and Neuromuscular Control in Low-Back Pain: Elite Athletes Versus General Population. Frontiers in Neuroscience 12. DOI=10.3389/fnins.2018.00436
- Hibbs, Angela & Thompson, Kevin & French, Duncan & Wrigley, Allan & Spears, Iain. (2008). Optimizing Performance by Improving Core Stability and Core Strength. Sports medicine (Auckland, N.Z.). 38. 995-1008. 10.2165/00007256-200838120-00004.
- Coombes BK, Bisset L, Vicenzino B. Management of Lateral Elbow Tendinopathy: One Size Does Not Fit All. J Orthop Sports Phys Ther. 2015 Nov;45(11):938-49. doi: 10.2519/jospt.2015.5841. Epub 2015 Sep 17. PMID: 26381484.
- Bohannon RW. Grip Strength: An Indispensable Biomarker For Older Adults. Clin Interv Aging. 2019;14:1681-1691 https://doi.org/10.2147/CIA.S194543
- Schoenfeld BJ, Pope ZK, Benik FM, Hester GM, Sellers J, Nooner JL, Schnaiter JA, Bond-Williams KE, Carter AS, Ross CL, Just BL, Henselmans M, Krieger JW. Longer Interset Rest Periods Enhance Muscle Strength and Hypertrophy in Resistance-Trained Men. J Strength Cond Res. 2016 Jul;30(7):1805-12. doi: 10.1519/JSC.0000000000001272. PMID: 26605807.
- Thiago Lasevicius, Carlos Ugrinowitsch, Brad Jon Schoenfeld, Hamilton Roschel, Lucas Duarte Tavares, Eduardo Oliveira De Souza, Gilberto Laurentino & Valmor Tricoli (2018) Effects of different intensities of resistance training with equated volume load on muscle strength and hypertrophy, European Journal of Sport Science, 18:6, 772-780, DOI: 10.1080/17461391.2018.1450898
Featured Image: BLACKDAY / Shutterstock


