During the 2007 NFL season, the Atlanta Falcons suffered seven devastating season-ending injuries. In 2008, the team had a complete turn-around, suffering only one minor injury in the post-season. What changed? Their new athletic performance director, Jeff Fish, shifted the team’s training focus from raw power and size to functional strength and stability by instituting the Functional Movement Screen.
The Functional Movement Screen (FMS) is an evidence-based exercise philosophy developed by Gray Cook, one of the world’s most respected injury-prevention specialists. According to Cook, the primary cause of athletic injuries is neither weakness nor tightness, but rather muscle imbalance. Just because you can bench five hundred pounds doesn’t mean you won’t dislocate your shoulder during the opening kickoff of a football game. Raw strength does not equal functional strength, and ignoring whole-body stability in favor of isolated muscle mass and power is a recipe for disaster.
Exercising muscles in isolation will change their shape and size, but it’s not likely to make your body any safer from injury. Working basic body movements, however, will strengthen muscles and make movement safer, whether it’s doing gymnastics or lifting a laundry basket.
 Want proof that Cook knows what he’s talking about? During the 2007 NFL season, after Cook introduced the concept to the Bears and Colts during the off-season, both teams utilized the FMS to successfully keep their athletes healthy and both went on to make appearances in the Super Bowl. Athletes throughout the NFL, MLB, NHL, and NBA, as well as Special Ops military personnel, now spend millions annually for trainers specializing in FMS to keep themselves injury-free.
So what is the Functional Movement Screen? It’s a set of seven fundamental movement patterns that can be evaluated to identify movement limitations and left/right muscle asymmetries. It’s a trouble-detection system to prevent injuries before they happen.
The tests are:
 Deep Squat (Lower Body): Used to assess symmetrical and functional mobility of the hips, knees, and ankles.
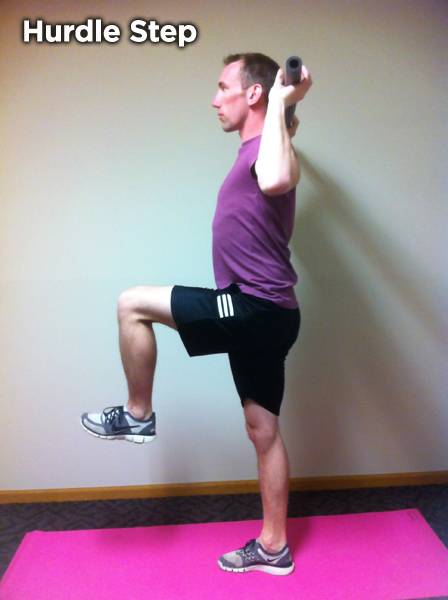
- Hurdle Step (Lower Body): Gauges stability and functional mobility of the hips, knees, and ankles.
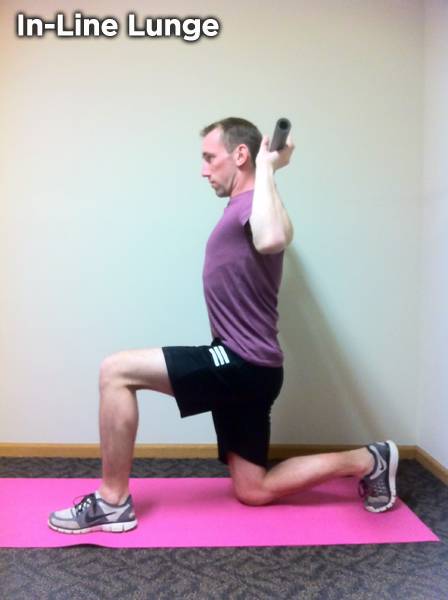
- In-Line Lunge (Lower Body): Used to assess torso, shoulder, hip and ankle stability and mobility, quadriceps ?exibility, and knee stability.
- Shoulder Mobility (Upper Body): Assesses shoulder range of motion as well as shoulder blade mobility.
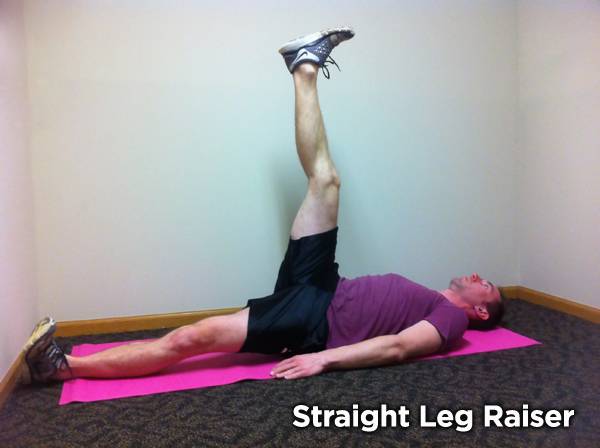
- Straight Leg Raiser (Lower Body): Gauges functional hamstring and calf flexibility while maintaining a stable pelvis.
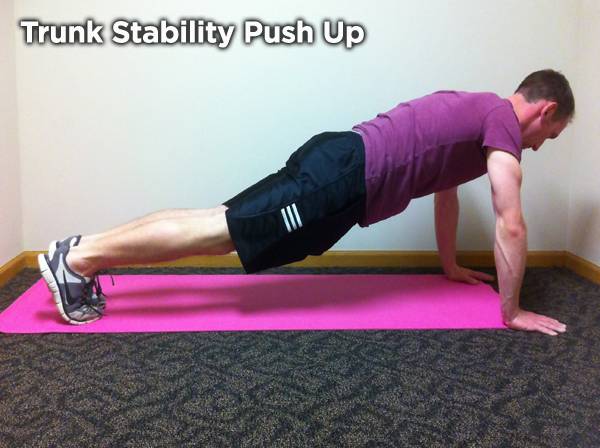
- Trunk Stability Push-Up (Upper/Lower Body): Used to assess symmetrical core stability.
- Rotary Stability (Upper/Lower Body): Assesses core stability in combination with upper and lower body mobility.
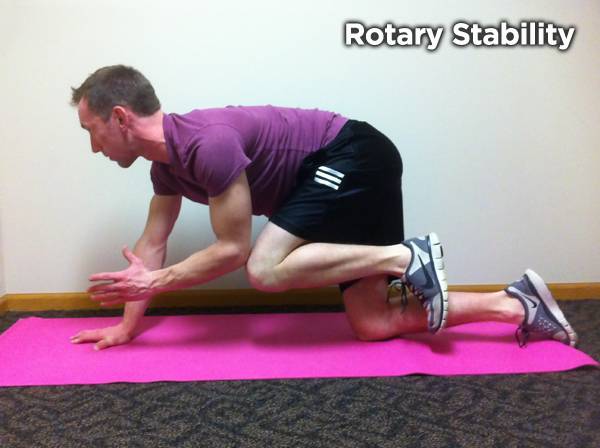 These tests place the individual in extreme positions where weaknesses and right/left imbalances become easily noticeable if appropriate stability and muscle balance is not present. The beauty of the FMS it is that just about anyone can learn the basic system quickly and have an effective way of evaluating basic movement abilities. It’s also provides a clear baseline to mark progress and measure performance during an exercise program.
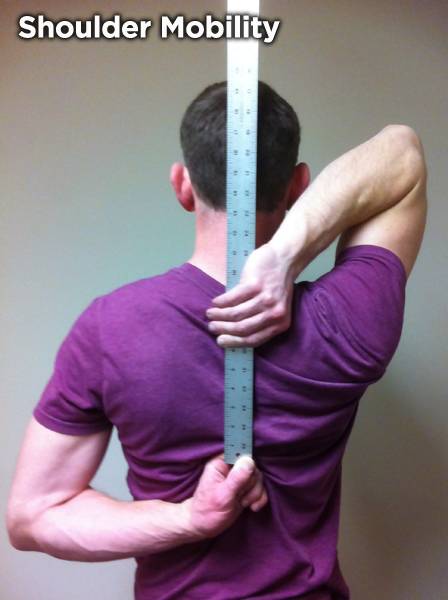 Providing corrective measures for every possible deficiency in these seven movements could take fifty pages of dense reading material (for that, head over to functionalmovement.com. But for everyone else, assuming you perform the screen and discover imbalances, Cook names these as the best across-the-board corrective exercises to fix the most common deficiencies:
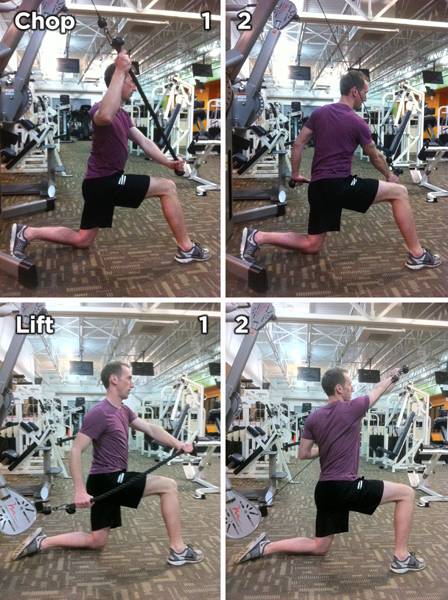
- The Chop and Lift (Whole Upper Body Stability)
- The Turkish Get Up (Connects Upper and Lower Body Stability)
- The 2-Armed Single Leg Deadlift (Whole Lower Body Stability)
- The Cross-Body 1 Arm Single Leg Deadlift (Advanced Whole Lower Body Stability)
These exercises should be learned in the order they’re listed, as better coordination is required as you move down the list. There’s no shame in sticking with the simpler exercises for several weeks if the more advanced exercises are too difficult at first.
A potential strategy for adding these exercises to your workout routine is as follows:
 Stage One
Based on the weaknesses identified in the FMS, practice the appropriate exercises listed above without weight until you are able to perform them for 5 reps on each side. Only when you can do this flawlessly without weight should you move on to stage two. This stage may take just one workout or may take a week or more depending on your beginning level of balance and fitness. If you weren’t 100% sure whether right/left muscle imbalances were present after performing the seven screen tests, it should be obvious the first time you attempt these exercises.
Stage Two
Based on the weaknesses identified in the FMS, perform 7 sets of each of the appropriate exercises twice per week. Use a comfortable amount of weight with a strong side to weak side ratio of 5 sets to 2 sets and a repetition range of 3-5 reps per set. In other words, perform 5 sets on the weak side and 2 on the strong side for each indicated exercise. Continue with this stage for four weeks, then re-evaluate with the FMS and repeat if necessary.
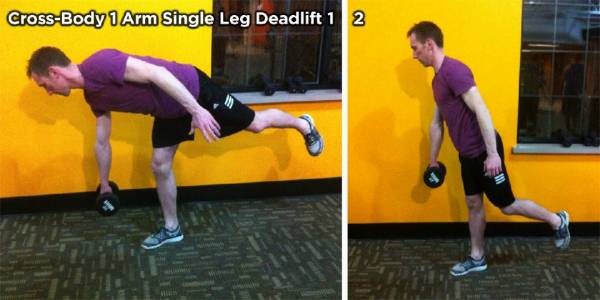
Don’t have the time? Do as much as you can. Consider that sacrificing forty minutes each week takes less time, and less loss of progress, than six to eight months of recovery after an injury.
As a physician, I want to stress that the FMS is a screen, not a diagnostic tool. As effective as the above exercises are, they won’t correct any underlying structural (whether spine or extremity) issues that only your doctor can properly diagnose and treat.
Nonetheless, utilizing the Functional Movement Screen before beginning a new sport or exercise program can help you determine functional deficits that are often overlooked by traditional athletic physical exams. If the weaknesses exposed by the FMS can be identified and addressed, decreased injury risk and improved athletic performance should follow naturally. Focus on pre-hab so you don’t have to do rehab!


