One of the most common range of motion issues I come across as a trainer is a poorly-mobilized posterior chain. Many athletes say they have “tight hamstrings,” but the issue is more than just hamstrings. It’s the entire posterior chain clenching and pulling when and where it shouldn’t be, like when you attempt a kettlebell swing and end up dropping into a squat, or when your lumbar rounds as you compensate with an exaggerated posterior pelvic tilt during the first phase of a deadlift.
Downward Dog, and its cousin the Three-Legged Dog, is one of the most popular yoga poses for a reason. Not only does it decompress and neutralize your spine, but consistent practice will correct most of the movement faults associated with kettlebell swinging and snatching, deadlifting, and overhead pressing.
You can utilize this posture before your training session as part of a mobility based warm-up, during your session between sets as a quick spinal decompression, and after your training session for something a little more engaging than “stretching.”
Downward Dog
The basic form of the pose looks simple enough on the outside, but the real benefits here are in the detailed adjustments that you can make on your own. First, begin on hands and knees:
Next, start to lift your hips while actively pressing down through the inside edges of your palms:
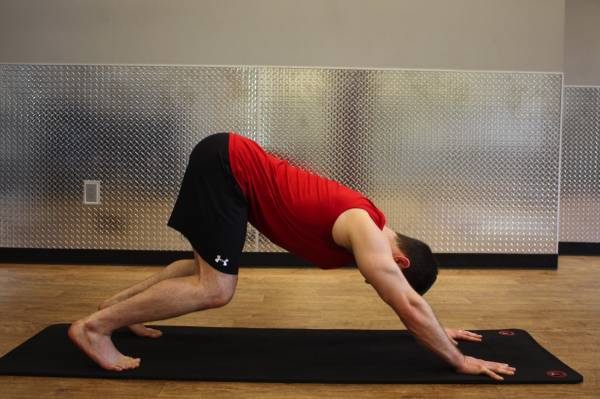
Keep your knees bent for now. For most people just starting out with this pose, you won’t straighten your knees any further. This is your initial position before making more detailed adjustments:
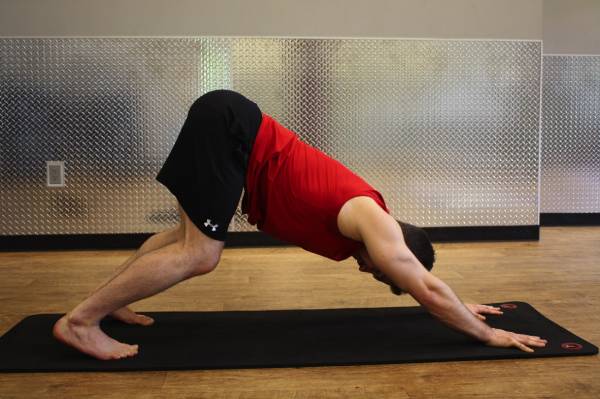
If you try to straighten your knees too far before you are ready, you’ll end up with an excessively rounded lumbar, which drops your sit bones, draws you into a posterior pelvic tilt, and ruins much of the benefit of the pose:
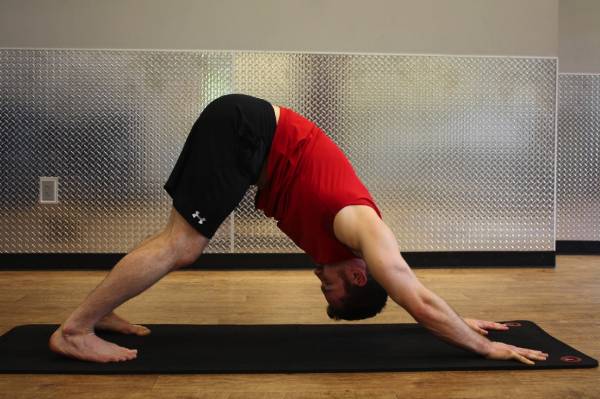
However, if you have been practicing for awhile or just naturally can lengthen your calves, hamstrings, and spinal erectors all together, then you might try to press your heels all the way to the ground:
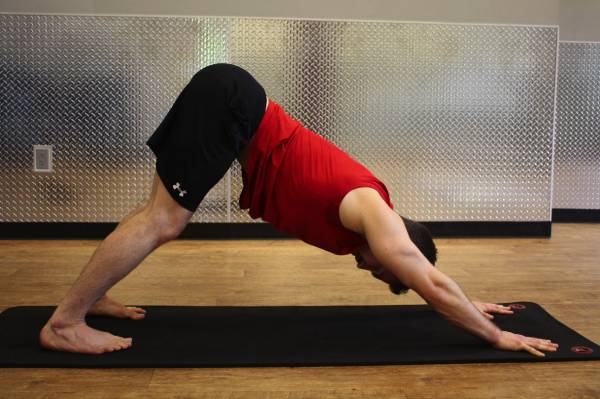
And now the fun begins!
First, roll your shoulders away from your ears and let your neck relax.
Take a deep breath in. As you exhale, attempt to scrape your hands forward away from your body while at the same time pressing your hands through the ground so that they do not move anywhere. As you do this, lift your hips up and back in the opposite direction. Your chest will shift slightly in the direction of your thighs.
From here you can start to experiment with pressing your heels down, but not at the expense of your hip elevation.
Once you can get your heels grounded, you can internally rotate your femurs by sliding your inner thighs to the back of the room while pressing through the outer edges of your feet. This adds an amazing stretch in all those little tiny muscles deep inside your butt cheeks.
Three-Legged Dog
From the Downward Dog position, simply shift one foot to your midline and lift the other leg:
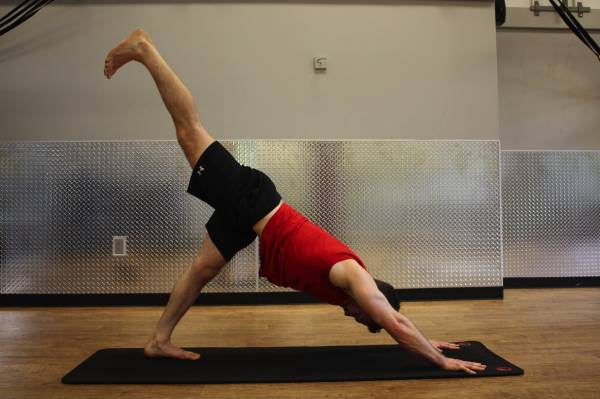
All the upper body cues stay the same. The challenge here is keeping your hips level.
Inhale and kick your elevated heel up and back. Exhale, and lower your elevated hip to be level with the hip of the grounded leg. Make this same adjustment with every single breath while in the pose. Many people will at first experience the sensation from this adjustment as pain, but with practice it will feel exhilarating and downright amazing!
I tried to exaggerate these adjustments in the video so they would be visible, but they are still very subtle; however, it makes all the difference in getting as much benefit as possible from this pose.
Quick Integration
Some general guidelines to using these poses:
- Before Workout: 5 seconds on each pose. 5 times through.
- During Workout: As needed, 10 seconds between sets
- After Workout: Try holding each one for at least 30 seconds, build up to 60 seconds.
But don’t forget: nothing beats a full 60 to 90 minute yoga session, so try one today!


