Sportive cycling events have become very popular here in United Kingdom over the last few years. If you look through the various online sources, you’ll find several options in most parts of the country every weekend. The names seem to get more intriguing as each new event tries to tempt you to take part.
What Is a Sportive?
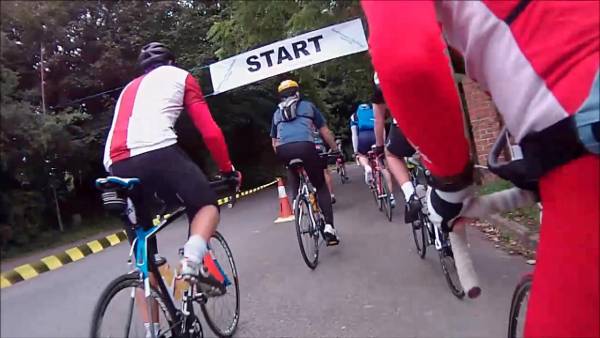
Generally, a sportive is an organized ride lasting anything from an hour to several hours. There are usually a few distance options to choose from and a few hills to challenge you. They are usually on a loop course with riders starting in waves to avoid congesting the roads. Depending upon the event there may be electronic timing with some recognition for completing the distance within different times. However, these events are not formally classified as races.
Routes are usually marked by small signs at key points and some of the organizers will arrange food and drink stations at various points, included in your sign-up fee. Mechanical support and pickup in case of difficulty may also be provided. I rode one event that was continuously patrolled by professional ‘neutral service vehicles’ and motorcycles. That felt really special!
Why Do a Sportive?
There are a few reasons to choose a sportive for your cycling event. In contrast to races, sportives are mainly social events and people are out to enjoy themselves. You may be undertaking a personal challenge for the first time, in regards to length or terrain. It may be a repeat of a previous event and you have set a challenge to complete the event a little quicker or take one of the different distance options. It might just be an opportunity to visit a part of the country (or a country) that is new to you, letting someone else do the work of sorting out the route and food.
Preparing to Do a Sportive
You enjoyment of the event will be enhanced all the more by being well prepared and avoiding any last minute drama. Pre-event checks are best done a few days prior to the event so there is time to undertake any remedial work. Finding you have a frayed brake cable the night before leaves no time to repair it.
Check for loose spokes, cuts and worn tires, good gear changes through the whole range, brake-rim alignment, smooth brake action, good brake pad condition, no loose pedals (yes, I have known someone who had a pedal become loose), no bottom bracket slack, no headset slack, secure fixing of any computer sensors, a comfortable and secure seat adjustment, no worn or fraying cables. Electrical items such as lights, GPS, or computers should have new or freshly charged batteries. Ensure any ancillary items like pumps and bags are securely fastened.
Equipment
You are going to be riding for a while, so it’s a good idea to take sufficient tools and essential items to enjoy completing the event with a minimum of fuss. Many events have some sort of recovery system in place, but having your own things will enable you to sort out any simple problems and be on your way again quickly.
 Spare inner tubes: These don’t take up much space and in the event of a puncture can be quickly changed. Keep the damaged one to repair when you return home. I always take one, and on a longer event I take two.
- Puncture repair kit: Should you be unfortunate to suffer multiple punctures these will help you get going again. Make sure you have the correct size patches and the adhesive tube actually has some adhesive (it tends to evaporate once the tube is opened). Remember to take some glass paper to clean the tire before applying the adhesive.
- Pump: A good pump will re-inflate a tire very quickly. There is plenty of room to attach these to the frame and the impact on weight is minimal. I prefer pumps to gas cylinders. Gas cylinders are a one-time affair and if you are unfortunate to have multiple punctures you may be stuck. My advice is to choose a pump that doesn’t need any fiddly small adapter for the type of tire in use – they are easily lost at the most inappropriate times.
- Tire levers: If you have not changed a tire before, my suggestion is that a simple practice of removing and replacing the inner tube will help if faced with a repair on the day.
- Chain quick link: It is possible, but rare, that you may experience a chain break. Small chain links take up hardly any space and if you are doing a particularly long ride in remote places with little support, one of these can get you home or at least to somewhere where you can find help. A small chain tool will also be required (perhaps on a multi-tool).
- Multi-tool: A small multifunction tool can often quickly cope with most adjustments and parts working loose.
 Map: Nearly all sportives have clearly marked routes or a leader who knows the way. Should you get separated from the main group or are unfortunate enough to require assistance, some idea of where you are will help you and anyone trying to find you. A sketch of the route folded up in a plastic bag might help out. Even better will be a copy of a map that may be provided by the event organizers.
- Mobile phone: For informing others in case of delays or needing assistance.
Clothing
Check the weather forecast for the whole route a few days ahead. If it is likely to be cold or wet, take the appropriate clothes. While you may feel warm when riding, your body will be losing heat and if you should stop, it’s possible to get cold (and uncomfortable) quite quickly. A compact fold up raincoat or gilet will help stop the wind and heat loss.
Comfortable feet and hands can make all the difference in cooler weather. This year I’ve been using some charcoal-based thermal shoe liners and they work wonders. Shoe covers and gloves, if appropriate, can also help the ride be more enjoyable.
Bring glasses. If you have been hit in the face at speed by a flying insect, this will come as no surprise. Glasses also help prevent dust and grit finding its way into your eyes. You don’t have to have the latest fashion items. Quite often some suitable safety glasses that look like spectacles can be found in a good hardware store. And considering the abuse they might get, it may be a better investment (although not so trendy).
Include in your checklist a change of clothes for the return journey. There is nothing worse than driving home cold and hungry in wet kit. If the weather is likely to be wet, bags to stow all the wet clothing and equipment can be helpful.
Drinks and Food
 Most people have about 2,000 calories of glucose stores in their body. More intense cycling will burn this up faster. Slower cycling will use up more body fat which is usually ample. For example an 80kg person with 18% body fat has nearly 130,000 calories available from this source.
The brain monitors this activity all the time and when it thinks glucose levels are running low will start to reduce the intensity at which activity can take place. Eventually this leads to ‘the bonk,’ when activity is reduced to a low level relying almost entirely on body fat reserves. In practice this means any event likely to last over two hours at a brisk pace will require additional food. Drinking water will be essential, and it’s a good idea to add electrolytes to replace minerals lost through perspiration.
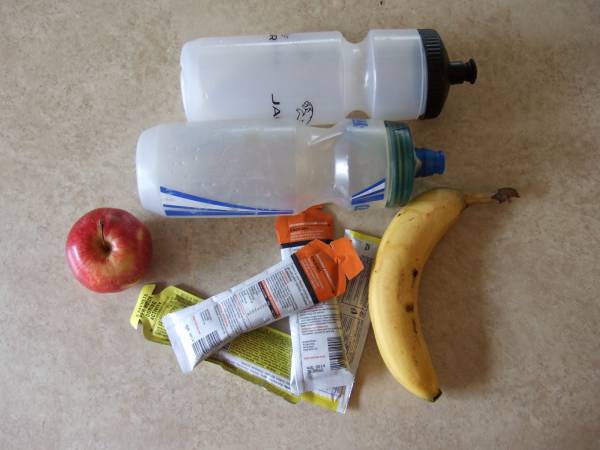
Although many events offer food and drink stations around the course, the fare can be rather variable and in some cases can run out. I always take sufficient food and drink of my own, so I know I like the taste and will be unlikely to suffer from any gastric distress. Sugar-based energy gels and drinks are good for providing a short burst of energy. They can provide about 240 calories per hour. This number of calories will last about half an hour. So, if the event is short to medium length, this could be a good re-fuelling strategy. Most commercial brands will also include a mix of electrolytes.
When riding long events, repeated topping up with sugars can be tedious and some slower digesting foods will provide a more steady release of energy. This can include fruit, or even sandwiches and oat bars. Something savory might also help take away the sugary aftertaste of gels. Ensure all foods are easy to handle. No accidents whilst riding and trying to unwrap food, please!
Training
These events tend to be long and steady. This implies that a significant amount of training should also be long and steady. This will help with basic endurance by assisting fat metabolism and cardiovascular health. This type of riding is well below threshold.
 The more challenging events often include a series of climbs. Try to find some climbs on your local circuit that will be similar in gradient to the ones you are likely to experience, or at least simulate these on an indoor trainer. If the hills are not long enough then include several climbs and descents in an interval type session. Choosing the right gear and speed such that fatigue is setting in at the top of the climb will be about the right intensity. Recover back down the hill and climb again. Again, these are steady hard work efforts, but not sprints.
It is inevitable you will find yourself riding with a group of other cyclists, which is part of the enjoyment. If you are not used to riding in a group I can recommend finding a local club or group and joining them for a few outings. You might be a regular rider with a club and are comfortable riding in your usual group. However, the other people in the event will, in general, be unknown to you. The level of skill is very likely to be different to yours too. Make sure that you leave enough space for people to make mistakes and make your own intentions very clear. Others might not be used to calling out warnings for damaged road surfaces or tight corners, or they may ride in an erratic way.
After the Event
First, congratulate yourself. You have achieved something and hopefully had a great time in the process. Next, do some stretching. After a few hours in a flexed position it’s a good idea to straighten out with a few gentle and slow stretches before jumping back in the car (or back on the bike) for the journey home.
I like to start at the top and work my way down easing all the ranges of movement back into the joints. Elongate the body by stretching the arms overhead. Follow this with some arm circles. Then upper body twists side to side. Working my way down to the lumbar area, I slide hands down each leg to get sideways flexion. If I can find a step or bench, I then put my foot on it and push hips forward to extend the hips (which will have been flexed for some time). Then down to each foot for some full-range foot circles in each direction. All these movements are quite slow and controlled.
Recap
- Remember why you are doing the event.
- Train specifically for the type of riding the route entails.
- Check everything over a week before and write a list of what to take and bring back.
- Pack your emergency/breakdown pack
- Check the event start times, procedure, and travel information
- Ensure that you take enough food and drink
- Bring a change of clothes and bags for the return journey
- Dress appropriately
- Enjoy yourself!


