The process of learning how to snatch is more like baking a cake than like making gumbo. You have to follow precise steps, you can’t skip them, you can’t do them in reverse order, and you need to get the amounts of each just right.
The process of learning how to snatch is more like baking a cake than like making gumbo. You have to follow precise steps, you can’t skip them, you can’t do them in reverse order, and you need to get the amounts of each just right.
Dinner foods are a bit more forgiving. They have some part of them that require you to do things in a particular order, but not anywhere near as much as baking does. Whether you chop up the veggies first, or brown the meat first, it just doesn’t make much of a difference. You can double the amount of chicken and the soup won’t blow up on you.
If you double one ingredient when you’re baking, you have to double them all. If you switch the order of operations, then you really could have things blow up on you!
Snatching is no different. Get the ingredients right, get the amounts right, do it all in the right order, and then stick it in the oven.
Ingredients List
The ingredients of a good snatch are not a bar and a platform or a nice pair of weightlifting shoes. Those things are more like your apron or your pots and pans. Instead, we’re looking for the actual motions and position you hit with your body and the bar.
The key ingredients of a great snatch are:
- Proper Start Position
- Knee Position
- Hip Position (this is the spot right BEFORE the explosion upwards)
- Lock Out
That’s it. When you are first starting out, it’s all you can do to make sure you at least have the basic ingredients in place: You drill these 4 spots, over and over and over. Only once you’ve gotten that down can you move on.
To make things more clear, here are the basics of each position. (In all of them, the lats should be tight!):
- Start – Heels down, shoulders behind the bar, bar over the base of the toes (start of shoe-laces). I like a start that has your lower body in a very similar position to what you’d be in at the bottom of an overhead squat or front squat.
- Knee – Heels down, shins perpendicular to the floor, shoulders forward over the bar.
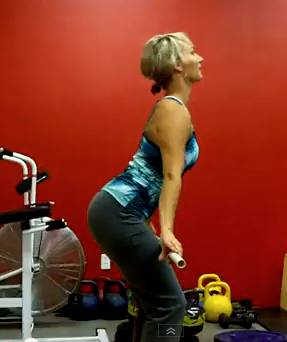
- Hip – Heels down, shoulders back behind the bar, lower body squatted down just a touch (like a quarter squat – Olympic squat! Hips over the heels, knees forward. Do not “sit back.”)
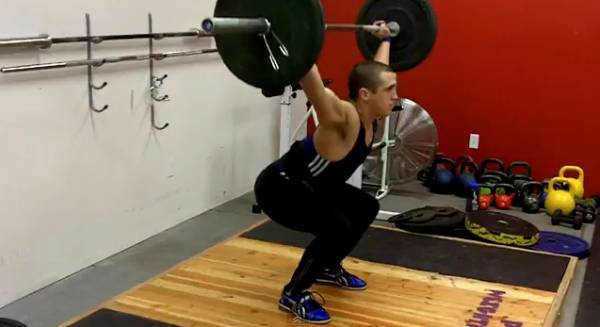
- Lock Out – This is the end. The catch. I don’t want you starting out by diving into a full squat. Simply catch the bar in the same quarter squat you started in. Lock the arms out tight – triceps press. Head forward a bit so that you can comfortably shrug the shoulders upward. It isn’t too complicated. If you think, “Stay tight!” You’ll likely do it about 90% right.
Mixing It All Together
Now for the hard part. It isn’t particularly tough to hold the above positions. It IS tough to properly move from one to the other. This is where the real learning begins, and it is what we’d have you hammering at my gym if you were in there with me.
Moving from the Start to the Knee
Go slow. If there is any piece of advice that works here, it is that. The goal is to get your knees to move back. They’ve started forward over the toes and now they have to transition all the way backwards so that your shins can be perpendicular with the ground.
Unfortunately I’ve found telling someone to get their knees back doesn’t work as well as I’d like it to.
Instead I say, “Get your butt up!” (or hips, if I’m trying to be dainty.) Moving the hips from what is (for your lower body) a squat position up to the “deadlift” position automatically moves the knees back without any need to think about it.
Do this with a conscious effort to PUSH the heels into the floor. Thinking of driving your heels down, rather than pulling the bar up (throughout the entirety of the “pull,” not just here) will save you loads of heartache and frustration in the long run.
Moving from the Knee to the Hip
Nothing in all of weightlifting is harder for most people than the transition from the knee position to the hip position. The misses than can be attributed to this would add up to more than all the other reasons for a miss combined. Getting it right is that important.

Thankfully, you can solve most of your problems by simply internalizing the phrase, “Slow…THEN Go!”
The movement from one position to the next during the pull is an acceleration. You never start out at full speed. The goal is to slowly increase speed over the course of the journey. When you are learning, always err on the side of going way too slow from the knee. Be patient. Be so patient that it looks like you’re just hanging out and having a tea party. It is only the last part of the movement that requires maximal speed and force. All the rest is a patient, patient, patient lead up.
Did I say patient?
Moving from the Hip to the Catch: Finish!
Weightlifters are fast. Crazy fast. And while I have told you to go slow and be patient now for a while, this is the one place where I want you to stop being civilized and go primal.

So long as you have been good and are actually starting this part of the movement from the correct Hip Position, then you can focus solely on exploding the hips and legs as powerfully as humanly possible. Pretend you’re the She-Hulk and go for it! Sheer aggression and animalistic psycho-tude go a long way toward making up for any flaws we’ve seen so far.
When the bar gets overhead, lock it out! Don’t be shy, and don’t let it fall on your head. The biggest irony in weightlifting (in a lot of things) is that your fear something will go wrong will cause you to be under-aggressive, which in turn will cause something to go wrong!
Be determined, finish hard and strong. Explode and lock it out.
Time to Bake!
The final step is the most obvious: Time. You can read all the articles you want, watch all the videos you want, but without a good chunk of time dedicated to drilling the above you won’t get anywhere. Them’s the facts.
Use the video I’ve put at the end of this post of a drill I call The Fab 5 Snatch Drill as your template for the baking process for a while. Get the positions right, get the transitions right, and practice, practice, practice.
That’s how you bake the perfect snatch.
Follow this link for the Fab-5 Snatch Drill Video!


