Back exercises come in two basic patterns: vertical, or overhead, pulls, like the classic pull-up, and horizontal rows. Many lifters are familiar with standard pull-ups, chin-ups, and pulldowns, but the wide variety of rows requires more specific attention.
The seated cable row offers distinct advantages over barbells, dumbbells, or other machines. The combination of body position, leverage, and unique resistance from cable pulleys make the exercise an excellent muscle-builder when using proper form to target the multiple back muscles.
Here’s a detailed guide to performing the highly effective seated cable row and programming tips to build a muscular, powerful back.
- How to Do the Seated Cable Row
- Seated Cable Row Mistakes to Avoid
- Benefits of the Seated Cable Row
- Muscles Worked by the Seated Cable Row
- Who Should Do the Seated Cable Row
- How to Program the Seated Cable Row
- Seated Cable Row Variations
- Seated Cable Row Alternatives
- Frequently Asked Questions
How to Do the Seated Cable Row
The seated cable row may, at first, appear daunting. Typically the machine consists of a long bench with a handle attachment on one side, an imposing weight stack, and not much in the way of reliable guidance.
More so than many other exercises in the gym, the seated cable row can’t often be learned by standing non-creepily in the corner of the gym watching another lifter do their set. The variety of handle options, versatile pulling angles, and prevalence of plain old bad form make it hard to know who to replicate to get the results you’re after.
Here’s a straightforward plan to learn basic and effective technique for the seated cable row.
Step 1 — Take a Seat
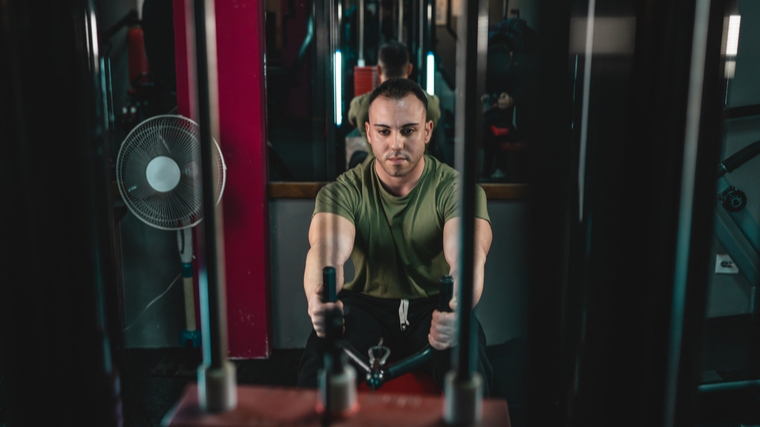
Find a “V”-shaped attachment with vertical grips which allow your hands to face each other. Clip the bar to the cable hook and sit on the bench with your legs bent and both feet on the platform.
Grab the handles, tighten your core, straighten your back, and extend your arms until they’re nearly locked out. Press against the foot platform to very slightly raise your glutes off the bench. Straighten your legs, feeling muscular tension through your entire body. When the weight lifts off the stack and your body moves backwards slightly, lower your glutes to the bench and ensure a tense, vertical upper body.
Your legs should be stiff with a slight bend. Your straight arms should be supporting the weight through the cable attachment. If your arms are nearly straight but the weight is not yet lifted from the stack, you’re too close. Repeat the process to reposition your body slightly farther back.
Form Tip: Some lifters may take a quicker setup by simply grabbing the handle, placing one foot on the platform while standing, and then “plopping” their body down onto the bench to raise the weight.
This no-frills process increases stress on the hips, low back, and shoulder joints due to the impact of dropping from a standing position while supporting additional weight (via the cable attachment). It also doesn’t allow the torso to remain in a well-supported position, which exposes the low back to more potential stress.
Step 2 — Row Your Elbows In

Press your feet into the platform without straightening your legs. Pull the bar into your mid-ab area until it touches slightly above your belly button. Throughout the movement, your upper arms should aim towards the ground, not towards the walls to either side.
Your shoulder blades should come together as your upper back contracts to help pull the weight. To reinforce your upper back engagement, imagine puffing your chest out. When you’ve reached peak contraction, your elbows should be slightly behind your body and your forearms should be near your ribs.
During the rep, focus on gripping the handle tightly while driving your elbows past your body. Keep your torso upright. Your upper body shouldn’t lean back to “reel in” the weight like a swordfish on a charter boat. Pulling only with your arms while keeping your upper body vertical ensures the large back muscles, not the smaller shoulders muscles or lumbar spine, are receiving the training stimulus.
Form Tip: The focus for this foundational movement is to keep the bar at roughly belly-button height to put the majority of the back under optimal muscular stress. A number of seated cable row variations manipulate the pulling angle to focus stress onto different parts of the back — pulling to the hips, above chest-level, etc. Those will be addressed below.
Step 3 — Extend Your Arms
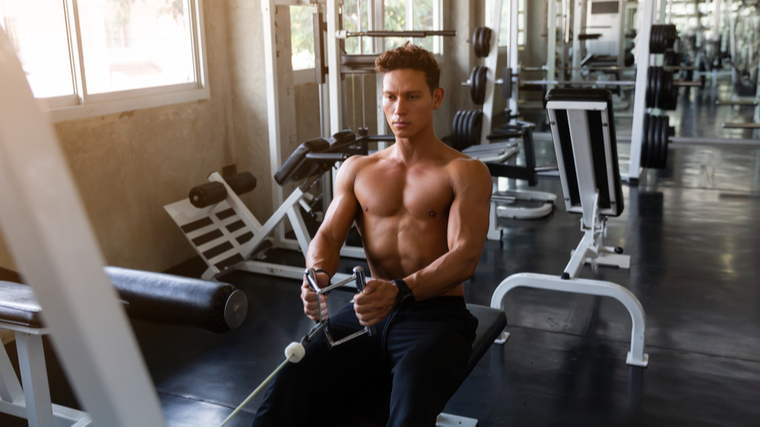
After completing the range of motion (with the bar touching your abs), reverse the movement by pushing your elbows and lower arms forward. Continue gripping the handles tightly to ensure control of the weight. Your shoulder blades should naturally extend as you reach the end range of motion. Do not deliberately “reach” your shoulders forward, which would expose the shoulder joint to excessive strain.
Maintaining an upright torso is even more critical during the lowering phase due to the pulling force of the weight stack and potential instability of the lower back. Resist the urge to lean forward. Keep steady pressure through your feet to engage the hamstrings and glutes for added lower back support. Once your arms are nearly locked out and your back muscles are stretched, pause briefly before pulling the next rep.
Form Tip: Your legs and upper body should make a general “L” shape during the entire rep. If your upper body moves and the angle changes to more of a “V”, your lower back is being recruited to move and lower the weight, which increases strain.
Changing your upper body angle also changes the cable angle relative to your muscles because your arms are closer to an overhead position. This alters muscle recruitment and changes the exercise’s effectiveness.
Seated Cable Row Mistakes to Avoid
Because your upper body is unsupported during each rep of the seated cable row, you may run into common mistakes that can reduce muscle activation and increase the risk of injury.
Short Range of Motion
For maximum muscle recruitment and development, perform the seated cable row by pulling the bar until it touches your abs and extending until your arms are nearly locked out (because the target muscle is the back, which can be fully stretched before your arms are extended).
Lifters often avoid the end-range of motion, on either the stretch or the contraction, in an effort to “keep tension on the muscle.” However, when using proper form, the muscle is always under tension.
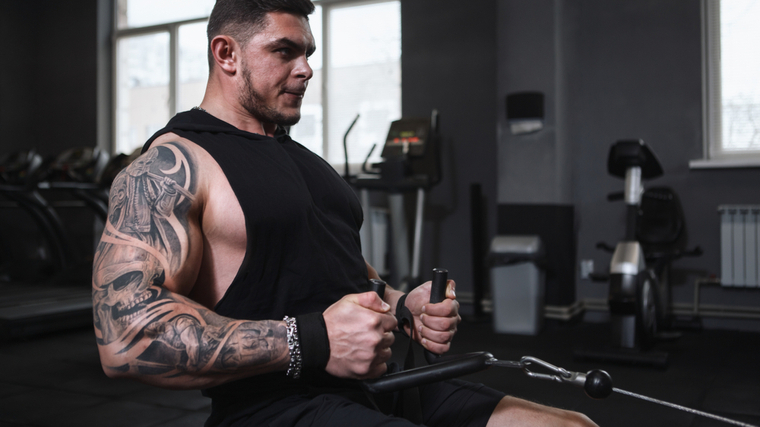
Using a full range of motion not only allows optimal development, but also allows the shoulder and elbow joints to function using their full mobility. Lifting with a full range of motion can help to improve overall joint mobility and flexibility. (1)
Avoid it: Individual limb lengths may sometimes require adjusting the seated cable row range of motion. For example, a lifter with very long arms may not be able to pull far enough to touch the bar to their abs while a lifter with short arms may have trouble getting into position while raising the weight off the stack.
Unless you’re exceptionally tall or exceptionally short (which will require adapting a number of exercises to your frame), maintain the reference point of using full stretch and full contraction on each rep.
Forward Leaning Torso
Wanting to move the torso forwards and backwards during a rep may seem intuitive and may even feel like a natural movement, but it’s counterproductive and exposes the lower back to added stress without adding significant muscular benefit.
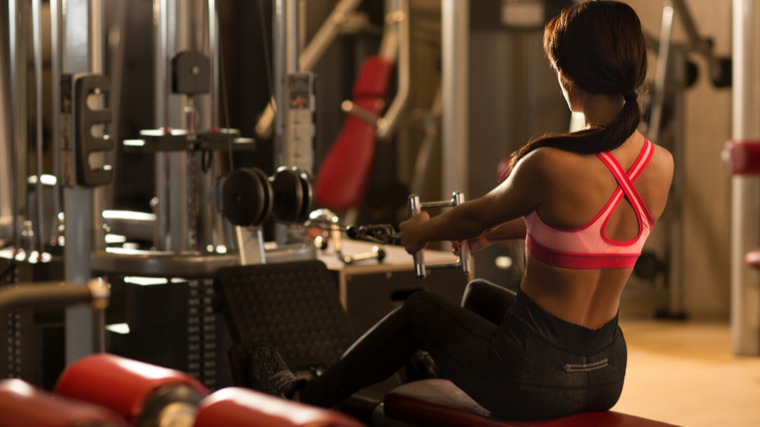
Leaning forward while lowering the weight may appear to increase the exercises range of motion, and a longer range of motion can sometimes lead to increased muscle recruitment. However, with the seated cable row, that added range of motion is not coming from the target muscle (the large muscles of the back).
The increased range of motion is achieved because additional muscles, particularly the shoulders and upper back, have been recruited. The target muscle isn’t receiving any added benefit. You may have seen photos or videos of massive bodybuilders nearly touching their toes with the bar in an extreme stretch. Don’t do that. It’s unnecessary, high risk, and low reward.
Avoid it: Pretend there’s a padded backstop jutting up from the seated row bench. Imagine keeping your hips and lower back against the seat when lifting and lowering the weight. Your head, shoulders, and chest should remain roughly above your hips throughout each rep.
Lifting Too Heavy
The majority of seated cable row stations are designed with the weight stack facing the lifter. This can create a mind game for anyone who over-focuses on moving the most weight possible rather than moving an appropriate weight to achieve the right training stimulus.
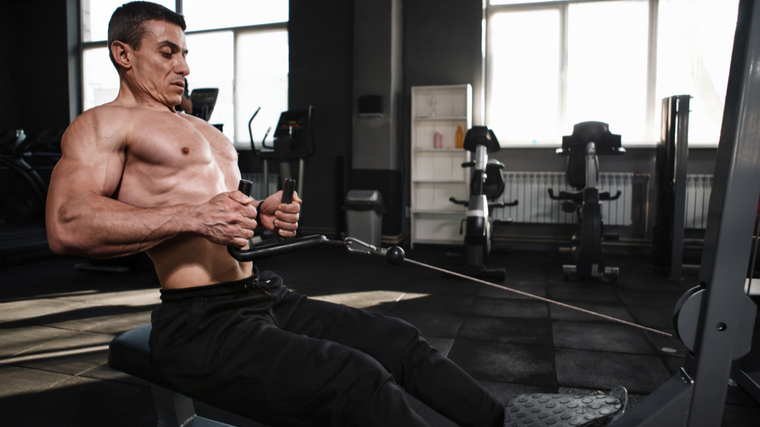
Even though the entire weight stack is staring back at you during the exercise, never feel as though you’re “only” lifting a certain amount of weight. If you’re achieving muscular fatigue in the programmed rep range, you’re on the right track.
Trying to use too much weight is often an underlying cause in the two previous mistakes. When the weight is too heavy, you’ll be unable to achieve a full peak contraction, so your range of motion is shortened. An excessive load can also pull you forward out of position, and require swinging the upper body to use momentum, not muscle, to lift the weight.
Avoid it: As with most exercises, avoid letting your ego dictate your actions. The seated cable row should never be an exercise to attempt extreme weights because the body isn’t aligned for a major display of strength without risking injury. Follow the sets and reps in your routine and maintain consistent technique to target the intended body parts.
Benefits of the Seated Cable Row
The seated cable row can play a significant role in building a muscular back with minimal joint strain. It’s often one of the first exercises lifters in a home gym attempt to replicate, since its unique cable setup requires a dedicated workstation. Here’s why this exercise is a high priority movement.

Back Size
Seated cable rows are a staple in nearly every back-building workout, and for very good reason. The constant resistance provided by the cable makes it a highly effective way to place your back muscles under extended time under tension, which is the catalyst for more muscle growth stimulus. (2)
Reduce Lower Back Stress
The seated cable row delivers constant tension from the cable pulley along with a stable, lower-back saving body position (assuming your form is tight). This combination makes it an ideal exercise for lifters unable to perform other row variations — like the barbell row — which may increase strain on the lower back due to a less-supported body position.
The cable’s constant tension also allows lifters to achieve a significant muscle-building stimulus while using relatively lighter weights. This reduces the cumulative stress on the joints without compromising hypertrophy (muscle size).
Muscles Worked by the Seated Cable Row
The seated cable row, and all rowing variations, will target multiple muscles in the back.

Lats
The latissimus dorsi, or lats, are what most people think of when they think of “a big, muscular back.” The muscle runs from under the shoulders down to the waist, with the developed muscle being visible under the arms near the ribs. The lats are worked during the seated cable row when your elbows pull the weight towards your body, causing a powerful contraction on both sides of the body.
Upper Back
The upper back is a collective term for the part of the back running from shoulder to shoulder between the neck and shoulder blades. It’s composed of several separate muscles including the rear deltoids, teres, rhomboids, and trapezius. These muscles are recruited during the seated cable row as the scapulae (shoulder blades) pull inwards while raising the weight.
Biceps
The biceps aren’t, and shouldn’t be, the primary muscle moving the weight in a seated cable row, but they are significantly recruited during the exercise. When your arm is bent to pull the handle towards your body, your biceps assist in the movement. The smaller forearm and gripping muscles also support the movement, as they do during any type of “pulling” exercise.
Who Should Do the Seated Cable Row
The seated cable row builds muscle size with reduced wear and tear on the lower back and shoulders. This makes the exercise valuable for a number of lifters.
Lifting for Muscle
When a lifters’ goal is to build a muscular back, the seated cable row can be invaluable. The cable provides constant tension which puts the muscle under greater overall stress compared to free weight (barbell or dumbbell) rows, which can decrease stress due to gravity affecting leverage in different positions.
Lifters with Back Pain
Because the seated cable row allows a lifter to train effectively without needing significant weight, it’s an effective option for lifters dealing with lower back pain. The cable also allows more adaptable joint positioning compared to a rowing machine, making it a better option for lifters with shoulder or elbow pain.
How to Program the Seated Cable Row
The seated cable row can be programmed with several effective methods to suit a lifter’s goal and individual needs. Due to body position and necessary technique, the exercise is not well-suited to extremely heavy, low-rep programming.
Moderate Weight, Moderate Repetition
Using a classic bodybuilding-style approach, reaching muscular failure in the 8 to 12 rep range for three or four sets, is one of the most common and most effective ways to program this exercise.
Light-to-Moderate Weight, High Repetition
The constant tension of the cables allows lifters to get a significant muscle-building effect without heavy, low-rep loading. Using two to three sets of 12 to 20 reps can be an excellent workout to “burn out” the back, particularly as the last exercise of a back workout when the muscles are fatigued from previous work.
Seated Cable Row Variations
The seated cable row is extremely versatile and a number of simple, effective variations can be implemented by simply attaching a different handle and/or pulling the bar to a different point of your body.
Long Bar Attachment
Using a straight pulldown bar, or long bar, allows either a palms-up (supinated) grip or a palms-down (pronated) grip. A supinated grip will activate the biceps to a greater degree while a pronated grip may be more comfortable on your shoulders, especially if you use a wider grip (outside shoulder-width).
A supinated grip also allows the user to pull the bar more efficiently to the lower abs or waist, which reduces upper back recruitment and can increase lat activation. A pronated grip allows you to pull the bar much higher, to chest or neck-level, which decreases lat recruitment and increases muscular stress on the entire upper back.
Rope Attachment
Attaching a rope handle, more commonly used for triceps exercises, allow the wrists to rotate during the movement. This freedom reduces joint stress. The flexible nature of the rope, compared to a solid metal handle, also allows a slightly longer range of motion at peak contraction.
Similar to the long bar, rope rows can be performed low to the hips for increased lat stress. The rope attachment is often used for pulls to neck or eye-level, appropriately called “face pulls”. This exercise prioritizes the upper back and shoulder stabilizer muscles
Single-Arm Cable Row
Attaching a single handle and rowing with one arm at a time offers several benefits. Like all unilateral upper body exercises, the overall core activation is increased, specifically the obliques and rotational stabilizers.
A single-handle, similar to the rope attachment, also allows your wrist to freely rotate during the exercise. This can decrease stress on the joints by encouraging the elbow to more with less restriction.
The single-arm cable row can also be performed while standing, instead of braced on the bench seat. This specific variation can have more athletic carryover, due to increased total-body recruitment. It has also been shown to build significant core strength. (3)
Seated Cable Row Alternatives
The seated cable row is highly effective and offers unique benefits, but other row variations can also provide specific training effects separate from the seated cable.
Barbell Row
The barbell row is considered one of the “big basics” — fundamental exercises like the squat, deadlift, bench press, and shoulder press which help to establish a base of head-to-toe strength.
The barbell row allows lifters to potentially move significant weight, which can have great carryover to building muscle size and raw power. However, due to the body’s position, the lower back is put under much more direct stress
Dumbbell Row
The dumbbell row is most commonly performed supporting the body on a flat bench while moving one dumbbell. However, using two dumbbells from a standing position can be another effective variation.
The dumbbell row is an effective balance of lower back support while also providing a full stretch and contraction for a strong muscle-building stimulus.
Chest-Supported Row
The chest-supported row is one of the most effective back exercises to drastically reduce lower back involvement, because the torso is fully supported on a bench and movement is unavoidably strict with no swinging.
This variation can be done on a specific chest-supported row bench or using a pair of dumbbells while lying chest-down on a bench set to a high angle.
FAQs
Why does my grip fail before my back muscles?
It’s not uncommon for grip to fatigue during many back exercises, because the hands and forearms are much smaller than the larger, stronger muscles of the back. Fortunately, grip strength improves relatively quickly from consistent lifting. Adding one or two grip-focused exercises (such as a farmer’s walk or pull-up hold) to your training week should yield noticeable results in a short time.
However, if grip strength continues to interrupt your back workout, use a pair of lifting straps to secure your grip to the handle. Be sure to use straps only when necessary, on the most challenging sets. Over-relying on lifting straps can end up being counterproductive by reducing grip development.
Why does my lower back hurt after a set?
Even though one benefit of the seated cable row is reduced lower back strain, some lifters may not feel totally comfortable with the exercise depending on their underlying condition.
Placing the feet in a wider stance on the platform, driving through the heels, and more actively engaging the glutes and hamstrings can all help to provide maximal support to the lower back. Ensuring a strict upright torso and tense abdomen during every rep will also reduce strain.
Should I do seated cable rows if I have a different row in my workout?
The majority of back-focused workouts will include at least one “overhead pull”, like a pulldown or pull-up, and at least one type of rowing exercise. The seated cable row provides specific benefits compared to rowing with barbells, dumbbells, or machines.
To ensure optimal progress, avoid performing exercises which are too similar to one another. However, depending on your overall workout plan, a session which includes seated cable rows for moderate reps and, for example, barbell rows for lower reps, could be an excellent approach to build size and strength. Performing seated cable rows with a long bar, followed by seated cable rows with a single-handle, would be redundant and much less effective.
Sit, Row, and Grow
Targeting the larger back muscles without aggravating the lumbar spine requires an attention to detail, both in exercise selection and performance. The seated cable row checks all boxes and allows you to train intensely without excessive strain. Practice the form tips and add the exercise to your back routine.
References
- Afonso J, Ramirez-Campillo R, Moscão J, et al. Strength Training versus Stretching for Improving Range of Motion: A Systematic Review and Meta-Analysis. Healthcare (Basel). 2021;9(4):427. Published 2021 Apr 7. doi:10.3390/healthcare9040427
- Burd NA, Andrews RJ, West DW, et al. Muscle time under tension during resistance exercise stimulates differential muscle protein sub-fractional synthetic responses in men. J Physiol. 2012;590(2):351-362. doi:10.1113/jphysiol.2011.221200
- Fenwick CM, Brown SH, McGill SM. Comparison of different rowing exercises: trunk muscle activation and lumbar spine motion, load, and stiffness. J Strength Cond Res. 2009 Mar;23(2):350-8. doi: 10.1519/JSC.0b013e3181942019. PMID: 19197209.
Featured Image: Amorn Suriyan / Shutterstock


