Tight hips are one of the major obstacles an athlete can have in maximizing power and performance. The couch stretch is a powerful tool every athlete should have in his or her toolbox. Understanding the how and why behind this movement will increase its effectiveness and make you a better athlete.
Don’t let tight hips get between you and your athletic potential.
Optimal Movement
More and more athletes inside and outside of the CrossFit world are using a variety of mobility techniques to get into better positions so they can be better athletes and all around better, higher functioning human beings. This is in part due to the work of Dr. Kelly Starrett, his book Becoming a Supple Leopard, and his website MobilityWOD.
One of the most notorious mobilizations Starrett ever invented is the couch stretch. For those plagued with the effects of sedentary work and lifestyle, this stretch is a beast. At CrossFit Virginia Beach, we see more crying, sweating, and people tapping out on this one than any other mobilization we do.
It’s also one of the most poorly executed techniques I see in my sports orthopedic clinic and in the gym, as well.
“This is only one, albeit potent, way to begin exploring missing ranges of motion that inhibit performance.”
Athletes come to me frustrated because they perform the couch stretch hoping to relieve some of the anterior chain tension associated with long-term sedentary positions. But often their results are limited due in part to the application of the technique.
Of course, there are many potential factors at play, but many times athletes are not getting as much from the couch stretch because of how they do it, not just because of how frequently they do it. The devil is in the details, after all.
So, by using the following sequence, we’ll learn to apply principals of good movement practice to the couch stretch so we, as athletes, can get the most bang for our buck when practicing this potent mobilization.
1. Midline First/Table Top
Bracing the spine first allows us to bias the lower body and emphasize the hip, knee, and ankle complex without creating an upstream compensation pattern that puts slack into the system. Because we’re are trying to create a better femuro-pelvic (read “hip”) relationship, we want to wed the pelvis and spine together before we load the system, just the same as any other movement we do. Weird, right?
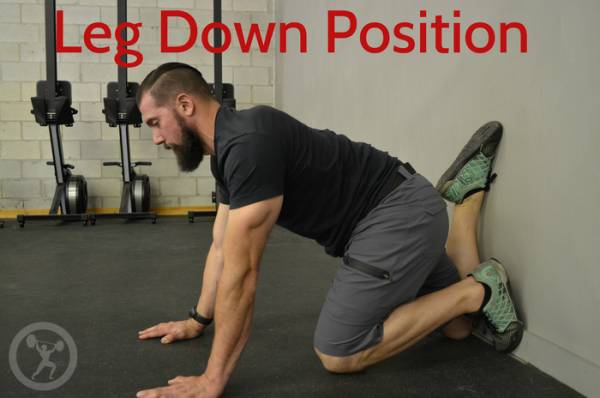
2. Knee on the Wall, Find Your Anchor
Getting the knee joint as tucked into the corner of the wall or couch as it can be is important. It gives us a secure anchor to generate and control stable tension through the system.
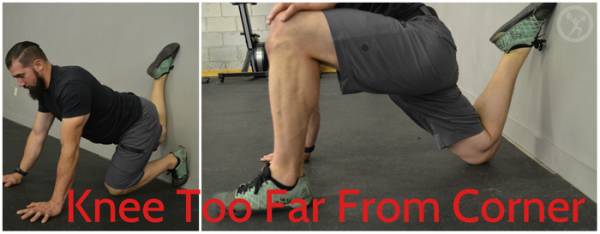
Allowing the knee to move away from the wall can create a bleed of tension by moving the hip into flexion and potentially allowing a fault at the hip and/or spine. Also, avoiding this fault prevents putting direct pressure on the patella where we can cause unnecessary discomfort.
3. Support Leg Comes Up, Check Your Spine Again
Here we bring the other leg into a position that looks akin to a lunge. This leg should be positioned generally hip width apart with the heel under or in front of the knee. Some of us may have such overwhelming anterior chain discomfort at this point that we needn’t bring our leg up at all. It’s more important that the side we’re treating maintains position than it is to replicate some picture we have in our head: “Kelly looks like this on MobilityWOD, so I’m going for it!
So, bring your leg up only if you can maintain the other positions previously discussed and you aren’t displaying any autonomic nervous system responses. These include but are not limited to:
- Inability to control breathing
- Shaking
- Sweating like a whore in church
- Inability to keep both eyes open simultaneously
- Involuntary bowel evacuation
- Projectile vomiting
Seriously, though, if it seems like too much, it is. Put your ego in check and back off a notch. Slow and steady wins in the mobility game.
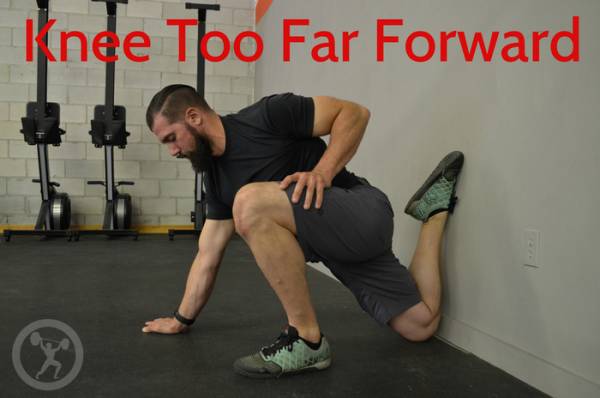
4. Add Tension, Move Towards Hip Extension
The operative word here is hip. So many times athletes miss this important distinction. Hip means femur and pelvis. This is where we most often fault to a locally overextended spinal position. What does that mean? Local extension in this case refers to segments of the lumbar spine overarching and creating compression and shear between vertebrae.
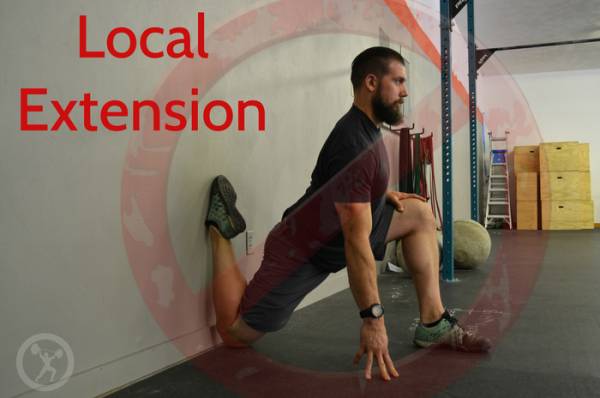
Additionally, in order to bias hip extension optimally, the hip needs to be moving toward internal rotation. It may be prudent in this position to use your stretched side arm to help support you.
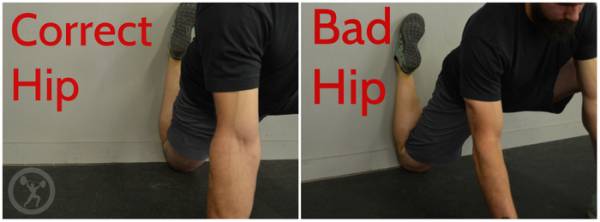
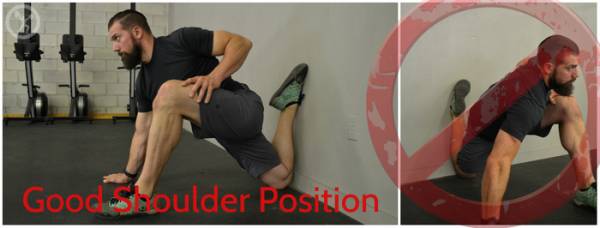
Note: This is still an opportunity to practice good position. You’ll be able to support yourself much longer with the shoulder in an externally rotated, locked-elbow position instead of dumped out, forward-shoulder position. No need to sacrifice your shoulders at the altar of your hip.
5. Variations
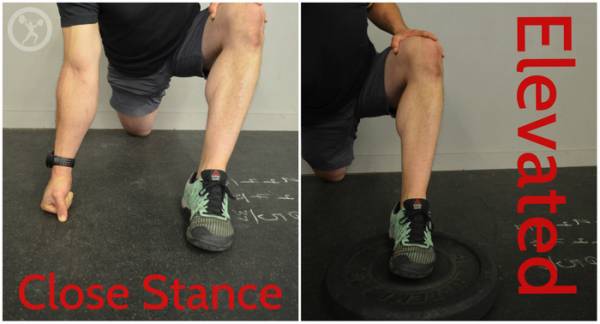
Once you’ve developed some mastery of the basic couch stretch, it can get really spicy. Adding a plate under the front foot and closing your stance are fun ways to start free-styling and hitting new and unique corners. A word of caution, though – get the basics right first. These variations will do nothing but bring frustration if you haven’t cultivated the basic positions for this technique.
Body Systems and Performance
While powerful and low tech, the couch stretch is not designed to be a catchall. The human body is a system of systems. This is only one, albeit potent, way to begin exploring missing ranges of motion that inhibit performance. Be sure to explore tight corners in a variety of ways. Lastly, if you’re just stuck or something seems beyond your understanding, then go to a qualified health professional and get help.
Check out these related articles:
- 5 Habits That Are Hurting Stomach Sleeping
- Connecting the Shoulders, Hips, and Core
- Dear Willow: My F$%kin’ Hips!
- What’s New On Breaking Muscle Today
Photo 1 courtesy of CrossFit Empirical.


