The dip is a classic gym movement that has been utilized to build both strength and those vanity shoulders, pecs, and triceps. The growth of CrossFit has re-popularized the dip, the ring dip, and the muscle up. But the dip is not as simple as it looks. It requires great strength, stability, and range of motion. Most people do not have the combination of all three, and that increases their risk of injury when performing this movement. So here are a few rules to follow and guidelines to performing your dip.
Self-Evaluation and Safety
Before performing any movement you first need to do a self-evaluation to see if the dip is even appropriate for your body.
- Are your shoulders and elbows pain free?
- Are you able to do push ups?
- Do you have any existing injuries or preexisting ones dips can aggravate?
- Are you an appropriate weight or body composition to perform dips?
Start by testing your movement in a safe environment. Either set your adjustable dip bar so your toes can barely touch the ground at the top of the movement, or put a box under your dips bars to achieve the same result. This way if you feel like you need to bail or you get uncomfortable all you have to do is stand on your feet.
How to Build and Progress Your Dip
The following building blocks will work whether you are training to get your first dip on static or parallel bars or whether you are moving on to your ring dips. But safety is always first. So if you have a strong full-range-of-motion dip, then you can move on to the rings. If you don’t have this ability, then stick with static bars.
Step #1: Building Range of Motion
First, you need make sure you have adequate range of motion. Try a dip with full assistance. So while you are standing, you will use your legs to dip your body down to a full range of motion. This means 100% of your weight is in your legs and your arms are passively bending. Your elbows should be parallel to your shoulders at the bottom.
If you can comfortably achieve a full range of motion, then you’re good to go to train your dips. If not, then use this motion as a stretch, and work on stretching your chest, triceps, shoulders, and lats. Add in foam rolling or other trigger point work as needed to release those muscles.
 Step #2: Building Stability
Next you need to achieve top end stability. This means being able to support yourself on top of the bar comfortably without shaking or losing shoulder positioning. If you are uncomfortable here, then use assistance and perform static holds. As you get more comfortable and stronger, you can use less and less assistance.
Step #3: Building Strength
Building strength is a key component. Push ups are a great way to start strengthening, but you can also add overhead presses, pull ups, and assisted dips. Don’t bother with machine-assisted dips. These type of dips are awkward, result in bad movement, and have little translation to the real movement. Instead, use bands. When using a band you must always control the movement and be strict. Resisting the urge to bounce will keep you safe and actually allow you to build strength.
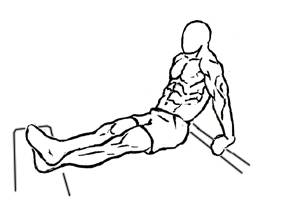
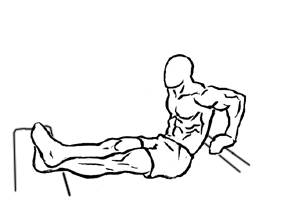
Performing bench dips is another great way to start the strength and movement coordination development. You can use a box or a bench, keeping your feet on the ground, and modulating difficulty by bending or straightening your knees. After bench dips become easier, then you can elevate your feet or even add weight in your lap. But take your time and don’t rush to more advanced movements if you are not 100% sure of your ability and strength.


Progress Comes From Patience
During this process keep in mind that dips are a difficult movement. You need to build slowly to keep your shoulders and elbows safe. If you start to get achy joints, your tendons get cranky, or your muscles are just plain sore, then give them time to recover.
One reason dips are difficult is because people no longer climb, support themselves on their hands, or rotate their shoulder in this range of motion in everyday life. By practicing dips you are reawakening range of motion, coordination, and strength you haven’t used in a long time. So be patient!
Also remember that if you are learning to perform a dip, or ring dip, don’t do the in a WOD. This practice belongs in skill development until you can do eight to ten repetitions comfortably. So when it comes time for the WOD, substitute movement instead of the dips. This will keep you able to practice and build your dips, while keeping your body moving well for a long time to come.
Photos courtesy of Shutterstock.
Bench dip graphic by Everkinetic [CC-BY-SA-3.0], via Wikimedia Commons.


