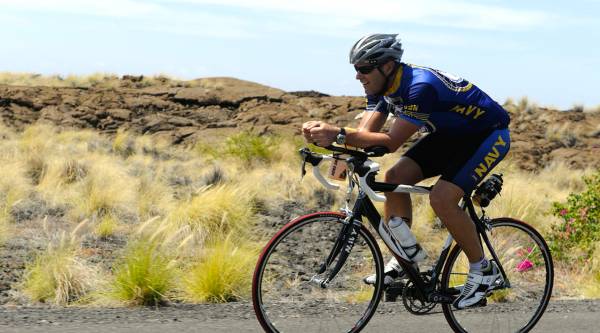
The transition. It’s one of the most unique aspects of triathlon that you just don’t get with other sports. Although for some it’s simply a chance to take a short break before moving on to the next leg, for others it is more important and doing it well could decide the outcome of a race. Regardless which camp you fall into, having a transition built upon solid fundamentals will help reduce race-day stress and set you up for overall success out on the course. We’ll take a quick stroll through a “lightning fast” transition so you can get a feel for what blazing fast transitions (90 seconds or less) look like.
Preparing for your race transitions is key. [Photo courtesy of Pixabay]
You Have to Do Your Homework
Because every race is different, doing your homework in the days before a race is crucial. Some triathlons are point-to-point, meaning you have to prepare for two separate transition areas. Iron-distance races typically have transition bags, special needs bags and changing tents. Often these long-course races don’t even allow you to setup gear by your bike. The point is: you need to do your research and know what you are getting into, as it will affect how you setup race morning. Here, we’ll keep it simple and look at the most common scenario of just one transition area. Let’s talk about setting up.
Setting Up and Going Through The First Transition
It’s zero dark thirty, you’re unsure whether or not you are happy to be awake yet, and it’s time to set up your area. Simple is the name of the game for quality transitions. This thinking may be a bit Spartan for some, but the less you have to go wrong and fret about the better. As you set up for race day and are working towards simplicity, keep these two ideas in mind:
- Do as much as you possibly can while moving.
- Bend over as little as possible.
These two concepts provide a really clear lens through which you view your setup. Let’s jump in and apply the concepts to your first transition. Only one to two things absolutely must happen inside of the transition area as you come out of the water. That’s it. All else is extraneous. First, if you have a wetsuit on, it needs to come off. Second, you have to put your helmet on. Everything else can, theoretically (depending on equipment), be taken care of as you move, assuming you setup correctly.
What does a good setup tend to look like? Here are some ideas:
- Put a towel down if permitted. This will help dry your feet and serve as a visual cue for your area.
- Place closest to you anything you need to touch right away. For example, extra gear you may bend over to grab for the bike leg (like a tool kit, nutrition, tubular sealant). If you bend over it needs to be super easy to grab. Often times you can simply tape these items to the bike and avoid this altogether. Rubber banding items together is not a bad idea if you are stuck with this option, though.
- If you want to avoid blisters by wearing socks, put these up front and have them as ready to go on your feet as possible (i.e. for longer socks roll the mouth back a bit so you can just slip your feet in).
- Put your run shoes in the back. If you’re doing shorter races, I highly recommend some sort of elastic quick laces (such as Lock Laces) so you can just slide the shoes on and go without tying them.
- If you plan to run with a hat or visor, place that either on top of your shoes or right beside them so you can put it on quickly either right before or after you get your shoes on.
- If you are required to run with a race number, use a number belt and put it on while you’re running.
- Attach the helmet to your handlebars in some way so you can quickly grab it and put it on without bending over.
- If you have clip-in shoes and pedals, clip the shoes into the pedals in advance and use rubber bands to keep the shoes horizontal so you can slide your feet in them as you pedal.
- Attach your sunglasses to your frame so you can grab them once you are going and put them on.
- Attach your nutrition to your frame and, if possible, arrange it in the order you plan to use it.
- If the weather will be extra challenging (super hot, chilly), plan to put extra fluids, salt capsules or clothes in your area so you can adapt as necessary for the conditions. I will often pack an extra bottle of sport drink with ice on really hot days just in case I botch my hydration on the bike by a little bit.
And You’re Off: Walking Through The Race
So now you’re all set up and your transition area is ready to roll. Let’s do a quick visualization of how it all looks as the race progresses. First, before you even begin the race, have this thought in your mind: you need to be prepared for anything. You can have the most perfect setup in the world, but you are in the midst of hundreds of athletes. Your stuff may get knocked over or bumped off your bike, so be ready to adjust. Starting with this mindset will build mental toughness and save you some panic in the heat of the moment.
As soon as you are up and running out of the swim, peel your wetsuit (if you have one) down to your waist and remove your cap and goggles. When you get to your transition area, peel your suit down to your feet, step on it with one foot and pull the opposite leg out. Repeat on the other side. If done well, this will go super quickly. Using some sort of lubrication (like TriSlide or BodyGlide) on your ankles is super helpful here, too.

Having a solid understanding of and strategy for transitions is critical. [Photo courtesy of Pixabay]
Next, grab any extra gear you may have that is not on the bike and stow it in your jersey pockets. After that, grab your helmet, snap it on and get going!
After you mount the bike and begin pedaling, you can get into your shoes and tighten the straps. This is also when you can put on sunglasses or pull stuff off your frame and put it in your pockets. If you can time this all so it happens on a downhill it will be even more efficient and you will lose less time getting situated.
After you crush the bike leg and are nearly back, it’s time to turn your mind to preparing for your transition. Much like the first time around, only two things really need to happen inside of transition: you need to rack your bike and get your run shoes on – all else is extra.
As you approach the transition, you need to loosen the straps on your shoes, pull your feet out (I put mine on the tops of my shoes) and get ready to dismount. You can do a flying dismount if you want, or you can stop and do it under more control. The difference is a few seconds – do what feels most comfortable to you. From there, look for your towel or other landmarks, rack the bike and slide your shoes on. If you have things to grab for the run (hat, salt capsules, number belt) grab that and go. This transition should be even faster than the first.
And that’s it. All your transitioning is done. Let your mind relax. You just have to race your race and have fun from here on out.
Transitions seem straighforward. But in the heat of the moment, things can quickly go sideways. So, preparation is key. And if seconds mean a lot to you, having a solid understanding of and strategy for transitions is critical. If you have any other go-to tips for transitioning, please leave them in the comments below. We’d love to hear them!
More on triathlon preparedness:


