Hopefully, if you are not already practicing some form of yoga on a regular basis, my previous article inspired you to integrate it more intentionally into your training, or at least tinker around with it. The first two poses that I’d like to dig a little deeper into today are the two that I would first recommend to any strength athlete wanting to add some yoga. If you only have five minutes to give, then it’s these two poses, for 60 seconds on each side. If you have ten minutes, then it’s these two poses, 60 seconds on each side for two repetitions.
The Benefits for Strength Athletes
Not only will these two poses – triangle and side angle – help you develop and deepen your hinging and squatting movement patterns while lengthening hamstrings, inner thighs, and your side waistline, but for those willing to dig a little deeper into the postures, they share a common adjustment that will reinforce your motor control and proficiency for generating hip torque, something we all need to increase strength gains and help prevent injury.
Our good friend Dr. Kelly Starrett of MobilityWOD makes this observation about the relationship between torque and trunk stability in his book Becoming a Supple Leopard:
“In other words, midline stabilization and torque are two parts of a unifying system that work in conjunction with each other. If you don’t have an organized carriage, you can’t generate torque or transmit force to your primary engines. Conversely, if you don’t generate enough torque, you can’t stabilize your trunk in a good position.”
Learning how to generate hip torque in a position that you are initially unfamiliar with will directly translate into a heightened sense of self awareness in all other athletic positions. Like I said before, yoga is so much more than stretching.
Triangle Pose
To get started, step your feet about three to four feet apart. Turn your right toes 90 degrees to the right and your left toes 10 to 15 degrees in the same direction:
Reach your right arm towards the wall as far as you can, keeping both side of your torso long:
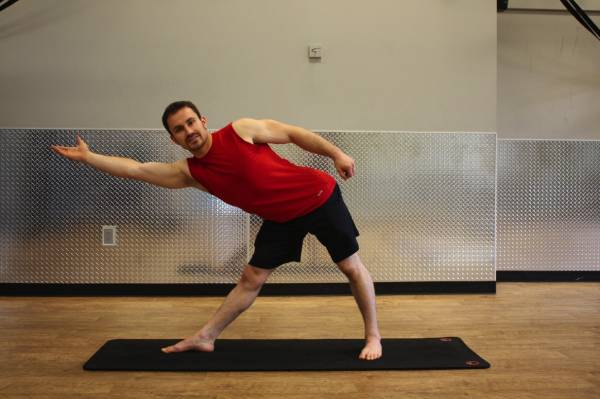
Now bring your hand down to the floor, your shin, or an elevated block:
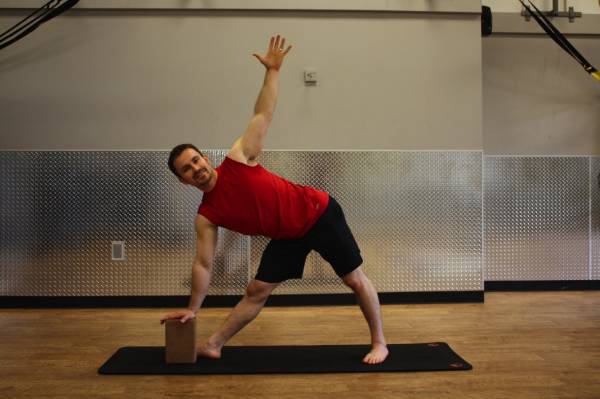
You will get more benefit from maintaining length in your sides and using a block for assistance than trying to reach for the floor while crunching up your side waistline:
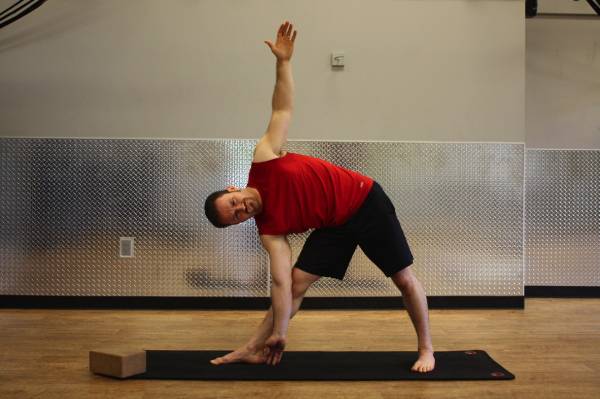
Now the fun begins! Once you are in this basic shape, contract the quadriceps on both legs. If your knee on the right leg does not fully extend, continue pursuing that full extension; however, if your knee in this position has a tendency to hyperextend, you will need to place your right hand on your shin and then press your shin into your hand to stabilize your knee joint. My super bendy people, I’m talking to you!
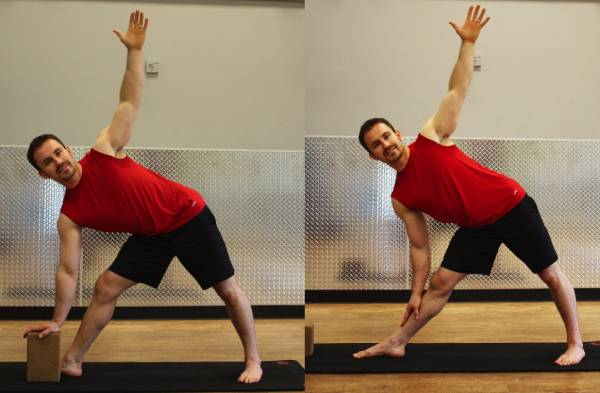
Look straight ahead with a neutral neck position, or if you are able, rotate to look up at your top hand. Now press through the outer edge of your left foot while continuing to squeeze your left quadriceps. You’ve arrived!
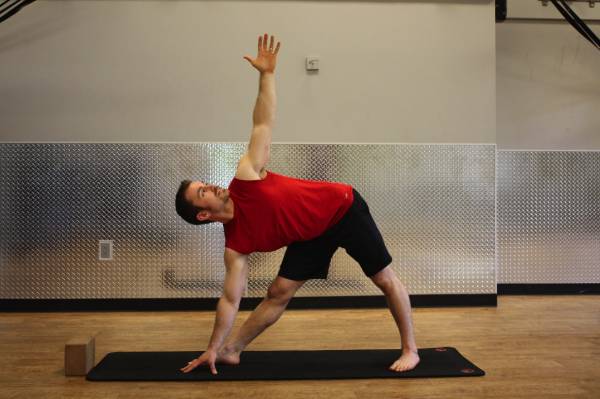
Repeat on your left side.
This is triangle pose. However, after you’ve practiced this position for a while, it’s time to add a little torque. While maintaining your position, attempt to corkscrew your left foot open in a counter-clockwise path. In other words, try to scrape your foot open towards your pinky-toe side. Your foot should not actually go anywhere, but rather your inner foot arch will lift and the rotational force you’ve generated with this closed chain isometric contraction will be translated to your hip capsule.
You might not feel this adjustment the first few times you try it. But stick with it. Eventually you’ll start to notice the external rotation of your femur as an independent movement skill.
Side Angle Pose
To get started, step your feet much further apart than triangle pose, about four and a half to five feet. Turn your right toes 90 degrees to the right and your left toes 10 to 15 degrees in the same direction. Bend your right knee so that your shin is vertical:
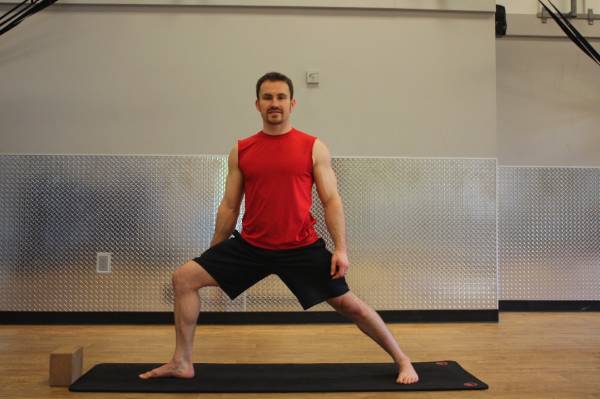
Reach your right arm towards the wall as far as you can:
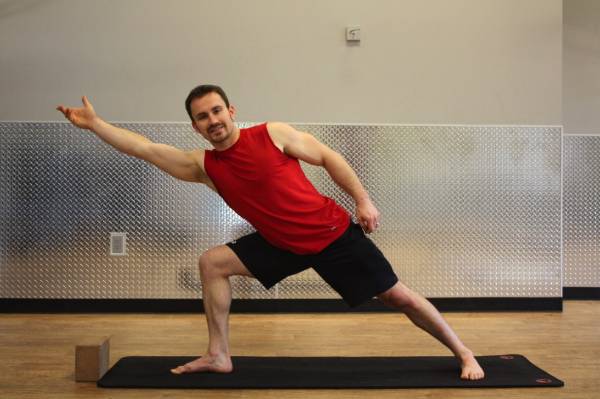
Place your right hand down on a block or to the ground:
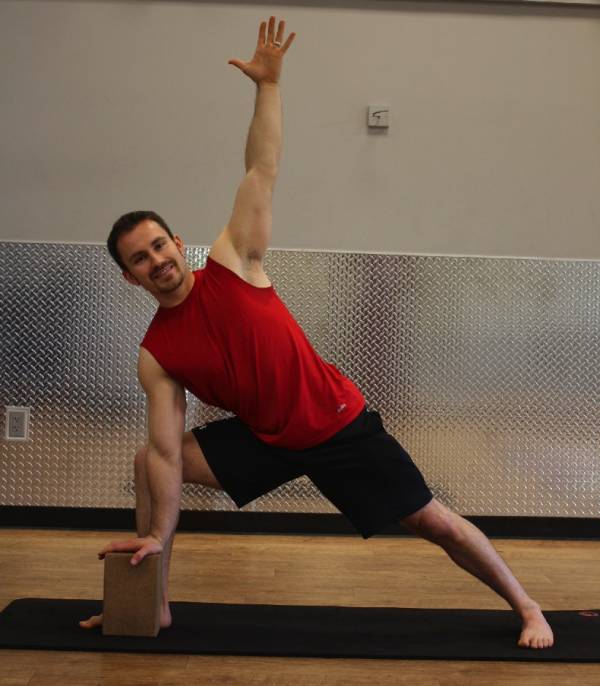
You will get more benefit from the pose by keeping your hips low and elevating your right hand rather than trying to touch the floor at the expense of your hip position:
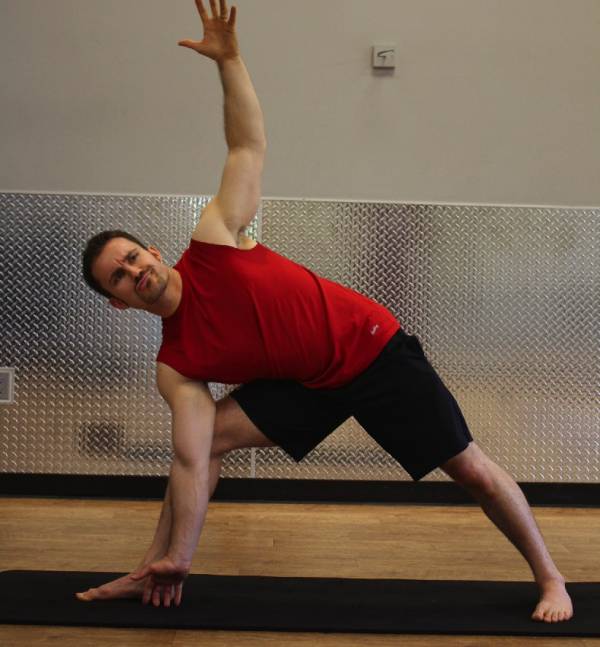
Lengthen through your left side ribs and reach your left arm overhead. Press through the outer edge of your left foot. You’ve arrived!
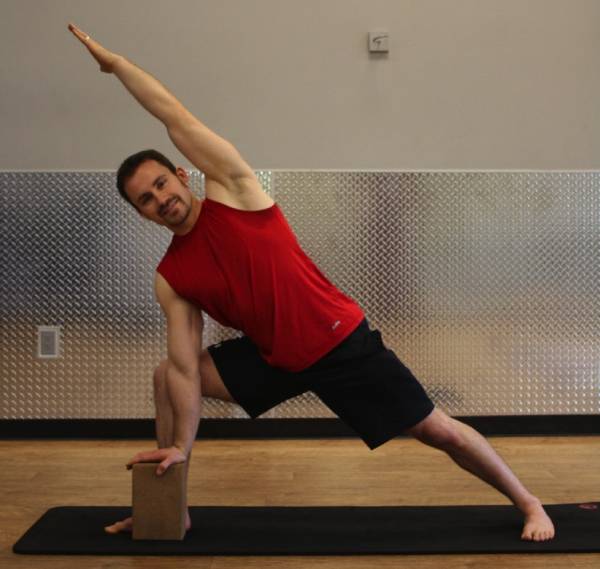
Repeat on your left side.
This is side angle pose. However, after you’ve practiced this position for a while, it’s time to add a little torque. While maintaining your position, attempt to corkscrew your right foot open in a clockwise path. You will see your bent knee translate externally, creating both space and stability in your right hip capsule. If side angle pose comes easily for you and the hip mobility is not an issue, begin practicing this pose exclusively in this way so that you can add a little more stability to that joint.
Try It Out
Practice these two poses as often as you can. The result will be a stable trunk with the ability to access your hip torque at any given moment. And we could all use a little more torque in our lives. Give these poses a shot and let me know how it went in the comments below.
References:
1. Kelly Starrett and Glen Cordoza, Becoming a Supple Leopard, (Las Vegas: Victory Belt Publishing Inc, 2013), 49.


