Imagine you are running away from some threat to your life. Perhaps you are hustling to escape the rising waters of a flash flood. Maybe you are bounding through the woods to hide from a wild boar. You scan the environment to put some distance between yourself and the approaching danger. Two of your best options for making it to safety are either to ascend something very quickly or to drop to a lower height without getting hurt.
In the parkour community, the first maneuver is known as a climb-up, and is a technique that involves running up a wall, grabbing the top edge, and pulling yourself up and over. Getting down from an elevated surface can be trickier, given the risk of injury from striking the ground. At a low enough height you might simply drop and roll, but for anything higher you might need to lower yourself before dropping or climbing down.
Getting on top of a wall with speed and descending from a wall quickly are two highly functional movement skills. If you enjoy running in obstacle course races, you definitely know what I mean. Drilling climb-ups and practicing dropping and rolling from a height are the most effective ways to get proficient with the skills. Unfortunately, doing multiple sets of each movement is not only exhausting, but can also take a significant toll on your body (especially with height drops).
As preliminary exercises, two variations of bodyweight dips can be remarkably useful for building the strength to assist with climb-ups and drop downs.
The Wall Dip
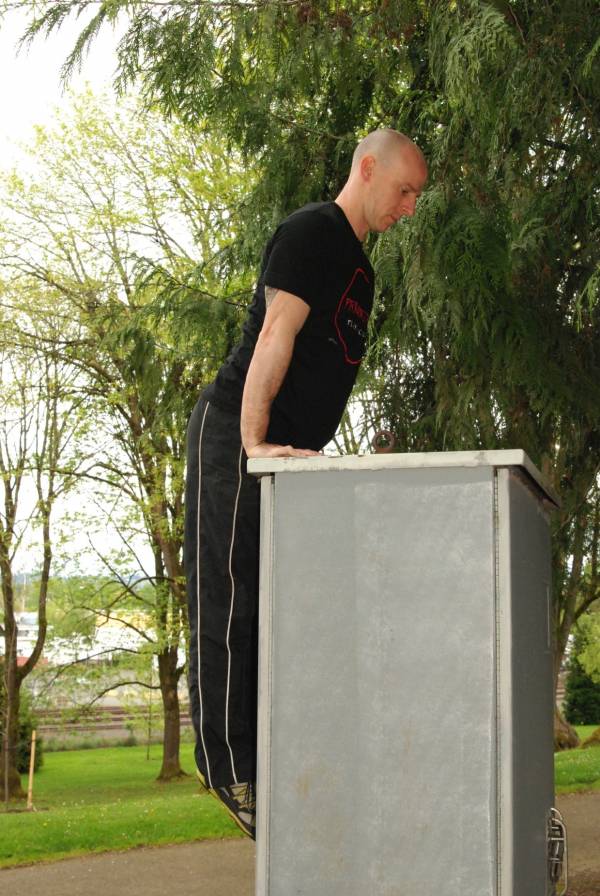
The first variation is called a wall dip and it entails positioning your chest over a wall, and then performing a pseudo push-up. Here is how to perform it:
- Position yourself on top of a wall, supported on your hands with your lower body hanging beneath you.
- Stack your hands directly beneath your shoulders.
- Place your palms flat with your fingertips pointing forward.
- Hinge at your hips and lower your sternum to the wall.
- Don’t let your elbows flare out to the side.
- Keep your tiptoes against the wall, and allow feet to slide up and down as needed.
- Press through your arms to lift your chest back to the full upright position.
Start with 5 wall dips and build up to sets of 10.

The Reverse Dip
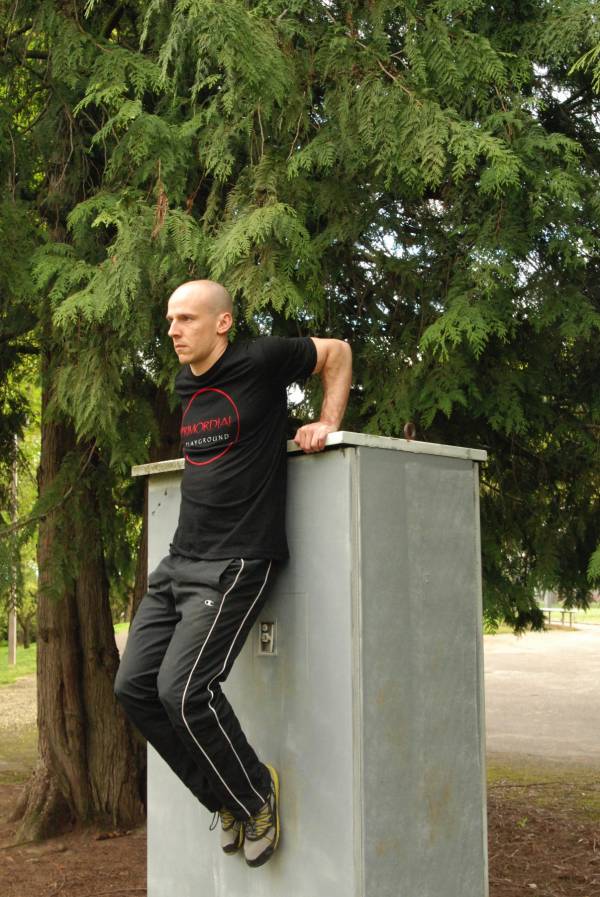
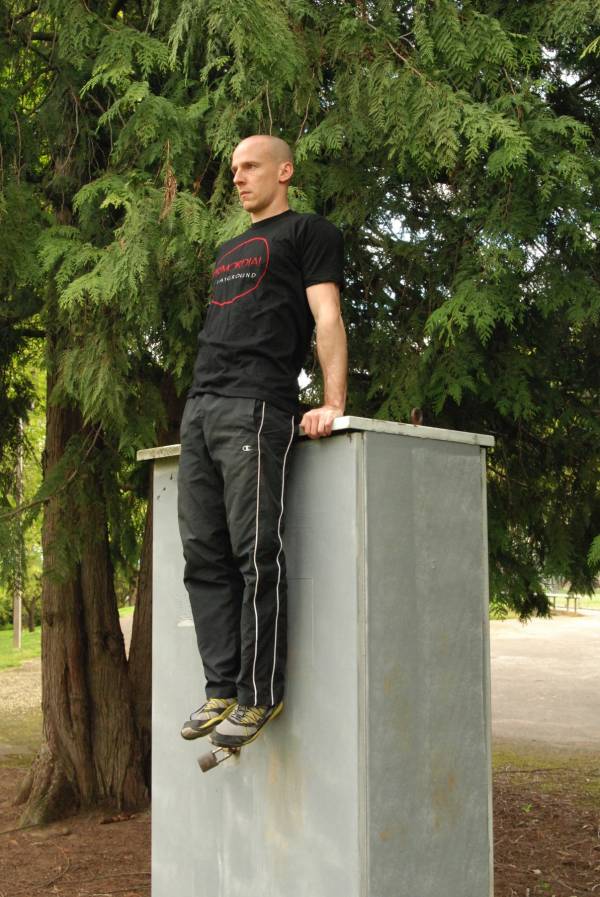
The second variation is known as a reverse dip, and has you facing outward from a wall. Here is how you do it:
- Sit on top of a wall with your legs dangling over the edge.
- Place your hands on the edge of the wall with your fingers pointing forward.
- Allow your hips to slide over the edge and then use your upper body strength to lower your feet toward the floor.
- Don’t let your elbows flare out – actively pull them in toward your ribcage.
- When you reach the comfortable limit of your shoulder flexibility, press your hands into the wall to lift your body back to the top of the wall.
See if you can do 3 consecutive reps and build up from there.


If this motion is too intense for you, increase your strength by doing simple bodyweight dips on a weight bench or plyo box. Likewise, if you feel limited by your shoulder flexibility, work on your shoulder extension by placing your hands behind you on the floor and scooting your bottom forward (while sitting on the ground).
Don’t have a wall to use? A pull-up bar or single parallel bar will work for each skill. However, be forewarned: it will dramatically increase the effort. Without your legs to counterbalance on the wall, you will struggle to keep from rotating under the bar.
As you get more proficient with each movement, start to work on your capacity to generate power with the motion. Lower yourself slowly and then press yourself back upward with explosive force. With enough arm drive you could almost make it plyometric by catching airtime with your hands, before lowering down again.
In the occasion that the wall dip or the reverse dip seems too easy for you, try increasing the difficulty by wearing a weight vest. Placing cans of food in a fanny pack or using heavy textbooks in a backpack are two of my favorite ways to add resistance, if I don’t want to wear a weight vest in public.
From here, your next steps will be to begin tying the component skills into real-life movement flow. Use the wall dip to increase your speed on getting on top of a wall. Use the reverse dip to lower your body a few feet before dropping from a wall and rolling away.
As you drill the movements, you’ll find that your efficiency dramatically improves and the skills begin to seem much less difficult. Effortless? Not by far, but they certainly become easier to perform.
Stay tuned for a coming article in which I’ll share the specific steps for performing an efficient climb-up.


