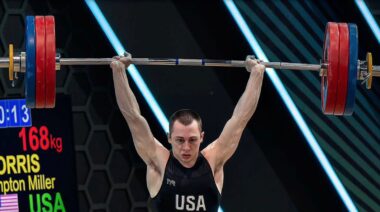
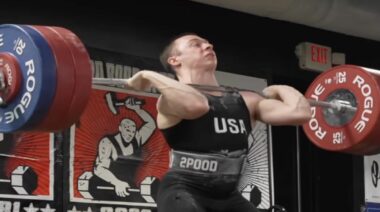
New athletes typically do one of two things with their upper backs when approaching a snatch or a clean:
- They over-tighten their upper back
- They don’t think about it at all
How can we get a new athlete to approach the bar and simply set his or her back correctly without a lot of thought? I’ve created an easy method to teach a good start position, and I’m going to share it with you.
RELATED: 2 Effective Methods of Getting Your Lifts Off the Ground
A Simple and Easy-to-Remember Get Set Method
Most of my coaching is done in clinic and certification settings that take me across the United States and into the depths of Asia. I often work with athletes from multiple countries at one time, and these are athletes I’ve never met before.
“It’s a simple way for your athletes to get their backs set correctly, and without you. You can teach it easily and they can continue to practice it on their own.”
As such, I’ve been forced to create a quick-and-easy method to get athletes into good start positions with their backs set correctly. I also needed it to be a simple and easy-to-remember method, as I might never see these athletes again.
How will this help your athletes? It’s a simple way for your athletes to get their backs set correctly, and without you. You can teach it easily and they can continue to practice it on their own.
The difference is, you are going to move your athletes through how their backs should be set. I say “move” because helping an athlete feel the process will have more impact than simply showing him or her with your back or verbalizing how it should feel.
RELATED: Mobility for the Start and Bottom in Olympic Weightlifting (Video)
In the video below I run you through everything in detail. Right after that we discuss the mobility and stability of these positions and give you a number of exercises you can use.
Feeling the Lat by Yourself
The lat. Ah, the lat. We often hear, “You gotta keep your lats tight!” But then the conversation ends there. What does that even mean! How do I feel a lat? Here’s how:
- Have your athlete stand tall with his arms to his sides and elbows turned out. The outside of his elbow should be facing away from his side, not pointing behind him. Also the shoulder must be neutral, not rolled forward.
- Have your athlete reach toward the ground with his hand. Do not let the athlete to bend over toward the ground. He’s just reaching down and this will help him feel the lat.
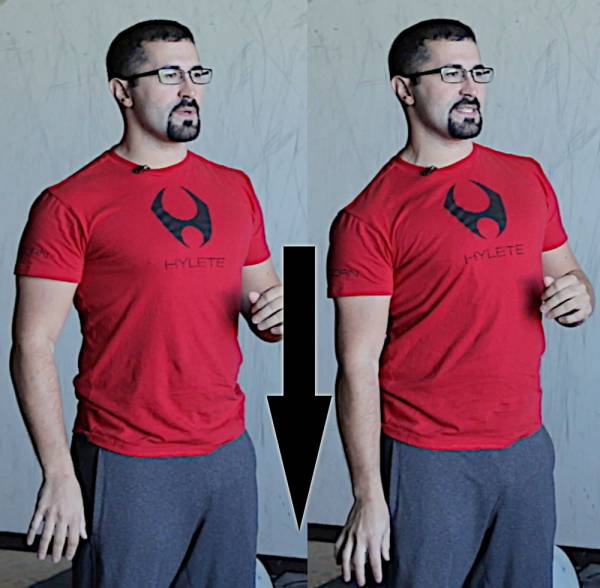
Feeling the Lat With Help
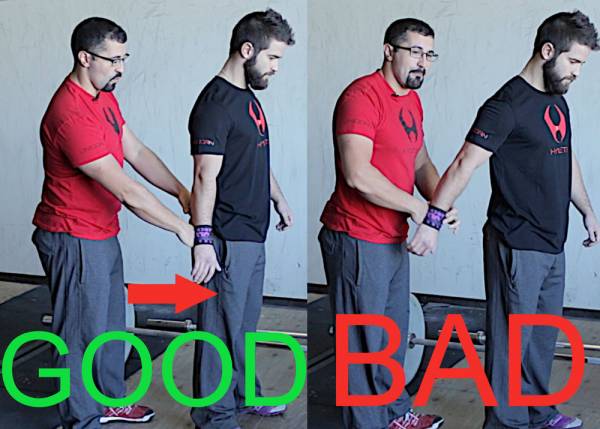
- Have your athlete stand tall with his arms to the sides and elbows turned out. The outside of his elbow should be facing away from his side, not pointing behind him. Also the shoulder must be neutral, not rolled forward.
- Stand next to your athlete and tell him to not allow you to push his arm forward. When he fights this movement, he’ll feel the correct way of having his lat tightened.
Note: Don’t allow the athlete to pull his arm in. The point is to not allow it to go forward.
Pull the Scapulae Down
- Have your athlete stand tall with his arms to the sides and elbows turned out. The outside of his elbow should be facing away from his side, not pointing behind him. Also the shoulder must be neutral, not rolled forward.
- Place your hand on his back about two or three inches below his scapulae on his erectors (just on either side of the spine). Ask your athlete to pull down his scapulae toward your fingers.
- If done correctly, the athlete will not be pinching the scapulae together or tightening the traps in any way. The traps will be loose and pliable.
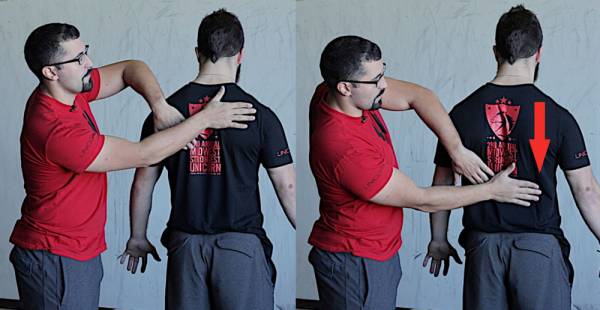
Sitting to the Bar With Our Back Set
- Repeat step two above, but this time have a loaded bar below the athlete. The bar should be positioned such that if the athlete looks down it will be covering the area where the big toe connects to the foot. Specifically, that knuckle or where the laces begin on his shoe.
- Once the athlete is set in step two, ask him to unlock at the hip and knee and sit to the bar without letting go of his scapulae. I’ll even keep one hand on the athlete’s back like in step two and my other hand on his shoulder so I can help him as he lowers.
- From here, have the athlete grab his grip and get set in the start.
Note: Many new athletes go absolutely wrong when they bend at the waist. They loosen their back as they grab the bar, and then try to bring their hips down to the bar to get set. Their back never gets truly set when doing this for two reasons: one, they’re new lifters and don’t understand where to be or how to tighten the back, and two, their mobility issues prevent good position.
Okay, so you’ve given these methods a shot, but your athlete freaked out. He’s uncomfortable and he can’t reach the bar with his back set like that. Don’t worry. This is common. In the video at the start of the article, we show you some mobility drills to help you. But remember, if mobility issue are in the ankles or hips it will cause a lifter to get loose and incorrectly sit back when moving down to the bar.
Overhead – Bone-on-Bone
Our scapulae don’t just come into play with our set-up, they also get involved when we go overhead. When you’re receiving a snatch or executing a jerk, your goal should be to immediately lock the bar out bone on bone.
RELATED: Mobility for the Overhead Position (Video)
“Bone on bone” means locking the wrist back, locking the elbow, and locking the shoulder. This allows for your skeletal structure to support the weight and not your muscles alone. This comes in handy when receiving heavy weight.
Have the athlete position his arms overhead to receive a snatch. Lay his wrists back while keeping the arm just behind the ear. When the athlete lays his wrists back, he should not push the arms back, as this will increase the strain on the front of the shoulder.
“Pushing down on the athlete’s hand in the bone-on-bone position should help him feel how his hips quickly become involved.”
Pushing down on the athlete’s hand in the bone-on-bone position should help him feel how his hips quickly become involved. Then, moving the hand to the straight position, again push down on the athlete’s hand to give him a sense of the muscles having to work more to keep his arm straight.
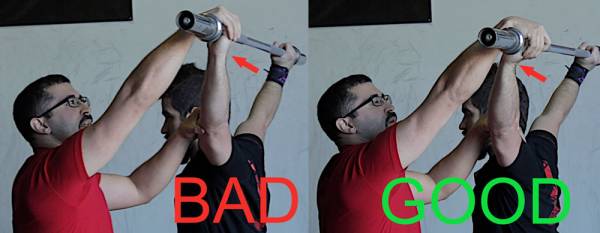
Try these drills and watch through the video. If you have questions on any of this, please post them to the comments below. Let us know what you tried and what difference it made.
Photo 1 courtesy of Reading Barbell.

