People love complexity. A quick survey of the fitness landscape will show you complicated diets, workouts, and methods of fat loss – despite the overwhelming evidence that the simple stuff works and often works better.
Fitness does not have to be this complex.
Mobility is another one of those areas where people like to pursue complicated interventions. Every day some new physiological magic trick pops up in my news feed promising instant improvements in one position or another.
While mobility is an area that may appear complex at first, once you break it down it’s actually pretty simple. Today, I’m going to give you a straightforward and systematic approach to improving your mobility. I’m not just going to give you a handful of drills and send you off. By the end of this article, you will understand the principles that drive improved mobility and how you can utilise them to become a better you.
Simple Is Better
I dislike complexity for a number of reasons, but the primary one is that in terms of reliability and data collection, it’s much easier to see the effect of a simple intervention. The more complicated a method becomes, the more difficult it is to determine what’s actually helping you.
“You can get creative if you want, just don’t get too far away from these basic principles. Most of the time, simple is all you need.”
I understand the appeal of some of these techniques the same way I understand the appeal of a brutal, vomit-inducing, meat-grinder of a workout. Clearly, if you’re working so hard and using advanced techniques, then you must be making progress. How could you possibly be wasting your time if you’re doing fancy things that require so much effort?
I realise there are many well-educated people who know exactly what they’re doing and still love workouts that make them nauseous. More power to them. Unfortunately, I feel like many others do these workouts because they don’t know what else to do and that stuff seems to work. Mobility is the same way. So rather than do what seems to work and what feels worthwhile because it’s complicated, let’s look at what actually does work.
The Causes Of Immobility
First, we should probably talk a little about what leads to immobility. There are a handful of factors that contribute, but the largest one by far is resting muscle length. Your muscles should be at a relatively neutral length when they’re inactive. Neutral is basically the mid-point between fully lengthened and fully contracted.
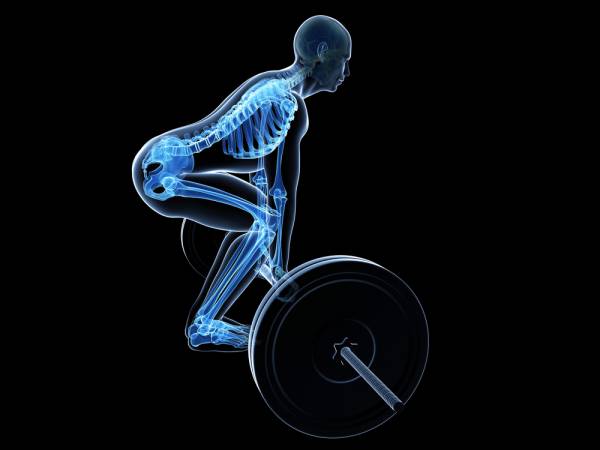
Your postural alignment can be affected by the neural input our bodies receive from repeated positions (like sitting).
For many of us, our muscles are far from neutral at rest. The reason for this is neurological input from repeated positions and movements. When you adopt the same positions over and over, your body eventually adapts by passively shortening some muscles, while passively lengthening others. These changes aren’t permanent, but they can predispose you to poor alignment and bad positioning that will lead to diminished gains and increased injury risk.
One of the easiest ways to reverse some of these negative effects is by improving your everyday posture and doing basic muscle activation work as part of your warm up. Generally speaking, your warm up should consist of some method of getting your body back to a neutral posture (like 90/90or diaphragmatic breathing) followed by some basic activation drills for underutilised muscle groups like your glutes and the muscles of the mid back. Focusing on proper form and good position will further enhance the effect.
“Yogis and martial artists have been harnessing the power of breathing for ages, but the rest of us are just starting to catch up.”
These basic techniques can do a lot, but some tissues are stubborn and require a bit more attention to get them moving again. To that end, I give you the simple mobility system. It consists of four steps.
Note: An important preamble to this method is that you must utilise good position. Don’t compromise your posture and neutral alignment for the sake of additional movement. Mobilising with bad posture is a waste of time and all the foam rolling and lacrosse ball smashing in the world won’t count for much if you’re not using the proper positions.
Step 1: Unload the Position
When trying to get into certain positions – an overhead squat, for example – there is a high demand placed on a lot of different muscles in terms of producing force, moving the body into position, and stabilizing that position. These multiple demands create a lot of potential for breakdown.
One of the easiest ways to improve your position is by removing the load, and I don’t just mean lowering the weight. The simplest example is to improve the bottom position of the squat by lying on your back with your feet on the wall. Now slide your hips closer and closer to the wall. You’ve just achieved a similar position to the bottom of a squat without requiring your body to stabilise.
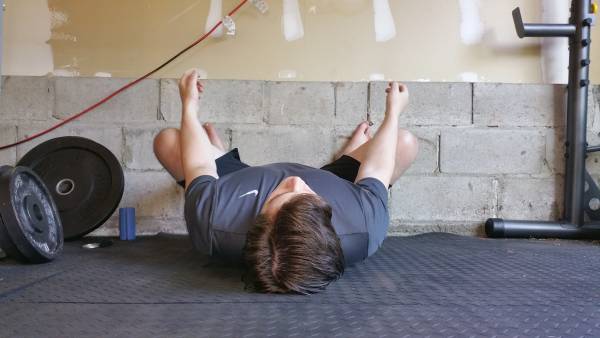
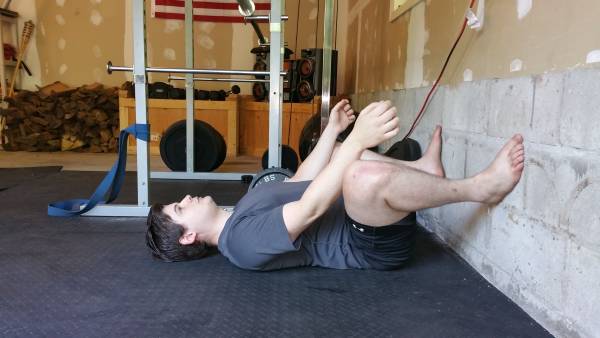
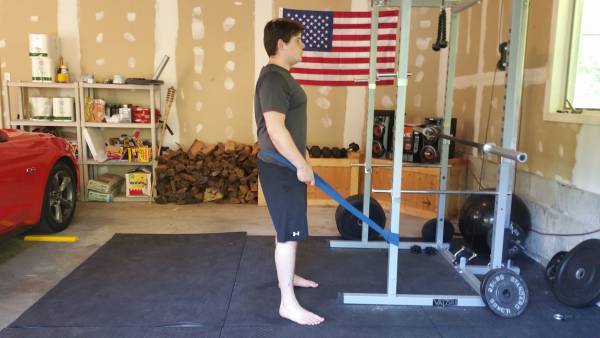
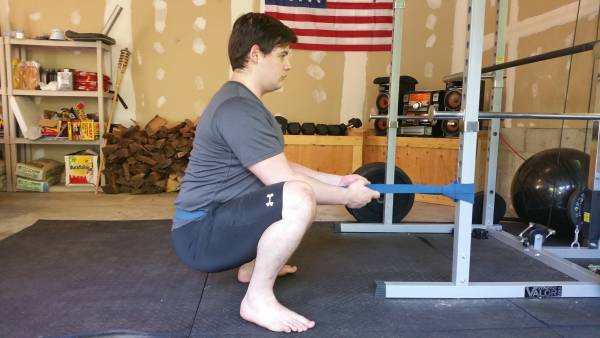
Another easy method is to anchor a band to a rig at about knee height, loop it around your waist and then sit down into a squat. Again, because the band is taking the majority of the load you won’t have to stabilise as much and you’ll probably find it easier to get into a good position. For your overhead mobility, you can anchor a band overhead or just hold onto a bar or something. The goal is to get into the position while allowing the muscles involved to relax.
Step 2: Challenge the Position
Now that the stability demand has been removed, you’re free to move further into the position than you would normally. For a squat, this is pretty simple – go deeper. If you can get to depth, then work on making sure you’ve got a neutral spine and an upright posture.
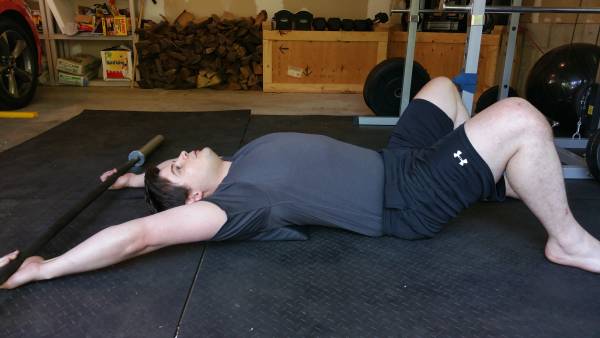
If you’re trying to improve your overhead position, grab a PVC pipe and hold it over your head while you’re in the bottom position. Lean side-to-side and push the pipe backward. It doesn’t have to be complicated, just work the position. If you’re lying on your back, you can put something under your upper back to elevate your body and let your arms hang down. Try to touch the floor.
Step 3: Breath
This is crucial. Yogis and martial artists have been harnessing the power of breathing for ages, but the rest of us are just starting to catch up. When you find yourself straining to reach a better position, take a deep breath. As you exhale, try to relax. Breathe out the tension. Focus on concentrated, deep breathing and moving a little further with each exhale. You’ll eventually reach a point where your position is not just restricted, but painful to push past. Don’t. The point is to improve bit by bit. That pain is telling you, “That’s all for today.”
Step 4: Reincorporate
Now that you’ve improved your positions, do some exercises that take advantage of your newfound ranges of motion. You need to give your body some new neurological inputs that tell it to keep this mobility available, rather than returning to your old resting lengths and positions.
Applications to Your Routine
And that’s pretty much it. My four-step simple mobility system. I encourage you to try this method with different movements. You can get creative if you want, just don’t get too far away from these basic principles. Most of the time, simple is all you need. Now get out there and get mobile.
Check out these related articles:
- Mobility Work – You’re Doing It Wrong (and Too Long)
- Is Mobility Just a Fad?
- Squats and Hip Dysfunction – 2 Common Problems and How to Fix Them
- What’s New On Breaking Muscle UK Today
Photos 1 and 2 courtesy of Shutterstock.


