The CrossFit box where I teach mobility here in Pasadena, CrossFit 626, recently opened up enrollment into a free-for-members “Mobility Movement” program. The program is led by one of our coaches, Jeff Quebral, who is using his CrossFit Movement and Mobility certification to guide the course.
It is limited to only eight participants, but I snuck in the door by asking if I could audit the course. I am particularly interested to learn how the mobility program I’m leading through my yoga knowledge stacks up with the “official” CrossFit mobility stance. Not surprisingly, there is a lot of crossover.
Over the next few weeks, I’ll take a look at what I learned in the course and how I would supplement the work with a yoga session. This week’s focus – squats. Squatting is one of the most basic and essential postures in both CrossFit and yoga, yet most athletes don’t have the necessary mobility to make squatting ergonomically correct for the body. The most limiting factors are tight ankles and hips, and the result of this is overloading or stressing the low back in the posture.
READ MORE: Screen Your Ankles to Improve Performance and Decrease Injury
Yoga and Self-Massage for Squats
The Mobility Movement session started with a ten-minute squat test, which is punishing for even the most mobile athlete. The goal wasn’t punishment, though, but assessment. As a yoga teacher, my brain was ticking on how we could supplement the myofascial release techniques with asanas (poses) to increase the effectiveness of the program. Here are some suggestions you may try in your mobility sessions:
Ankle Release
Ankle release is necessary and beneficial if the shins begin to burn or ache in a squat. If you feel you cannot adequately lower the hips without falling backward, your ankles may also be the culprit. (In yoga, we encourage students to place a rolled-up blanket or small bolster under the heels to help maintain the arch of the foot if shin pain is extreme. During pregnancy, the arches of the feet fall, so using a blanket is recommended in prenatal women in order to protect the ankles and knees.)
Myofascial Release:
Come to a seated position with one leg extended, the second leg bent at the knee, sole of the foot tucked into the inner thigh of leg one. Using two lacrosse or Yoga Tune Up balls, place one ball under the foot of leg two, just beneath the talus. Use the second ball to massage out the inside of the ankle, moving from the inner arch of the foot, around the inner talus, and up the ankle, making small circles with the ball to release the tight fascia.
Recommended Yoga Postures:
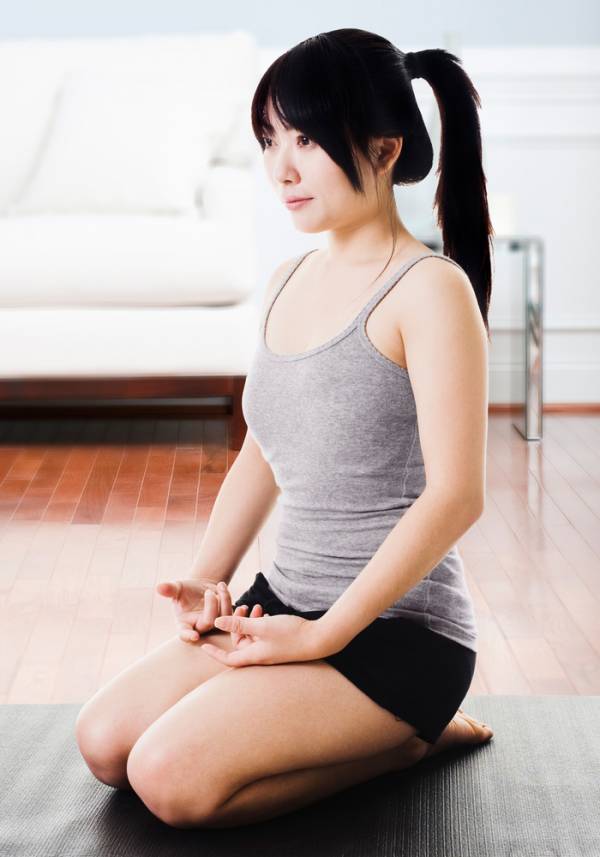 Hero’s Pose – Come to kneeling. Separate the knees and feet hip-width distance with the top of the feet flat on the ground. Sit between the feet, hugging the flesh of the glutes with the ankles so the ankles do not sickle. If this places too much strain on the knees, place a yoga block beneath the sit bones. If this is too much on the ankles, place a rolled up blanket under the arch of the ankle, then lift the knees the same height with a second blanket (a small bolster can also do the trick). Sit for up to five minutes. The posture will build in intensity, placing moderate stress on the ankles and knees. Move only into discomfort but never into pain. If you experience any sudden, sharp or unbearable sensations, modify the pose with props or by doing a half posture, kneeling on one leg with the second leg extended. Counter with down dog for one minute.
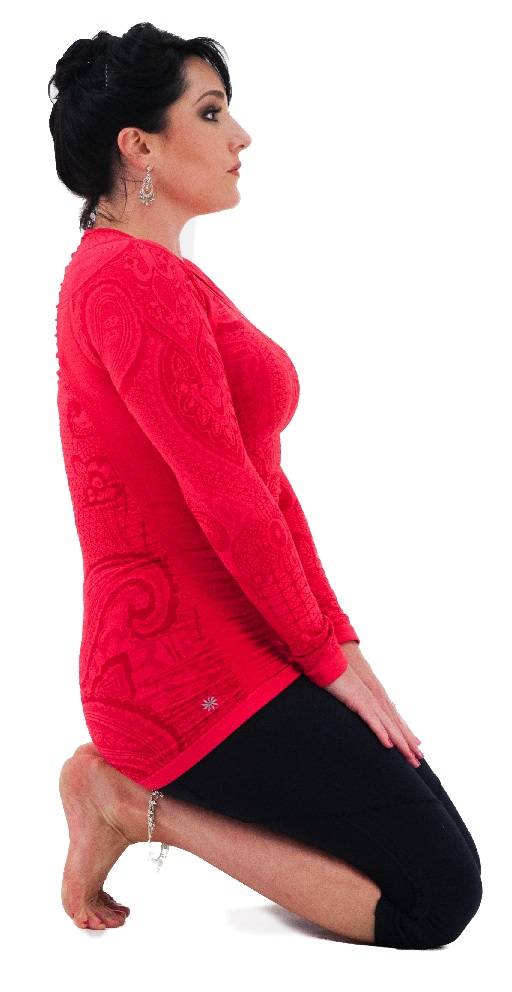 Foot Stretch – Come to kneeling. Separate the knees and feet hip-width distance with the toes tucked under. Begin to sit the weight of the hips back onto the heels. If it is too much on your feet, place the hands on the ground like child’s pose to support some of the weight, shifting the hips back as much as possible onto the heels. If you can tolerate the stretch, allow the chest to come all the way upright, placing the weight of your body directly on the heels without turning the ankle. You will feel the “necks” of your toes and the arch of your foot stretch, and you may feel the front of the ankle stretch (it will be stretching whether or not you feel it). Hold for up to five minutes, and counter with child’s pose.
Hip Release
Hip release is necessary if you cannot come fully into a squat position without limitation in the knees or low back. You may also have limitations due to hip tightness, if you feel you cannot lift your chest and maintain a neutral spine when in a squat. If you have pain in the knees, talk with your coach, as some positions are contraindicated for knee issues, and you may need to modify your squats.
LEARN MORE: 7 Minute Hip and Shoulder Opening Yoga Flow (Video)
Myofascial Release:
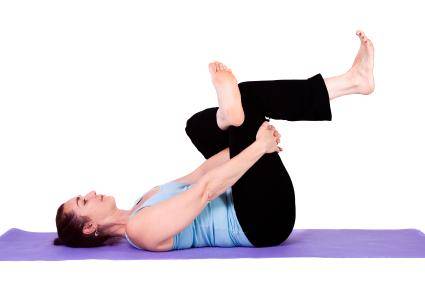 Come to seated with the knees bent and soles of the feet on the floor, hands behind you for support. Bend the left knee, placing the left ankle onto the right thigh, just above the knee. Draw the left shin toward your chest as you maintain a strong, neutral spine. In yoga, this is a seated variation of thread the needle pose (the traditional version is pictured to the right). Place a lacrosse or Yoga Tune Up ball under the left glute. Flex the glute to resist the pressure of the ball, then release the flexing and allow your weight to sink onto the ball as you move it lightly in a circle. The sensation will be very strong. Use this technique along the entire glute, including the glute medius, on the upper and outer portion of your hip. Repeat on the second side. Counter pose by lying on the back, knees bent, feet on the floor, knees knocking together for thirty seconds between sides.
Recommended Yoga Postures:
There are an uncountable number of yoga postures to open the hips, and this is a major benefit of a consistent yoga practice. Here I will list two that target the outside of the hip in a creative way.
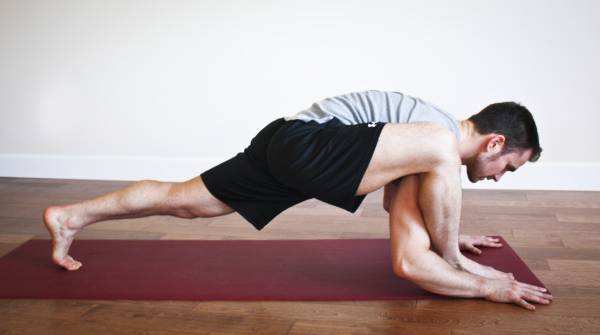 Head to Ankle – From down dog, step the right foot forward all the way between the hands, until the knee is just over the ankle. Crawl the right toes outside of the right hand, toes, ankle and knee angled outward just lightly. Lift the left knee up, walk the left leg as far back as you can, then lower the left knee to the ground. Start by lowering to your forearms. Attempt to draw your right shoulder underneath your right thigh with the forearms on the ground. Stay here, or draw your head to your right ankle. While it is possible to feel this stretch in the left psoas area, we are going for a stretch in the outer right hip, so draw the head down to the ankle as much as possible and focus on this part of the stretch. If the knee turns out, make sure the toes and ankle are doing the same thing, to keep the entire leg in one connected chain of rotation. Repeat on the second side. Counter pose by holding down dog, bending one knee then the other to sway the hips lightly, for about thirty seconds between sides.
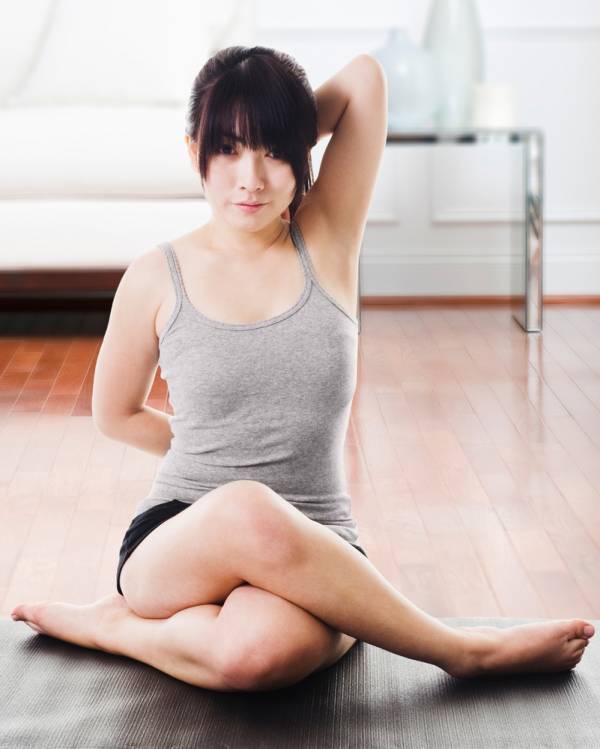 Cow Face Pose – This is a unique pose as it places the hips in internal rotation with a slight external rotation, getting into a portion of the glutes some stretches – like pigeon – may leave behind. I like to start this pose from all fours. (Men should be cautious as they have some “equipment” that can get in the way as the hips come back. Adjust as necessary.) Cross the right leg over the left at the knee, as if you are sitting in a chair. Staying crossed at the knee, separate the feet as wide as possible. Begin to sit the hips back, ideally coming to a place where both sit bones are on the ground between the heels. If this cannot happen, place a block or bolster underneath the sit bones to boost your hips up. You may already feel sufficient stretch here. If you’d like to go further, take hold of your feet with your hands, flexing the feet and drawing the legs as close to parallel as possible while providing light pressure back against the feet with your hands. From here, you can fold forward, ideally hooking your chin over the top knee. In my experience, everyone feels a stretch here. Hold up to five minutes. Repeat on the second side. Counter pose by holding down dog, bending one knee then the other to sway the hips lightly, for about thirty seconds between sides.
Question for the Coaches
There is one area where my school of thought differed from the session. In yoga we stress a kinetic chain of motion from the hips to the ankles. Essentially, this means if the hip turns into external rotation, the knee and ankle follow. The reason for this is because the hip, being a ball-and-socket joint, is the most mobile of the chain. The knee and ankle are both forms of hinge joints, so they have a limited range of motion. Specifically, the knee only flexes and extends, it does not rotate. We want all rotation in a squat posture to come from the most mobile joint – the hip. In his book The Key Muscles of Yoga, Ray Long, M.D., explains, “Obtaining this external rotation form the knee joint creates incongruency because the knee is a hinge joint with limited capacity to rotate. This incongruency can result in the abnormal distribution of joint reaction forces, injuring the intra-articular structures of the knee.”
For a squat position, there is some disagreement in the yoga community on whether the feet should be straight forward or turned out lightly in order to maintain safety in the knees. It is my understanding the official position for lifting is with the feet straight forward, but I’ve seen some coaches teach squats with the toes slightly turned out.
READ MORE: Powerlifting Versus Olympic Squats: Which Is Better?
Photos courtesy of Shutterstock, except Foot Stretch Head to Ankle are property of Breaking Muscle.


