In the United States, patients with musculoskeletal conditions incur total annual medical care costs of approximately $240 billion. Eighty percent of American adults will experience back pain at some point. The non-medical costs associated with low back pain in the United States exceed $100 billion per year, two-thirds of which are a result of lost wages and reduced productivity. Back pain is also one of the most common reasons for missed work. In fact, back pain is the second most common reason for visits to the doctor’s office, outnumbered only by upper-respiratory infections.
Substantial evidence supports the use of exercise as a therapeutic tool to improve impairments in back flexibility and strength. Exercise is safe for individuals with back pain because it does not increase the risk of future back injuries or work absence. In fact, patients can see a 10-50% decrease in back pain after exercise treatment alone.
A sedentary lifestyle is often associated with low back pain, due to muscle imbalances from poor posture. But in this article, I’d like to talk about low back injuries among active individuals, and how to optimize your recovery while still training.
Posture and Activity Come First
Before we go any farther, let me remind you that I am not a doctor or physical therapist, and this article should merely be used as advice, and not a prescription for a rehab program. If you have a low back issue that you think may be serious, make sure you talk to your doctor about what kinds of things you can and can’t do, depending on your situation.
Secondly, I’m going to be talking about dealing with minor low back strains sustained during activities like weight training and sports. If you have a back issue that stems from poor posture or a sedentary lifestyle, that’s a different topic in itself, but I’ll briefly touch on it.
Being physically active is one of the absolute best things you can do if you’re inactive and living with low back pain. First, you need to learn what good posture is and how to maintain it throughout the day. Let’s have a quick primer on good posture and how to hold it:
- Stand up with your feet underneath your hips and toes straight forward.
- Squeeze your butt tight and brace your abs like you’re pulling your ribs towards your waistband, but don’t slouch.
- Brace like you’re waiting to be punched in the belly.
- Now with that bracing, stand tall and pull your head back so it doesn’t trail forwards. Your spine should now be neutral (meaning not flexed forward and not arched backwards) and you should be standing tall with your eyes forward.
Deviations from this position, combined with bad posture while sitting and lying down, can lead to tightness in the low back and associated pain.
Once you know how to hold proper posture, you need to continue to focus on it while performing a full-body weight training program. Besides challenging muscles, using weights challenges your posture, and overcoming the weights to maintain good spinal position is key to keeping your low back healthy and strong. Your program should include a proper warm up, hip and middle back mobility, stability work for your trunk, and resistance work using compound movements like squats, deadlifts, lunges, presses, and other exercises that involve large muscle groups working together. You also need to work on your flexibility with proper foam rolling and other mobility work, along with static and dynamic stretching.
Now let’s move onto the topic of minor low back injuries that arise while lifting weights. A while back, I sustained a minor low back tweak, and at first didn’t focus on recovering correctly. I spent too much time dealing with the pain before systematically addressing my back pain and the root cause of my injury. After following this protocol, I recovered well, came back stronger, and have been able to use my minor setback to help others deal with similar issues.
The 5 Phases of Recovering Your Back
My injury came about after feeling a twinge on a heavy pause squat, followed by a trip to a trampoline park later that week. The episode left me in so much pain it was hard to sleep. Without an MRI I can’t be sure, but I believe I strained a low back muscle directly next to my spine where it met my sacrum (possibly multifidus or rotatores). I had pain in the left side of my low back that radiated outward while standing. It was accompanied by sharp pain while sitting or squatting.
The tightness and pain limited spinal flexion and made it difficult to lift anything. I was cleared of a possible disk injury by a chiropractor, so I surmised it was a muscular issue that stemmed from not holding a stable midline while squatting and jumping. I knew I needed to slowly and systematically work my way back. That’s when I came up with this 5-phase recovery program. While it is specific to my injury, you can modify it to your situation and slowly get back to your pre-injury strength.
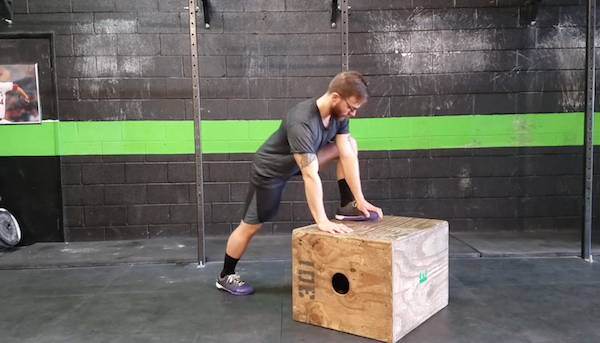
Phase 1: Manage Pain and Restore Mobility
In order to get back to moving correctly and reduce your pain, you will have to stop doing the activities that cause it. Pain is your body’s way of saying it doesn’t like you moving a certain way. After an injury, even proper movement can still hurt, if the tissue hasn’t healed and the surrounding muscles have locked down to protect it.
In this phase, I cut out all jumping, deadlifts, squats, burpees, running , rowing, kettlebell work, basically any spinal flexion, standing overhead presses, and performed no metcons or circuits with my lower body. I know it seems excessive, but reinjuring yourself while recovering is an issue that’s probably all-too-familiar for a lot of you. I only performed upper-body movements, cycling, swimming, water exercise, walking, using a stepmill, and plenty of hip and leg mobility.
For my back-specific rehab, my go-to movements were:
- Single leg toe touches to drill proper hip hinging
- Clamshells, fire hydrants, and other gluteus medius work
- Hip raises and other gluteus maximus work
- Plank variations to work on midline stability
- Reverse hypers, and light back extensions to reintroduce some movement in my back, as long as they didn’t hurt that day.
This movement menu was huge for me during this time. I found core and hip movements that didn’t cause pain, and helped resolve my postural issues on certain lifts. I use these same exercises now as prehab, or preparatory exercises before my lifts, to make sure I move in good positions and stay safe while getting stronger.
Self-myofascial release (SMR) techniques were extremely effective, in the beginning stages especially, as they helped me gain back some mobility after the muscles around my strained muscle had locked down to protect it. I foam rolled my hamstrings and glutes daily, and used lacrosse balls to mobilize my thoracic spine and to rollout out my quadratus lumborum (a low back muscle to the side of my injury which was along my spine). If you’re experiencing tightness in the muscles around the strain, SMR can provide relief while not challenging the affected tissue like static stretching might, depending on where your injury is located.
During this time I also purchased a dual transcutaneous electrical nerve stimulation (TENS) and electric muscle stimulation (EMS) unit. The TENS setting was used to provide immediate relief to the pain, while the EMS later on allowed me to provide some bloodflow to the area, since I wasn’t able to move it.
Heat was also effective in calming the pain and tightness, and was a great relief right before bed and in the car on the way to work in the morning. Mind you, these last two methods are mainly for symptomatic relief. They don’t fix the issue, only rest and corrective exercise can do that.
As for rest, I took three full days off to start, so my body could focus on relaxing and healing. I didn’t want to rest so long that I became immobile, which is often the problem people have when they rest completely after injuries. After those three days, I returned to the gym with just upper body and core stability movements until phase one was completed.
Sleep is huge when you’re recovering from an injury. Just think about how your dog recovers when they hurt their paw: they sleep. I aimed for nine or more hours a night during this phase of recovery. It meant going to bed early, but I knew it’d greatly decrease the amount of time I spent recovering.
Regarding my nutrition, I focused on high-quality foods with tons of vitamins, minerals, and water during my recovery, as well as high doses of fish oil to control inflammation. Increasing my fat intake helped with growth hormone production, and upping my protein aided in repairing the damaged tissue. I was also less active during this phase, so I didn’t need as many carbohydrates. I cut out all alcohol (which I didn’t have much of before anyway) and all sugar so I could focus on high quality foods.
How long you need to stay in phase one of your recovery is individual, so do not put a timeframe on your recovery. Instead, commit to a minimum amount of time to spend in a phase (at least a full week). I continued phase one until I experienced zero resting/daily activity pain. After that, I tested my squat and deadlift form. When you’re coming back, tightness is fine and to be expected, but movements must be pain-free before moving to phase two.
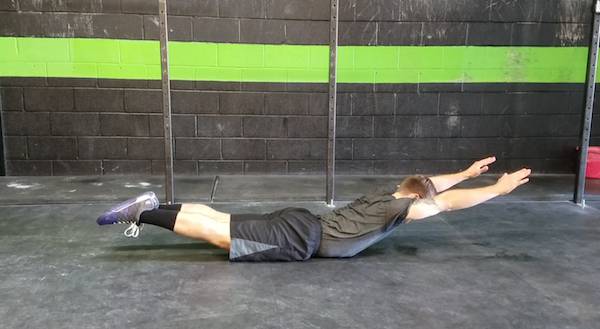
Phase 2: Endurance and Stability
Even though you can put some lower body lifts back into your program at this point, your priority needs to be on absolute perfect mechanics throughout each rep. I still didn’t do any jumping or plyometric exercises, no kettlebell swings, cleans, or snatches, no slamballs, barbell back squats, or fast bilateral hip flexion or spinal flexion, and no circuits using my lower body. I did keep up with my upper body movements, but added in bodyweight and light kettlebell squats, deadlifts, lunges, and step ups, with a focus on pause/tempo reps.
With my workout routine, I had two lower body sessions per week, and still focused on upper body in lifting my sessions. I wanted to make sure my legs had plenty of time to recover, even though I wasn’t really challenging them that much. I performed high repetition sets (15-25) to drill the pattern without compromising my spinal position.
I kept up with my SMR, and increased the difficulty and range of motion on my rehab exercises while backing off on the TENS/EMS unit, and only using heat once a day. My sleep went back to eight or more hours, (mainly because getting nine hours a night is difficult) and my nutrition stayed the same as phase one, but I did add dextrose back in my post-workout shakes, now that my workouts were increasing in intensity.
At first, I did have some slight pain in my lower back after my lower body lifts, so I continued phase two until I had zero pain on all kettlebell squats and deadlifts. At that point, I tested my barbell front and back squats and deadlifts, and since they were pain-free, I moved on to phase three. But again, I’d advise you spend at least a full week reestablishing mechanics and stability.
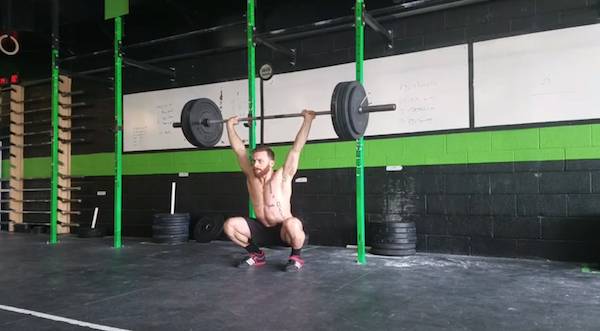
Phase 3: Strength Endurance
The third phase was freeing for me, because I was able to reintroduce barbell lower body work and even running. I still stayed away from jumping, high velocity kettlebell lifts, and fast hip and spinal flexion. I still performed circuits only with upper body lifts.
My rehab continued with tons of planks, back extension and reverse hyper holds, and band antirotation drills to make sure I was holding a stable midline during all movements. My hips were loosening up, so the volume of my hip drills went down, since at that point I was able to squat lower and lower and work on my lower body lifts without pain . Rehab drills are great, but there’s no substitute for full range of motion, functional movements.
With phase three, SMR is used less as a pain management tool, and more as a method to restore resting length of the muscles, now that they are being challenged in higher repetition ranges at moderate loads. I was also able to add in more mobility and stretching drills, now that my entire posterior chain was starting to feel more human and less like steel. Even if you don’t have pain, recognize the importance of mobility and SMR’s role in it.
While the TENS/EMS unit was helpful before, once I started being able to challenge my entire body in the gym, I found I used it less and less as my lifts got better. You could still use it if you have the time to, but I didn’t see much of a difference on the days when I used it as opposed to the days when I didn’t.
In my routine, I was back to lifting with my entire body, but I stayed humble and tried to keep lower body weights light and controlled. Rushing recovery by trying to PR on your way back is the quickest way to stay stuck in an injury cycle.
Sleep stayed at eight hours, and I returned to my usual flexible dieting, with an eye on my sugar intake. Fish oil went back to the usual maintenance dose.
In your own recovery, I’d suggest you continue phase three until full control is established on all squats and deadlifts. Spend no less than one week working on these lifts. Full control here means zero deviations from your best form at lighter loads. There is no point in adding weight if you can’t control your spine throughout the full range of motion on lower body lifts.
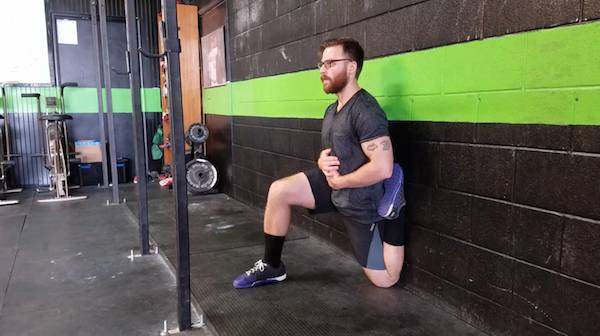
Phase 4: Hypertrophy and Strength
Here’s where it started to get fun. Now that I was back to full body lifts, I moved into low, moderate, and high repetition ranges, while still focusing on control. I was back to sprinting and doing circuits with my lower body. To add weight on my lifts, I used bands on squats and deadlifts, and slowly brought the weight up. This was key in my recovery. By attaching resistance bands to the bar on squats and deadlifts, the weight is heaviest at the top of the movements where I knew I could control it, and lighter at the bottom where the spine is more at risk.
I still avoided any movement that caused pain, even if it was in the plan for that day. I also used caution with plyos, and used soft surfaces for box jumps. I completely avoided any lift with a hard deceleration or eccentric portion. Rehab exercises became prehab at this point, and were still incorporated in all of my warm ups. It actually got me into a good habit of doing preparatory movements in all of my workouts, and since then, has shaped the way I warm up my clients.
My workouts were written to gain the size in my lower body back after all of those weeks off. I still wasn’t pushing the weight a lot during this time, and made sure my routine was split enough to allow for full recovery. An upper/lower split is great for this, so you can still drill the movements multiple times a week, while giving yourself a full recovery between lower body sessions, where your lower back is taxed the most.
I continued to use bands in phase four to add resistance before adding weight until my strength was established on squats and deadlifts. Take your time on this phase to make sure you get the endurance and size back in your legs before you get back into the heavy stuff in phase five. Three to four weeks is not that long, considering how important your base strength is before adding intensity.
Phase 5: Reestablishing Maximal Strength and Power
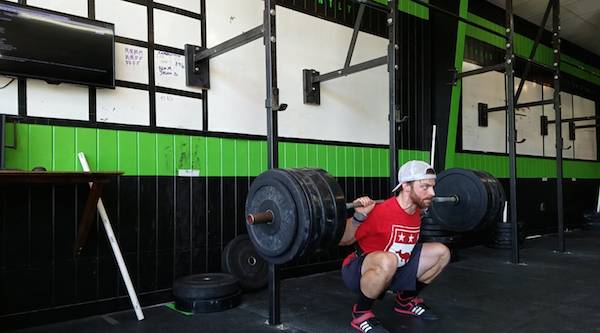
Finally we’re at the end of recovery. In this phase, you shouldn’t have any symptoms from your injury. The focus is to gradually get your strength back on your big lifts, improve your ability to decelerate, and increase your rate of force production. Use a basic linear progression program, start light, move with intention and focus, and add a little weight to the bar each week as you slowly rise from the ashes like the barbell phoenix that you are.
Don’t skip your prehab. I kept it up and still incorporate posterior chain activation, core stability, and hip mobility into all of my warm ups before squatting or deadlifting. Not only will you increase your activation and awareness before loading up a bar, you will keep your hips and spine healthy and performing well so you don’t end up injured again.
Use SMR to stay nice and supple, and use your TENS/EMS if you feel like it helps you recover. Keep up the good sleep and nutrition habits that you developed over the first four cycles. I can’t stress enough how important sleep and nutrition was to my recovery and subsequent strength gains after my injury.
When you first start out in phase five, give it two weeks before you put plyos back in workouts and increase the load on your circuits. Remember, you have the rest of your life to train. Take it slow, and gradually work your way back. Phase five is more of a maintenance phase, than a rehab phase. After a month or two in this phase, you can go back to whatever program you like.
I moved into another strength program, but it did take me almost six months to get my squat close to what it was prior to my injury. Now, a year later, I’m squatting for 10 repetitions what used to be difficult for three reps before my injury. This is largely due to the lessons I learned throughout my recovery.
Train for the Long Term
All in all, it took me about eight weeks using this protocol to return to normal lifting. Occasionally afterwards I’d feel some tightness during an exercise, and I’d modify the movement to make sure I had complete control, and stop if I ever felt low back pain.
The biggest takeway from all of this was how important it is to focus on posture while lifting. I always thought that I kept my posture in mind, but the more I evaluated my movement, the more I saw small flaws that needed to be fixed. This didn’t mean that I stopped squatting, deadlifting, or pressing overhead; it just meant I lightened up the weight and focused on my form, while really hammering core stability work both in warm ups and after my lifts.
Looking back on my injury and how it’s shaped the way I program for my athletes, I’m kind of glad it happened. If I hadn’t tweaked that muscle, I wouldn’t have learned what it takes to recover from back injuries, and how to use those same prehab exercises in my programming to ensure the safety of everyone that I train. If you’re reading this while suffering from a low back injury, I sincerely hope this article can help you systematically address your pain and get back into your usual lifting again. Just stay patient, and listen to your body.


