The back lever is a challenging and impressive exercise. It’s one of the lower level exercises performed on the rings in gymnastics, but that doesn’t mean it’s easy.
Besides looking awesome, the back lever has many benefits. It’s a whole-body exercise with emphasis on the back and core. It also requires some strength and flexibility in the shoulders and arms, and in a typically untrained position. Variations of the back lever are widely done in the bodyweight and calisthenics movement. So, the aim of this article is to lay out a progression that can help you achieve this exercise.
Leverage and the Lever
As a bodyweight exercise, the main aspect of the back lever difficulty is due to the leverage involved. With your body held out horizontally, your core must support everything to stay in line, as your arms work to support your entire bodyweight. And since no one is going to start with the full movement, we’ll use the principle of leverage to create easier variations.
One other note before we begin with those progressions. This can be an awkward position to get into. In addition, when you are somewhat inverted you will often lose the feeling for where your body is in space. For that reason, it can be helpful to have a spotter who can not just assist you if needed, but indicate when you’re in the right place (i.e. back parallel to the ground). As you become more practiced in this exercise, you’ll be able to tell where you are on your own.
Skin the Cat: A Preparatory Exercise
The skin the cat is where you raise your legs up from a hanging position, thread the feet under the bar, and lower them down as far as you can behind you. Then you reverse the movement coming back up. There are several variations on how you can do this exercise, but purpose of the basic version is to build flexibility in the shoulders as they come to full extension. What’s more is that you hang your bodyweight from here, so it’s under load.
Depending on where you’re at now, you may need to start slowly with this move. The goal is to be able to relax in the back hang completely and also come up from that position. This gives you much more flexibility than you need for the back lever and its good to have that extra should you need it.
Tuck Back Lever
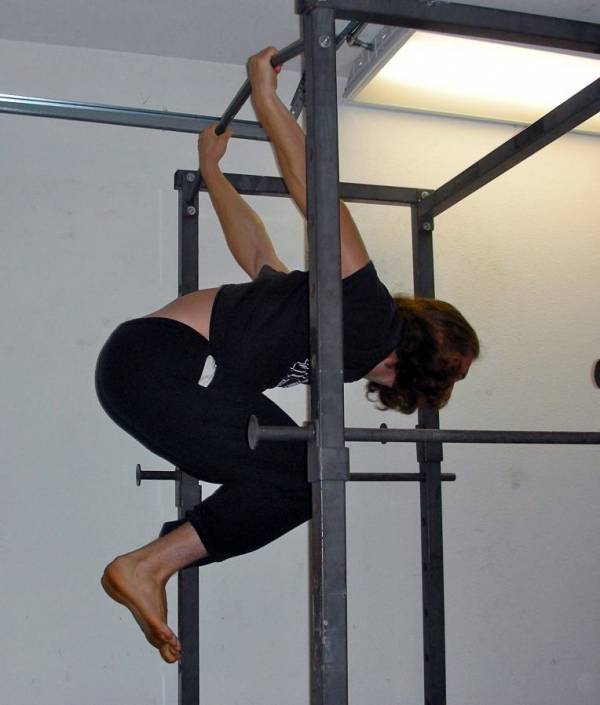
Grab the bar in an overhand grip. Jump or tuck up into a ball pulling yourself in a skin-the-cat manner. Lower yourself until your back is approximately parallel with the ground. You can stay tucked up tightly into a ball, with a rounded back, or allow your legs to open up slightly as is shown below. Hold this position.
Advanced Tuck Back Lever
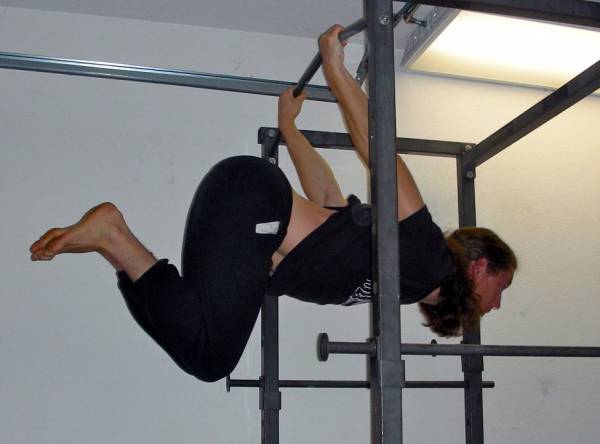
Get into the same tucked back lever position. From here you are going to straighten your back. This opens up the hips, so that they are approximately ninety degrees from your body, thus increasing the leverage.
Legs Bent Straddle Back Lever
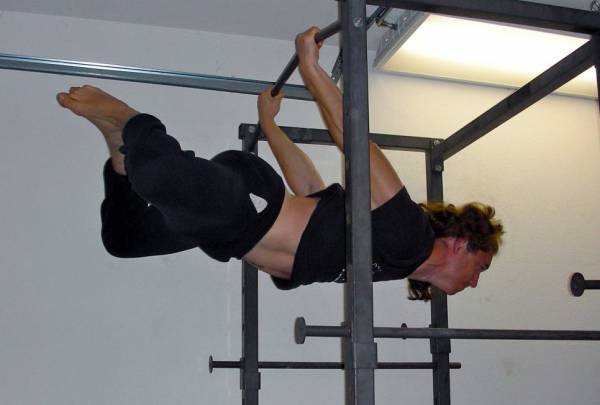
Pull yourself up until your head is facing the ground with your legs overhead. Straighten the hips out, but keep the knees bent. I like to keep my feet touching each other. Spread the legs at the knees as wide as you can. Keep this alignment lower until you are parallel with the ground and hold. Lowering into position in this manner is easier than extending into it once you’re horizontal.
Legs Bent Back Lever
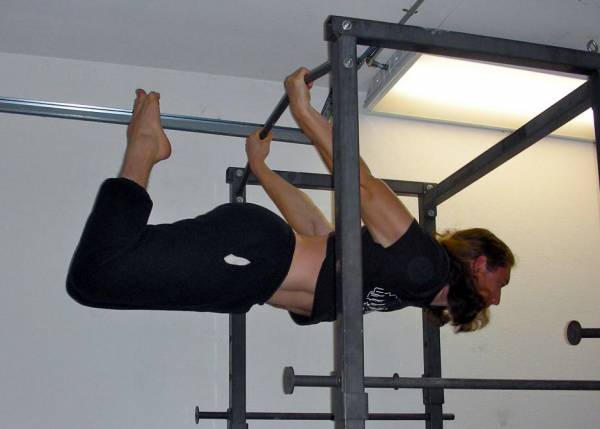
Pull yourself up until your head is facing the ground and your legs are overhead. Straighten the hips out, but keep the knees bent. This time keep the knees together. Keep this alignment lower until you’re parallel with the ground and hold.
Straddle Back Lever
Pull yourself up until your head is facing the ground with your legs overhead. Straighten out the legs at the knees and the hips. Spread your legs as wide into the straddle position as you can. Keep this alignment lower until you’re parallel with the ground and hold. The wider your straddle the easier this will be.
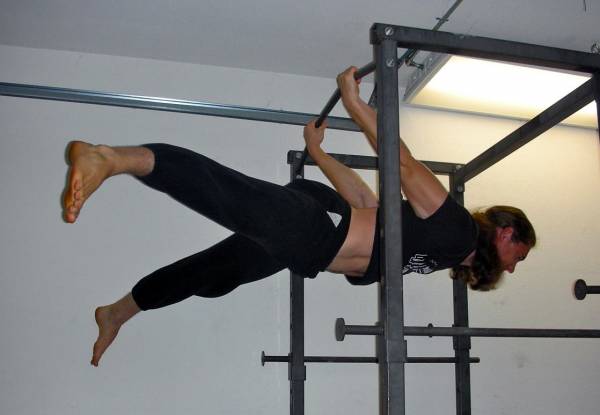
Back Lever
Pull yourself up until your head is facing the ground with your legs overhead. Straighten out the legs at the knees and hips. This time keep the legs together. Your body should be in one straight line through your legs. Keep this alignment lower until your parallel with the ground and hold. Sometimes the body takes a slightly bowed position. This is equally fine, but if you’d like to avoid it, contract the abs more to enter a hollow position.
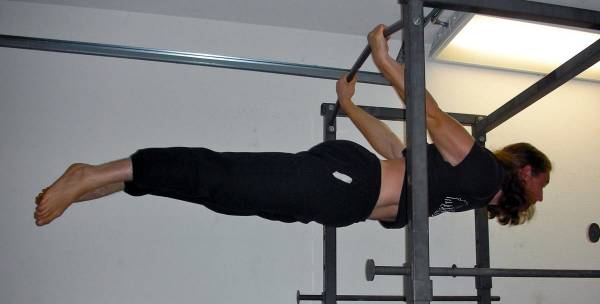
This simple progression can take months to go through for most people. Take your time, working through the steps and adding a second here or there to each position. I like to move onto the next position once a fifteen second hold can be achieved on my current progression.
Once you’ve reached the back lever, congratulations! Of course from here there are more advanced variations you can do. In my next article I’ll cover the opposite movement, the front lever, which is an even more difficult move.
Photo 1 by English: Cpl. Jennifer B. Poole [Public domain], via Wikimedia Commons.


