When it comes to Olympic weightlifting, the snatch and clean get the most attention. The jerk just doesn’t get the same amount of love. As a trainer, I’ll take some of the blame. My weightlifting teaching progressions address the snatch first, followed by the clean, with the jerk bringing up the rear.
Although this approach is logical, the lifts shouldn’t be judged in this order in regard to complexity or merit. The jerk is every bit as technical and challenging as the clean or snatch.
RELATED: Perfecting Your Jerk
In this article, we’ll take a look at the entire jerk movement from start to finish, and detail exactly what you should be doing at each stage to ensure a safe and successful lift.

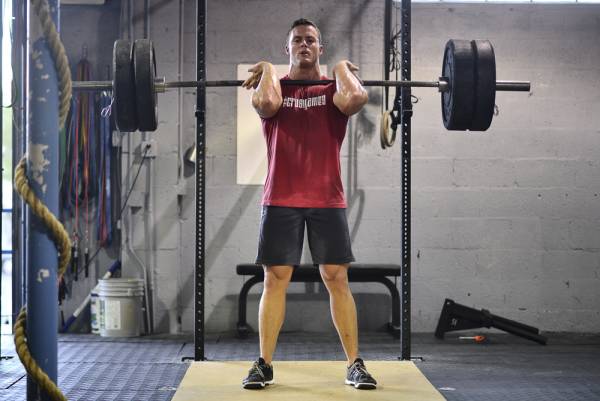
The Grip
A good jerk starts with the barbell in a solid rack position with a proper grip. The grip width for the jerk should be just outside your shoulders. If you have large biceps and/or a tough time externally rotating your arms while gripping the barbell, then a wider grip may be required.
“A good jerk starts with the barbell in a solid rack position with a proper grip. The grip width for the jerk should be just outside your shoulders.”
Once you’ve securely gripped the bar, raise your arms until your triceps are parallel to floor, similar to the position used in a front squat. Your wrist should be slightly cocked with the barbell gripped securely. If you’ve got poor shoulder or thoracic mobility, then you’ll need to let the barbell roll onto the tips of your fingers in order to get into a solid lifting position.
RELATED: How to Determine Your Jerk Grip Width
The Stance
The jerk primarily uses the lower body and trunk to dynamically get the barbell overhead. With that said, safety is paramount and your goal with any dynamic overhead movement should be to maintain a stacked spinal column while exhibiting force throughout the lift.
This is often best achieved by taking a wide stance with your feet slightly externally rotated. Although it varies from person to person, I prefer most people take a stance similar to their front squat.
RELATED: The Jerk Drive Comes From the Legs (Video)
You may have psychological difficulty with this because a narrow stance feels more powerful. But unless you have outstanding ankle flexibility, it is difficult to prevent your torso from shooting forward in the drive phase of the lift while in a narrow stance. It’s also difficult to wind up and subsequently release the stored energy in your hips while employing a narrow stance.
The Dip-Drive
When you are ready to execute the dip-drive of the jerk, take a large belly breath and hold it. This will help protect the lower back and transfer energy from your legs through the trunk to the barbell.
“The jerk relies heavily on the tension of your musculature in order to generate force. If this phase looks slow and sluggish, like a wet sponge, then you’re doing it wrong.”
To start the dip, slightly flex at the knees, pushing them out like you would in a squat. This movement should occur quickly. It’s a shallow and violent movement.
The drive phase is simply a redirection of force. This action is largely dependent on creating tense musculature throughout the legs and trunk, while quickly extending the knees, ankles, and hips. It’s important we drive through the heels during this step. You may end up on the forefoot or toes, but that should be a symptom of your natural kinesthetics – not a contrived effort.
RELATED: It’s All About the 2-Phase Dip
The jerk relies heavily on the tension of your musculature in order to generate force. If this phase looks slow and sluggish, like a wet sponge, then you’re doing it wrong.

Jerk dip drill.
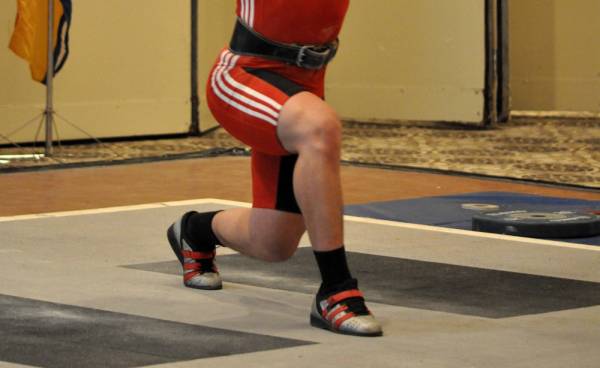
The Receive Position
Once the drive is initiated, the barbell should hop up with some zip. It will become weightless for a split second before reaching its apogee. It’s at this point that you need to aggressively drop under the bar into a split jerk receiving position.
“The first question you probably have is which foot should go forward. The answer is easily found by asking a buddy to give you a light push on the back when you’re not expecting it.”
Most adults will receive the barbell in a split jerk position (as opposed to the push jerk position) due to mobility limitations and the increased efficiency the split jerk offers. With that said, one of the most important things you’ll need to figure out when it comes to split jerking is footwork.
The first question you probably have is which foot should go forward. The answer is easily found by asking a buddy to give you a light push on the back when you’re not expecting it. Whichever foot you put forward to break your fall is your dominant foot. That’s the one that will go forward in the jerk.
RELATED: The 2 Fundamental Roles of Footwork in the Jerk
Of course, once you’ve executed your dip drive, you’ll only have a split second to get your feet into this stable position, so it will take some practice and concentration.
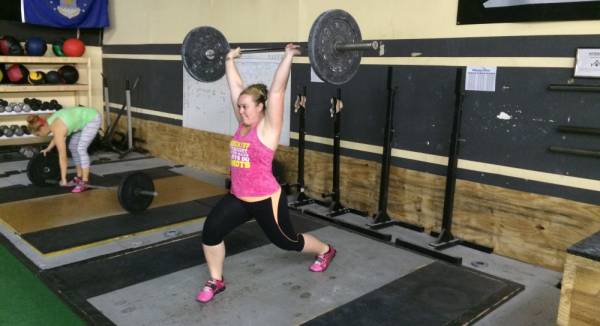
The Lock-Out
During the barbell’s weightless phase, after the drive, you need to rotate your arms into a locked-out overhead position while simultaneously dropping under the bar. Done properly, the jerk only asks the arms to stabilize a load, not press it (that will result in a “no lift” in competition).
RELATED: A Jerk Is a Jerk (and a Press Is a Press)
This position is best achieved by aggressively moving your front foot forward with a slight inward canter, while simultaneously driving the back leg’s knee down toward the spot on the floor the feet previously occupied. You don’t want to literarily drive the knee into the ground, but it helps to think that way in order to create a stable base.
A slight internal rotation of the front foot will help create a stable split receiving position. The downward motion of the rear knee helps create relaxed flexion, enabling you to adjust depth based on the outcome of the drive phase. This position also prevents tight lifters from getting stuck in the split because they’ve reached their end range of motion in the anterior hip capsule of their rear leg.
“You don’t want to literarily drive the knee into the ground, but it helps to think that way in order to create a stable base.”
When you’re in this split position, imagine we painted a circle on the platform the size of a large hula-hoop. Your feet should be in contact with the inside edge of that hoop. If your rear foot is way back and outside the hoop, then it’s a problem.
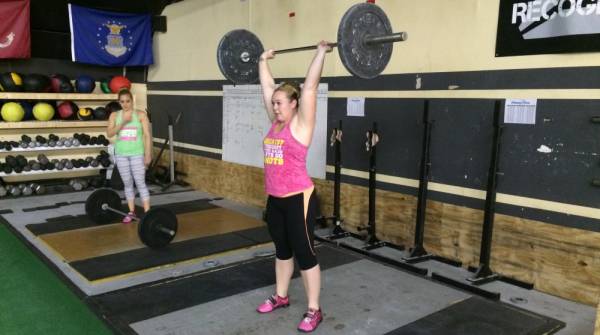
The Recovery
When the bar is locked out overhead and you’re in a stable split position, then it’s time to stand the weight up. This is easily done by taking a half-step back with the forefoot, bringing the rear foot a half-step forward, and then repeating that process.
It’s important your feet are parallel to one another on the platform at this point, and you’ll need to have control of the barbell overhead. Again, failure to do so will result in a “no lift” during a meet.
RELATED: Behind the Neck Jerk Balance (Video)
Never ghost ride or drop the barbell from overhead. I always encourage my athletes to maintain control over the bar until it descends to their mid-thigh. From a safety standpoint, I understand it may be necessary to drop from overhead during a poor lift, but it’s important to respect the equipment and the sport by exercising some control when appropriate.
Summary of the Split Jerk
The jerk requires a great amount of athleticism, concentration, and timing in order to do it well. Remember Rome wasn’t built in a day, but it burned in one. Take your time and use reasonable weight while learning this lift.
RELATED: Catching the Bounce: The Jerk
The jerk is a demanding lift that can help a wide range of trainees when done properly. But due to its complex nature and each individual’s anthropometric nuances, I feel it’s of utmost importance that all trainees find a knowledgeable and competent coach to help them in their journey.
The information I’ve shared here is certainly not everything there is to know about jerking, but I think it offers some good conceptual starting points as well as tips for the intermediate lifter. So, I encourage you all to take these points and go have fun training the jerk.
Photo 1 courtesy of Shutterstock.
Photo 2 courtesy of CrossFit Empirical.
Photo 3 “Clean and Jerk” by Jamie Jamieson. Attribution 2.0 Generic License.
Photos 4 and 5 courtesy of Eric Auciello.