True veterans of the iron game who have clocked enough hours under some heavy-ass loads know that lower back injuries are a frustrating part of the game. If you think this doesn’t apply to you, think again.
Back injuries are the price of doing business if you’re training at the right intensity. So get off your high horse and listen up. It’s just a matter of time until the iron takes you as its next victim.
5 Steps to Safely Train Around Lower Back Pain
This isn’t your physical therapist’s handcuffing list full of dainty recommendations to lay off the weights. These tips will have you maintaining your hard-earned muscle armor and dominating your stat sheet while letting your lower back recover, thus reducing the risk of another debilitating injury.
TREAT IT: Super D Video: Treating Lower Back Pain
1. Assess the Severity of Your Pain
Dominating sets can wait a day. We have to first figure out if you’re able to get back in the saddle or whether you’re going to wet your saddle. With every case of lower back pain presenting in a unique fashion, it is necessary to determine whether you are dealing with just another muscle tweak or an amount of structural and functional damage.
Before you pick up the phone to throw your name on the weeklong waiting list to see your primary physician (who is probably a triathlete, if he trains at all), go through this checklist. If you are having any of the following symptoms, then you were right, your best bet is to go ahead and make that call:
- Tingling or numbness
- Loss of sensation
- Loss of motor control (inability to coordinate voluntary movements)
- Loss of bowel or bladder function
- Severe immobility, inability to walk
2. Skip the Trip to Your Orthopedist
If you made it through the checklist above with a clean slate, chances are you are dealing with a purely musculoskeletal issue. Without neurological involvement, you will be able to independently manage your painful episode. Lucky you.
The ability to successfully self-treat will save you time, money, aggravation, and your general sanity. Through my years of treating lower back pain as a sports performance physical therapist, I can confidently say that 95% of expensive diagnostic imaging procedures are downright worthless.
“The ability to successfully self-treat will save you time, money, aggravation, and your general sanity.”
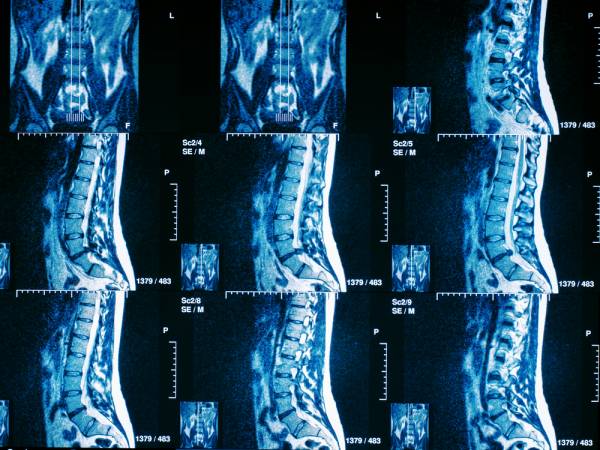
Sure, today’s imaging techniques can show structural damages in high definition, but have we forgotten about functionality? There are guys playing on Sundays in peak physical condition with imaging that would indicate a train wreck, but they’re still cashing big checks and doing it pain free. There are also desk jockeys out there hindered by gut-wrenching pain but showing clean scans.
As Tyler Durden might say, “You are not your fucking MRI.”

If your back pain is a chronic or recurring issue, the current symptomology should present in a consistent manner as previous injuries. And guess what, if you’re not willing to do things that you have never done before to rid yourself of this literal pain in your ass, then your orthopedic surgeon will be more than happy to grab the knife and open you up, cashing another absurdly large paycheck from the fat cat insurance company in the process. The choice is yours. I suggest you choose to be your own best advocate.
3. Classify Your Painful Pattern
Individuals with active and painful lower back symptoms will all be uniquely inadequate in their own dysfunctional ways. Despite the fact your recumbent bike-riding spine doc has classified your condition as “special,” it can still be categorized into one of two distinct groups: flexion- or extension-based pain and dysfunction.
Flexion-based pain and dysfunction is most prevalent within our culture of sitting, slouching, and overall piss-poor posturing. On the opposite end of the spinal spectrum, extension-based dysfunction presents more in active populations, especially those stuck in an anteriorly tilted pelvic position for extended periods of time.
FIX IT: How to Unlock Your Athletic Potential Through Good Posture
If you don’t know what I’m talking about, turn on ESPN. CrossFit has produced some of the fittest men and women on the planet, but also some of the most poorly positioned backsides for elite athletes in recent memory. And we wonder why CrossFitters continue to get injured.
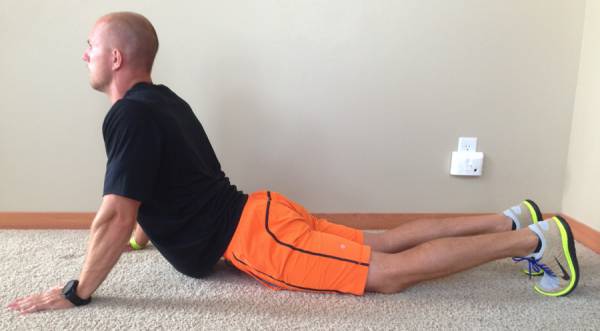
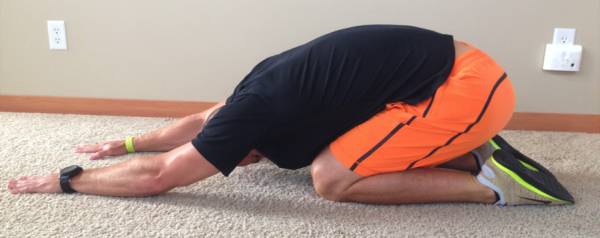
Using two clearing tests popularized by the Functional Movement Systems (FMS), you will be able to determine your prominent movement dysfunction by the presence of pain while completing the motions below. If either of these tests illicits pain, that is considered a positive test. The most painful test classifies you as either flexion or extension intolerant.
 Spinal Extension Clearing Test
The results of these clearing tests will differentiate the daily movements and positions that will aid your path to recovery from those that will leave you flat on your back for the next three weeks, wishing you would have taken this classification system seriously.
For flexion-based dysfunction, avoiding sitting and slouching is imperative. As for extension, hanging out in an extended spinal position for long durations can exacerbate your current symptoms, delaying your recovery for a few more painful weeks.
For both painful patterns, keep moving and change positions as often as possible. Keeping your body mobile, while routinely giving your spinal structures a break, will speed up the recovery process and have you pushing new personal records in no time.
4. Avoid Heavy Front-Loaded Hip Hinges
The position you were in when you got hurt should be avoided. But don’t try to reinvent the wheel. Just stay off these movements until you earn the right to program them back into your routine:
- Deadlift
- Barbell Row
- Good Mornings
- Full-Range Crunches/Sit ups
- Back Extensions
- Low Bar Back Squat
- Leg Press
5. Increase Your Work Volume
In order to overload your lower body while staying within the parameters of the above programming, the overall work volume of a training session needs to increased. Volume can be most effectively manipulated by adding both sets and reps for each movement.
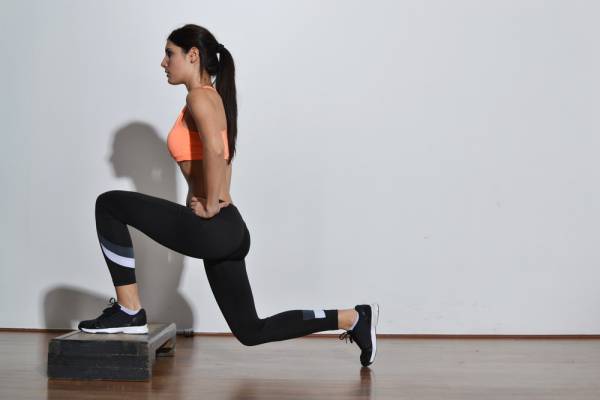
For single-leg primary strength movements, it is imperative not only to push as hard as possible, but to program with primary strength loads that keep you within a range of four to eight reps. Overall volume of your workout will be increased in these primary movements because they replace the traditional power work (between one to four repetitions) that is commonplace for many strength athletes. As long as you can maintain spinal positioning and stability, work towards fifty total reps per leg for single-leg work.
“In order to overload your lower body while staying within the parameters of the above programming, the overall work volume of a training session needs to increased.”
During split-stance work, strength and hypertrophy parameters are most advantageous to continue the pre-exhaustion of the lower body, while also putting an emphasis on increasing the total volume of the session. Stick to sets of eight to fifteen reps per leg, while working your way to sixty total reps per leg.

For any single-leg movement, make sure to complete all your reps on one leg before moving on to the opposite leg. This will allow you to maintain maximal tension and stability through the pillar, while not having to reset your spinal position over and over. For example, for step ups, complete six reps on the left, followed directly by six reps on the right.
You’ll know its time for bilateral work when you start shaking, are walking a little butt-hurt, and are contemplating going to the bathroom to release your demons. This is called pre-exhaustion, and the work that is put in after this level of trashing is what will keep you progressing, even with a painful lower back.
RELATED: The Best Back Workouts
Bilateral work is saved up for extended sets, finishers, and conditioning. Pick two movements that meet the criteria for safe lower-back programming (my favorite is the trap bar deadlift off platforms and isometric bodyweight squat holds), and crush them. Bilateral work is maximal effort, so go hard. Don’t worry about stressing the core. Your legs will be so fried that they will be the limiting factor to every set. Keep loads relatively light and reps to the max. Shoot for three sets of twenty-plus reps for two bilateral movements to put the final nail in this workout’s coffin.
If you have questions on this approach or how to work your way through these steps, please post them to the comments below.
Photos 1, 2, & 5 courtesy of Shutterstock.


